Soul Food Studio

Crafts

Spreading The Word One Parcel At A Time: Sustainable Packaging, Sending My Babies Out Into The World

Crafts, AllAmanda Russell
packaging .jpg

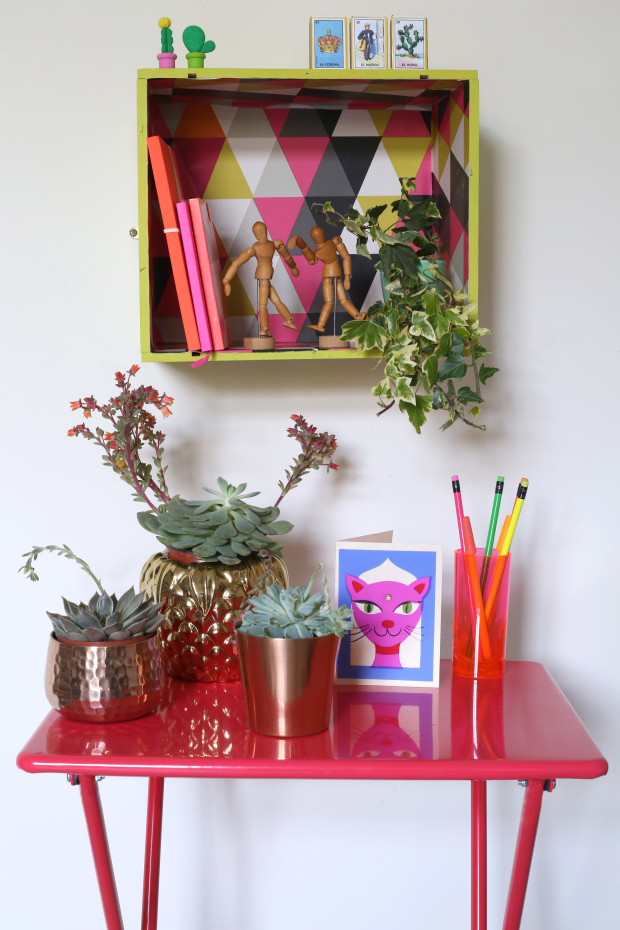
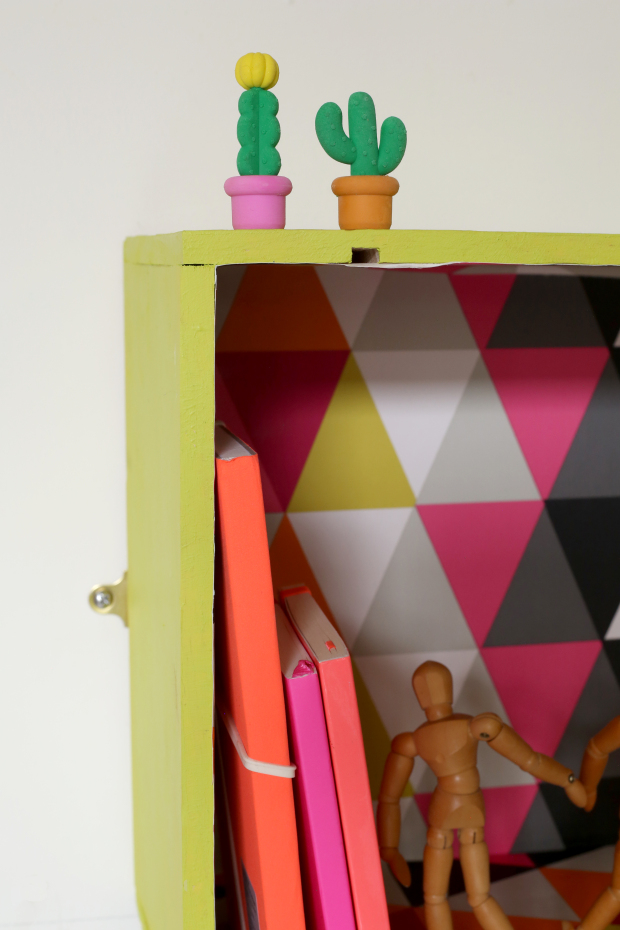
The stock in my shop is vintage, antique and sustainable. I’m always charmed by the story attached to vintage items, as it adds another layer of unique richness. It feels good to find new homes for the preloved treasures I’ve sourced and sending them out to be reloved is the start of a whole new chapter.

If this is the story of the stock in my shop, then it follows the journey and continues reflecting this in the new home and beyond. It feels right that I should put as much thought into the packaging at the end of their time with me.

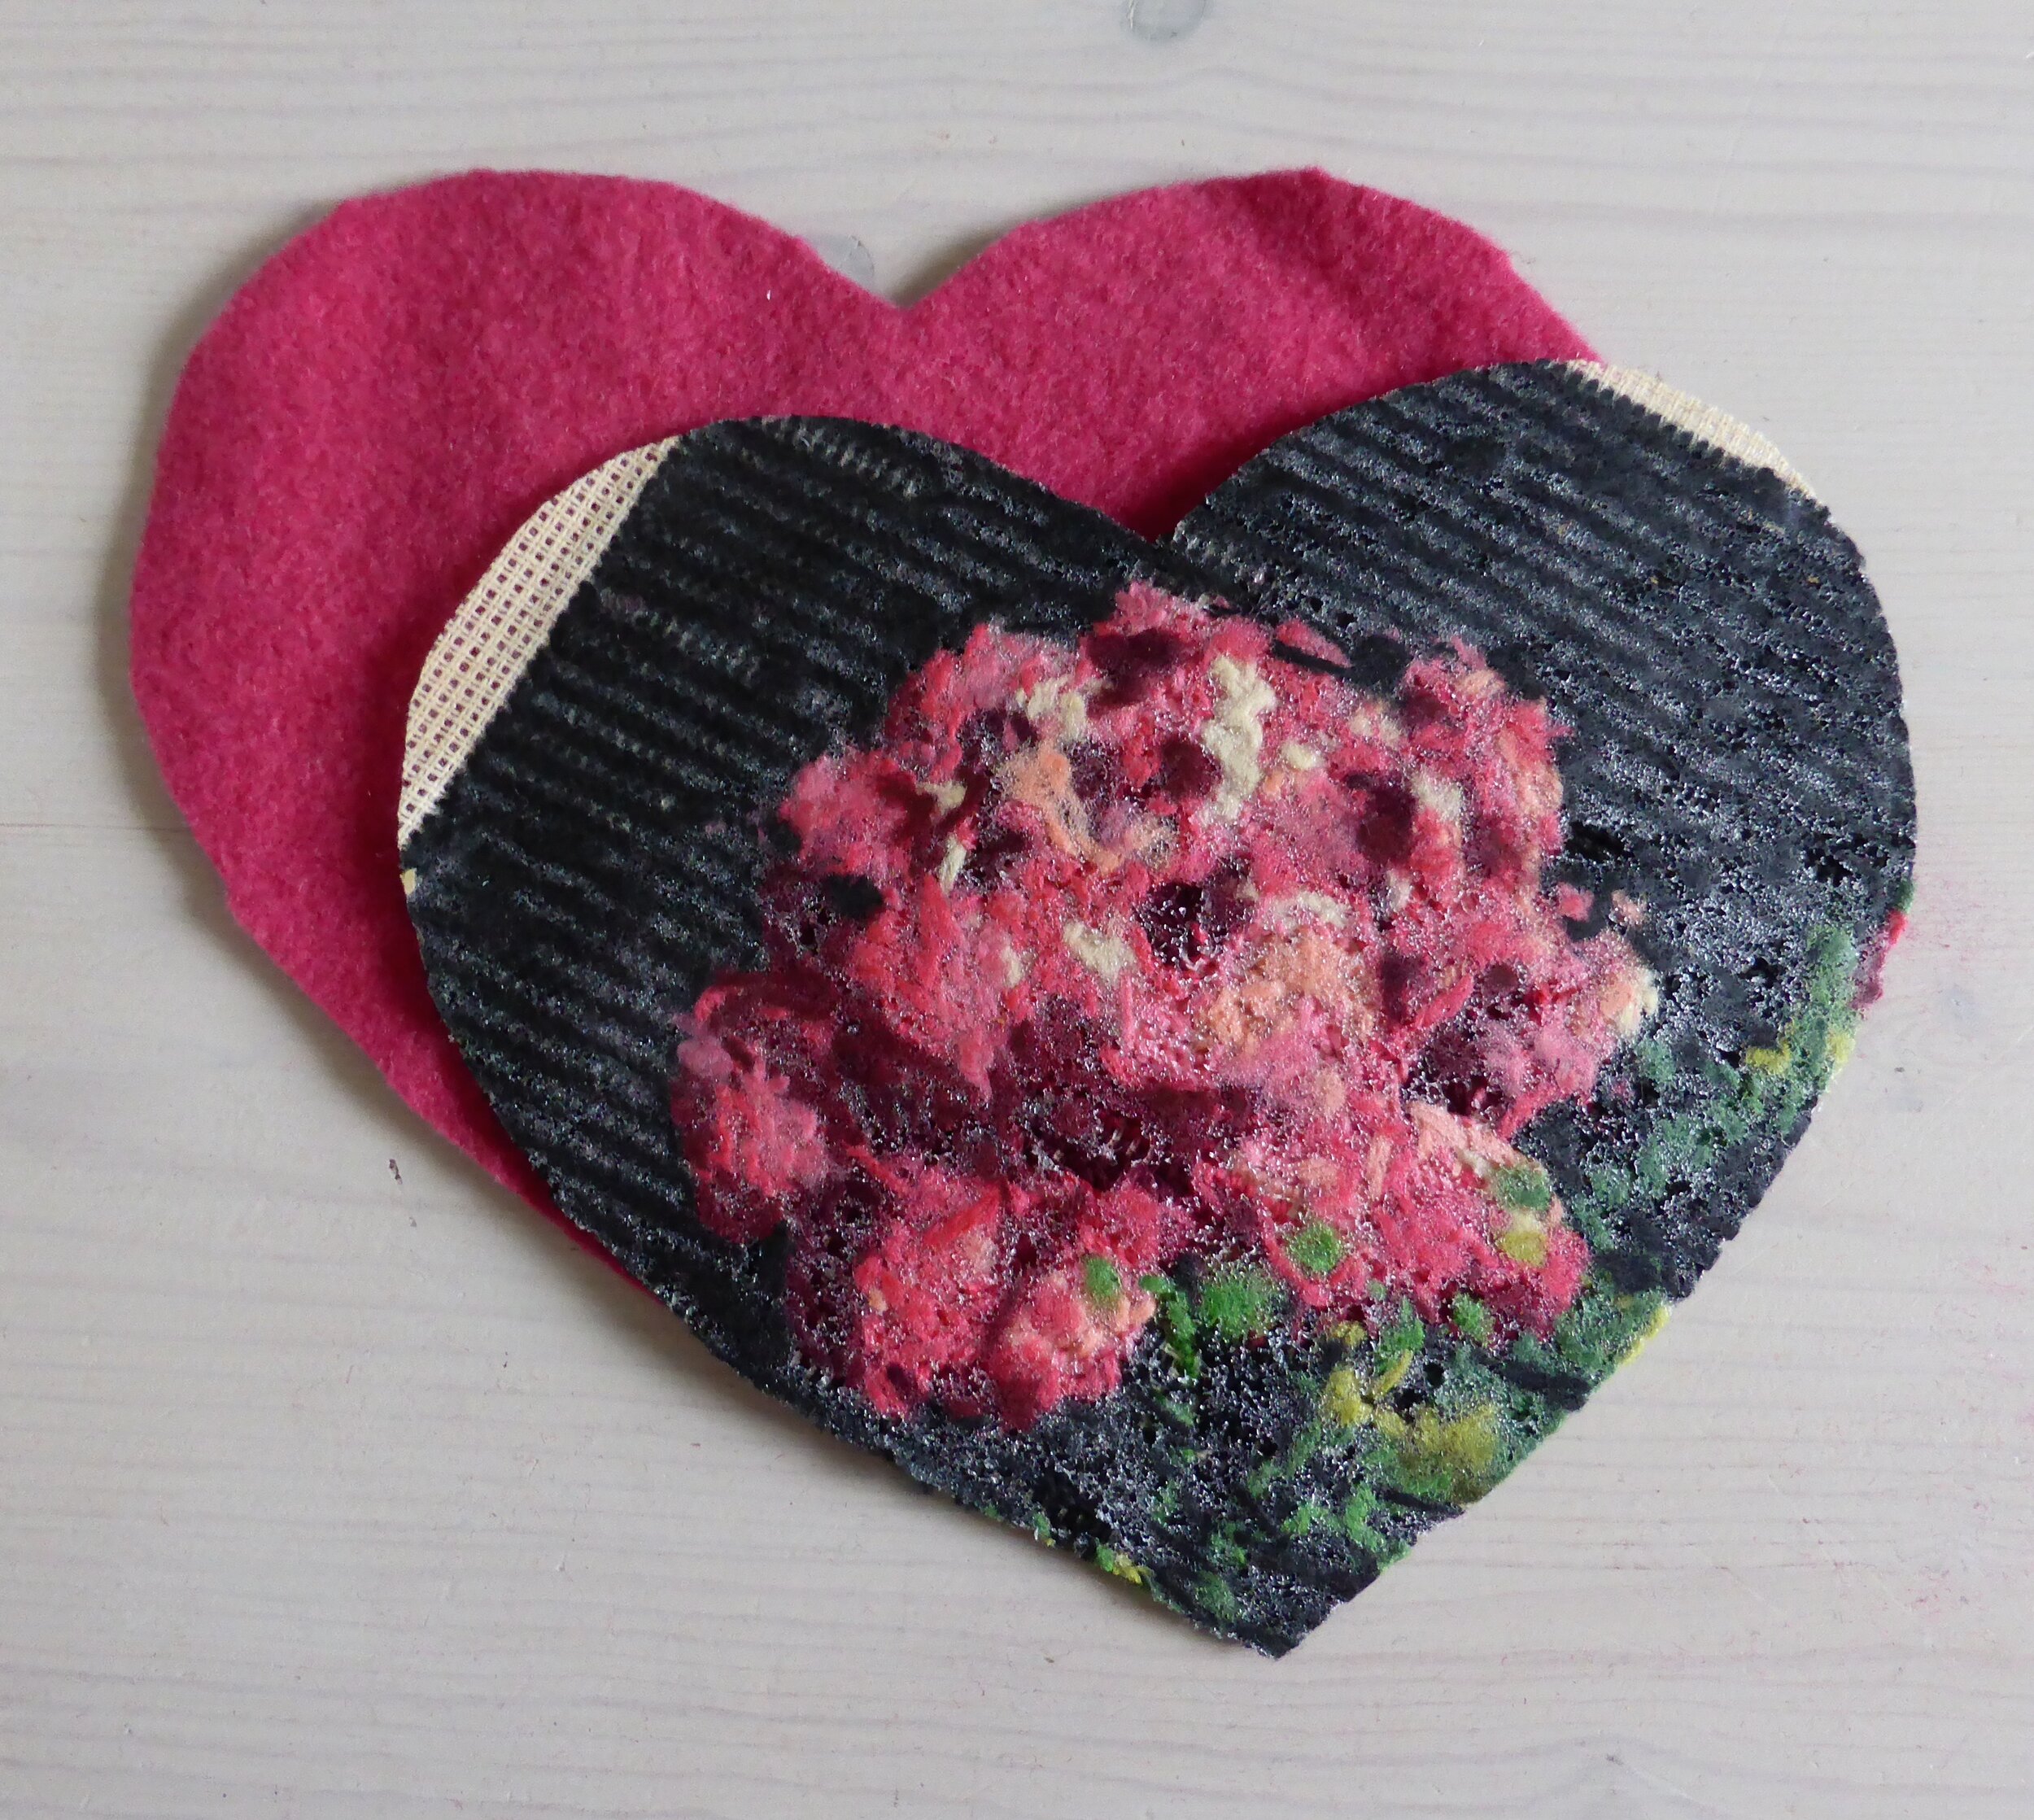
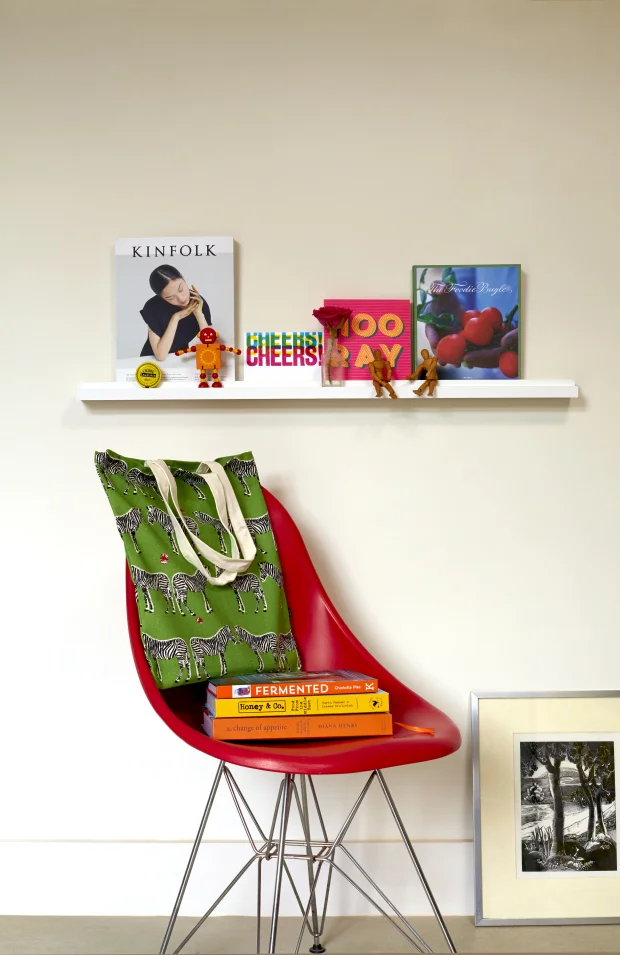
Don’t we all love the unwrapping, it’s one more exciting part of the buying experience. I remember the magic of gifts from my step grandmother. Wrapped in crunchy recycled tissue the parcels were often embellished with a gift tag cut from scraps of printed pictures, the wrapping secured with reused velvet ribbon, coloured twine or glossy embroidery floss. I remember the heady excitement of wondering what precious surprises were carefully nestled in the layers of crinkled paper.

Our resources are a precious commodity to be used sparingly and where ever possible given new life. Surely designing a packaging livery that reflects the company’s sustainable ethos and reusing packaging, can be as attractive as any using new materials? My mission is to create a parcel that brings delight, while still being desirable and mysterious. A theme that’s not rigid, so it can develop and flex according to the available materials as we go along. I’ve long been cutting out the plastic and packaging, now it’s time to show intention following through in the shop.

packaging 2.jpg

Learning by example is always solid. I’m not alone looking for a more sustainable way forward so I’ve turned my attention to checking out the parcels that arrive from online retailers. Silver antiques dealer Natasha @the_ urban_ vintage_ affair has a super positive blog about the do’s and don’ts of sustainable packaging. Hayley @shopivyjoan sources gorgeous vintage homewares and has a wonderful brand image as does the upmarket product designer extraordinaire Snowden @snowdenflood Both source packaging from suppliers Kite packaging who have a strong ethical message. And last but not least you might never buy packaging again by following the brilliant advice from Louisa, vintage garden and lifestyle online supplier @Sugdenanddaughters who puts out a message for unwanted packaging to her local community.

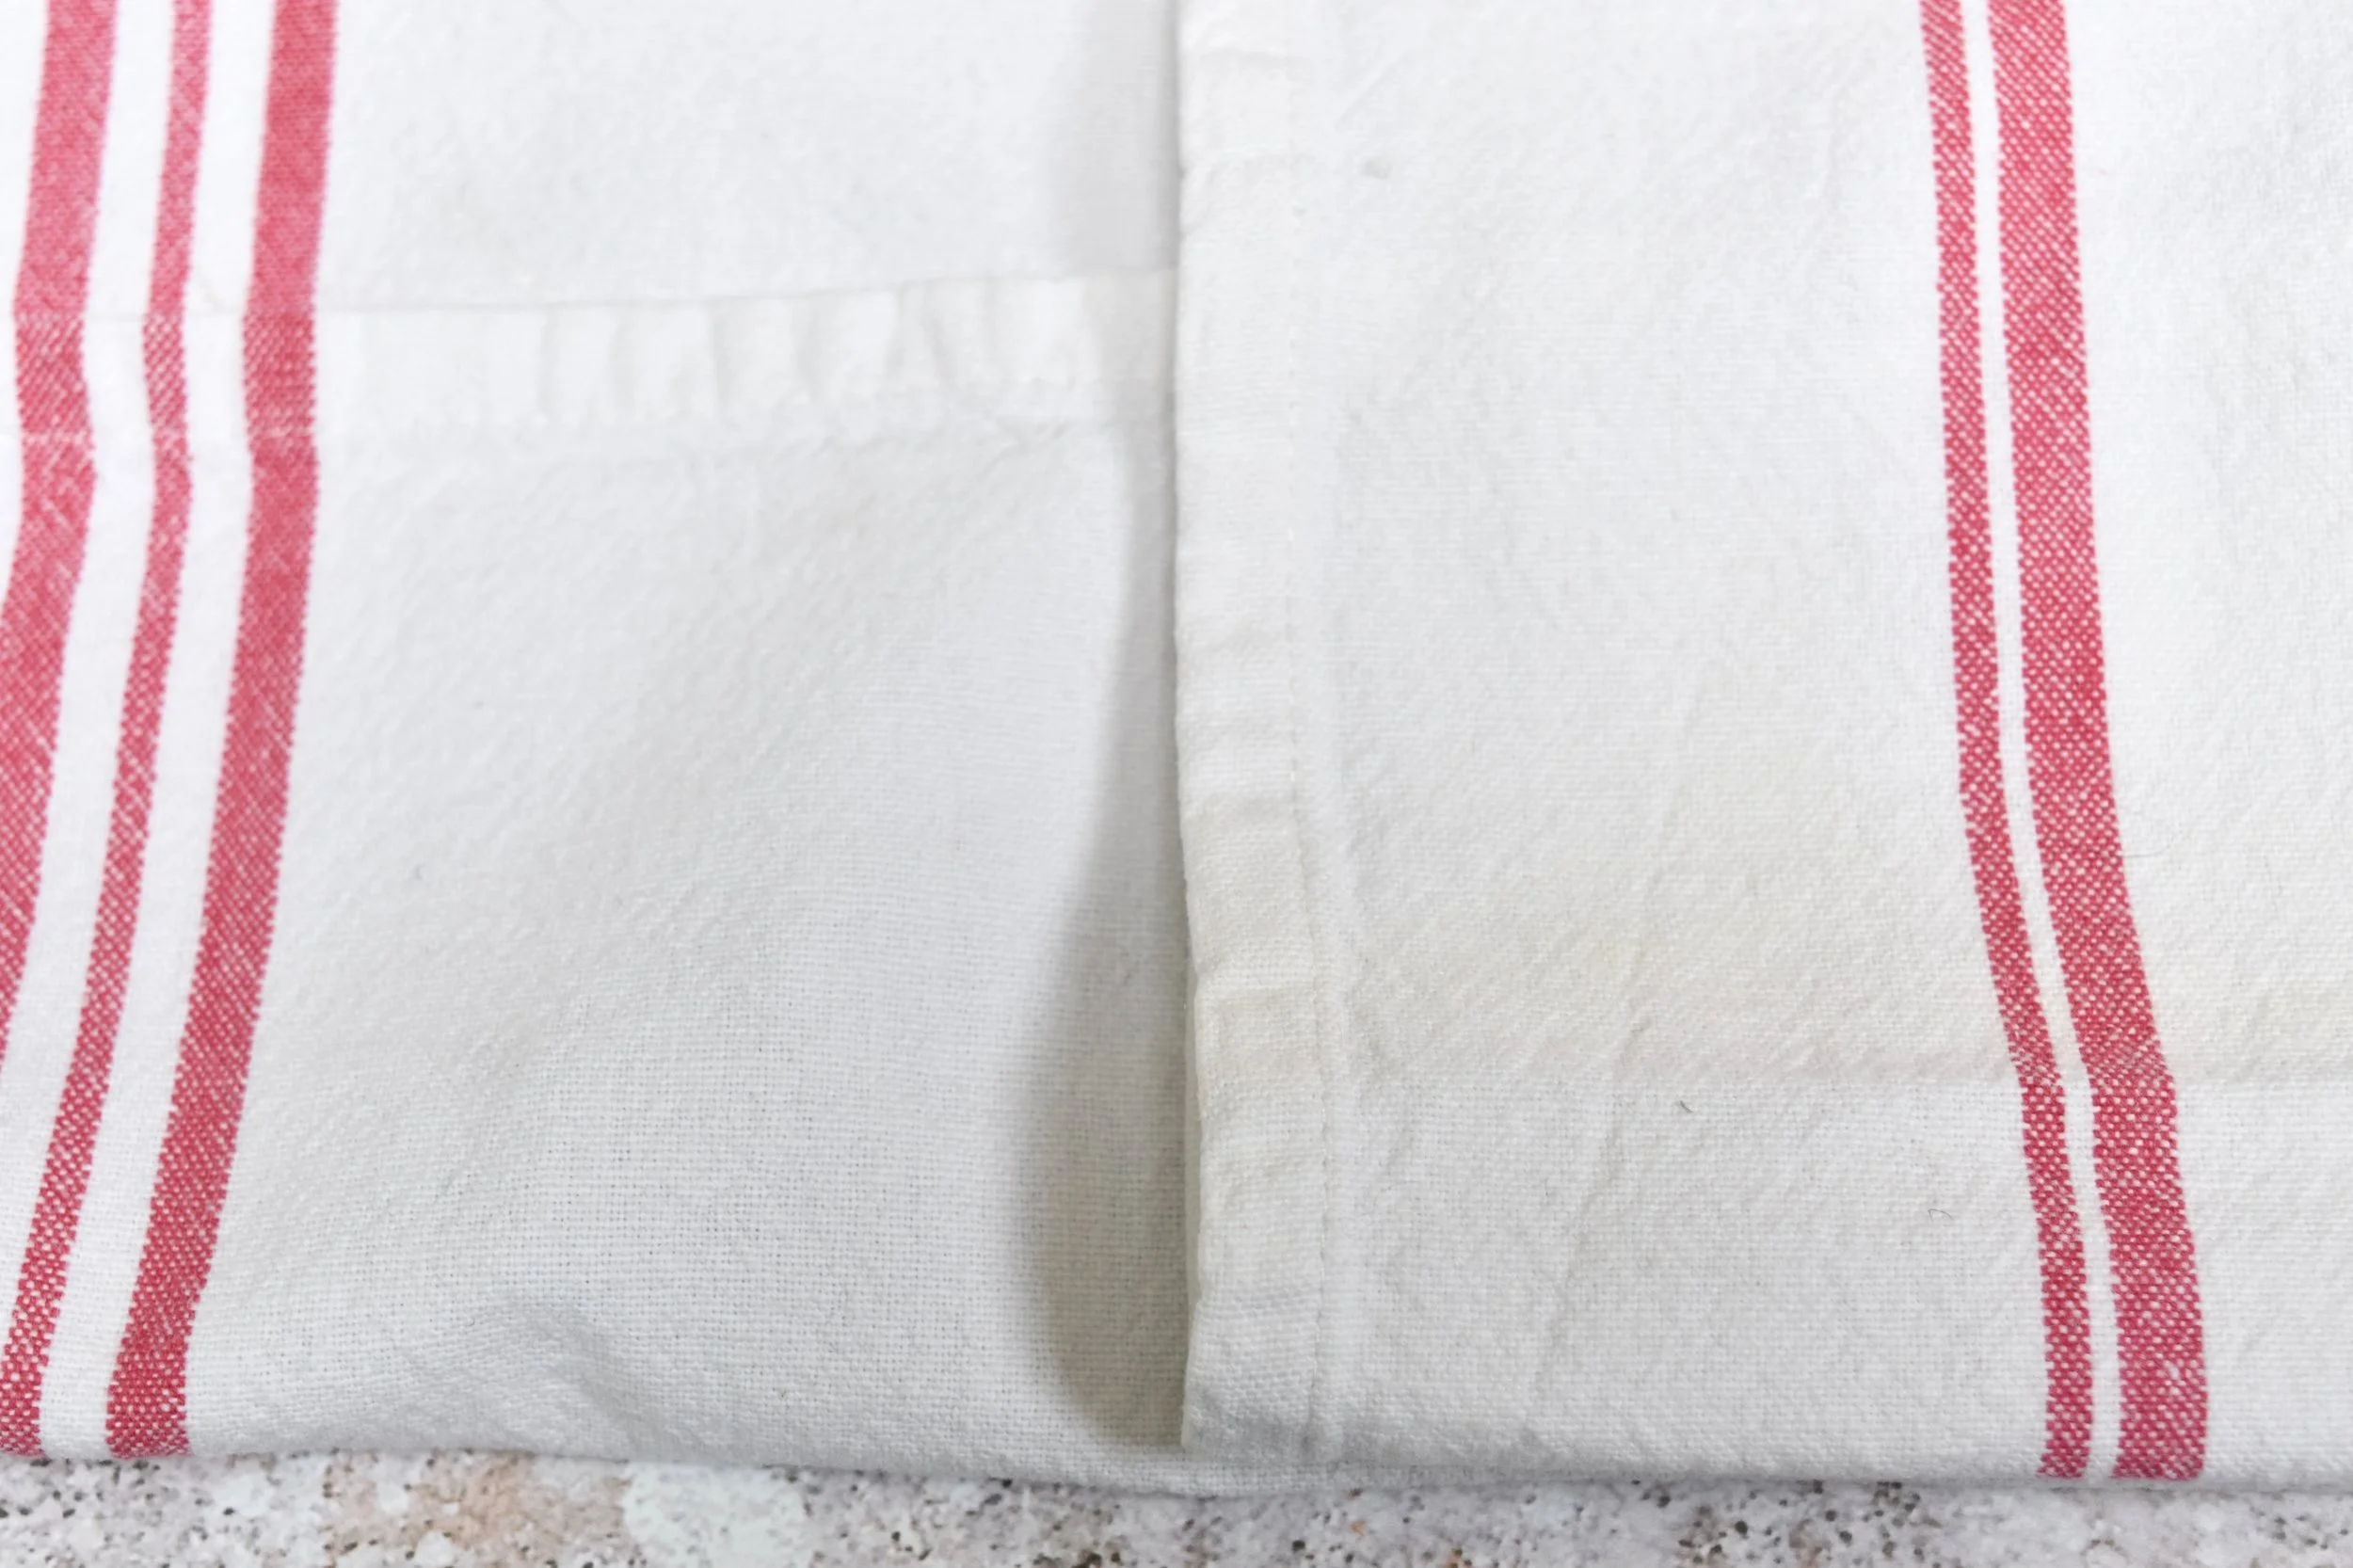
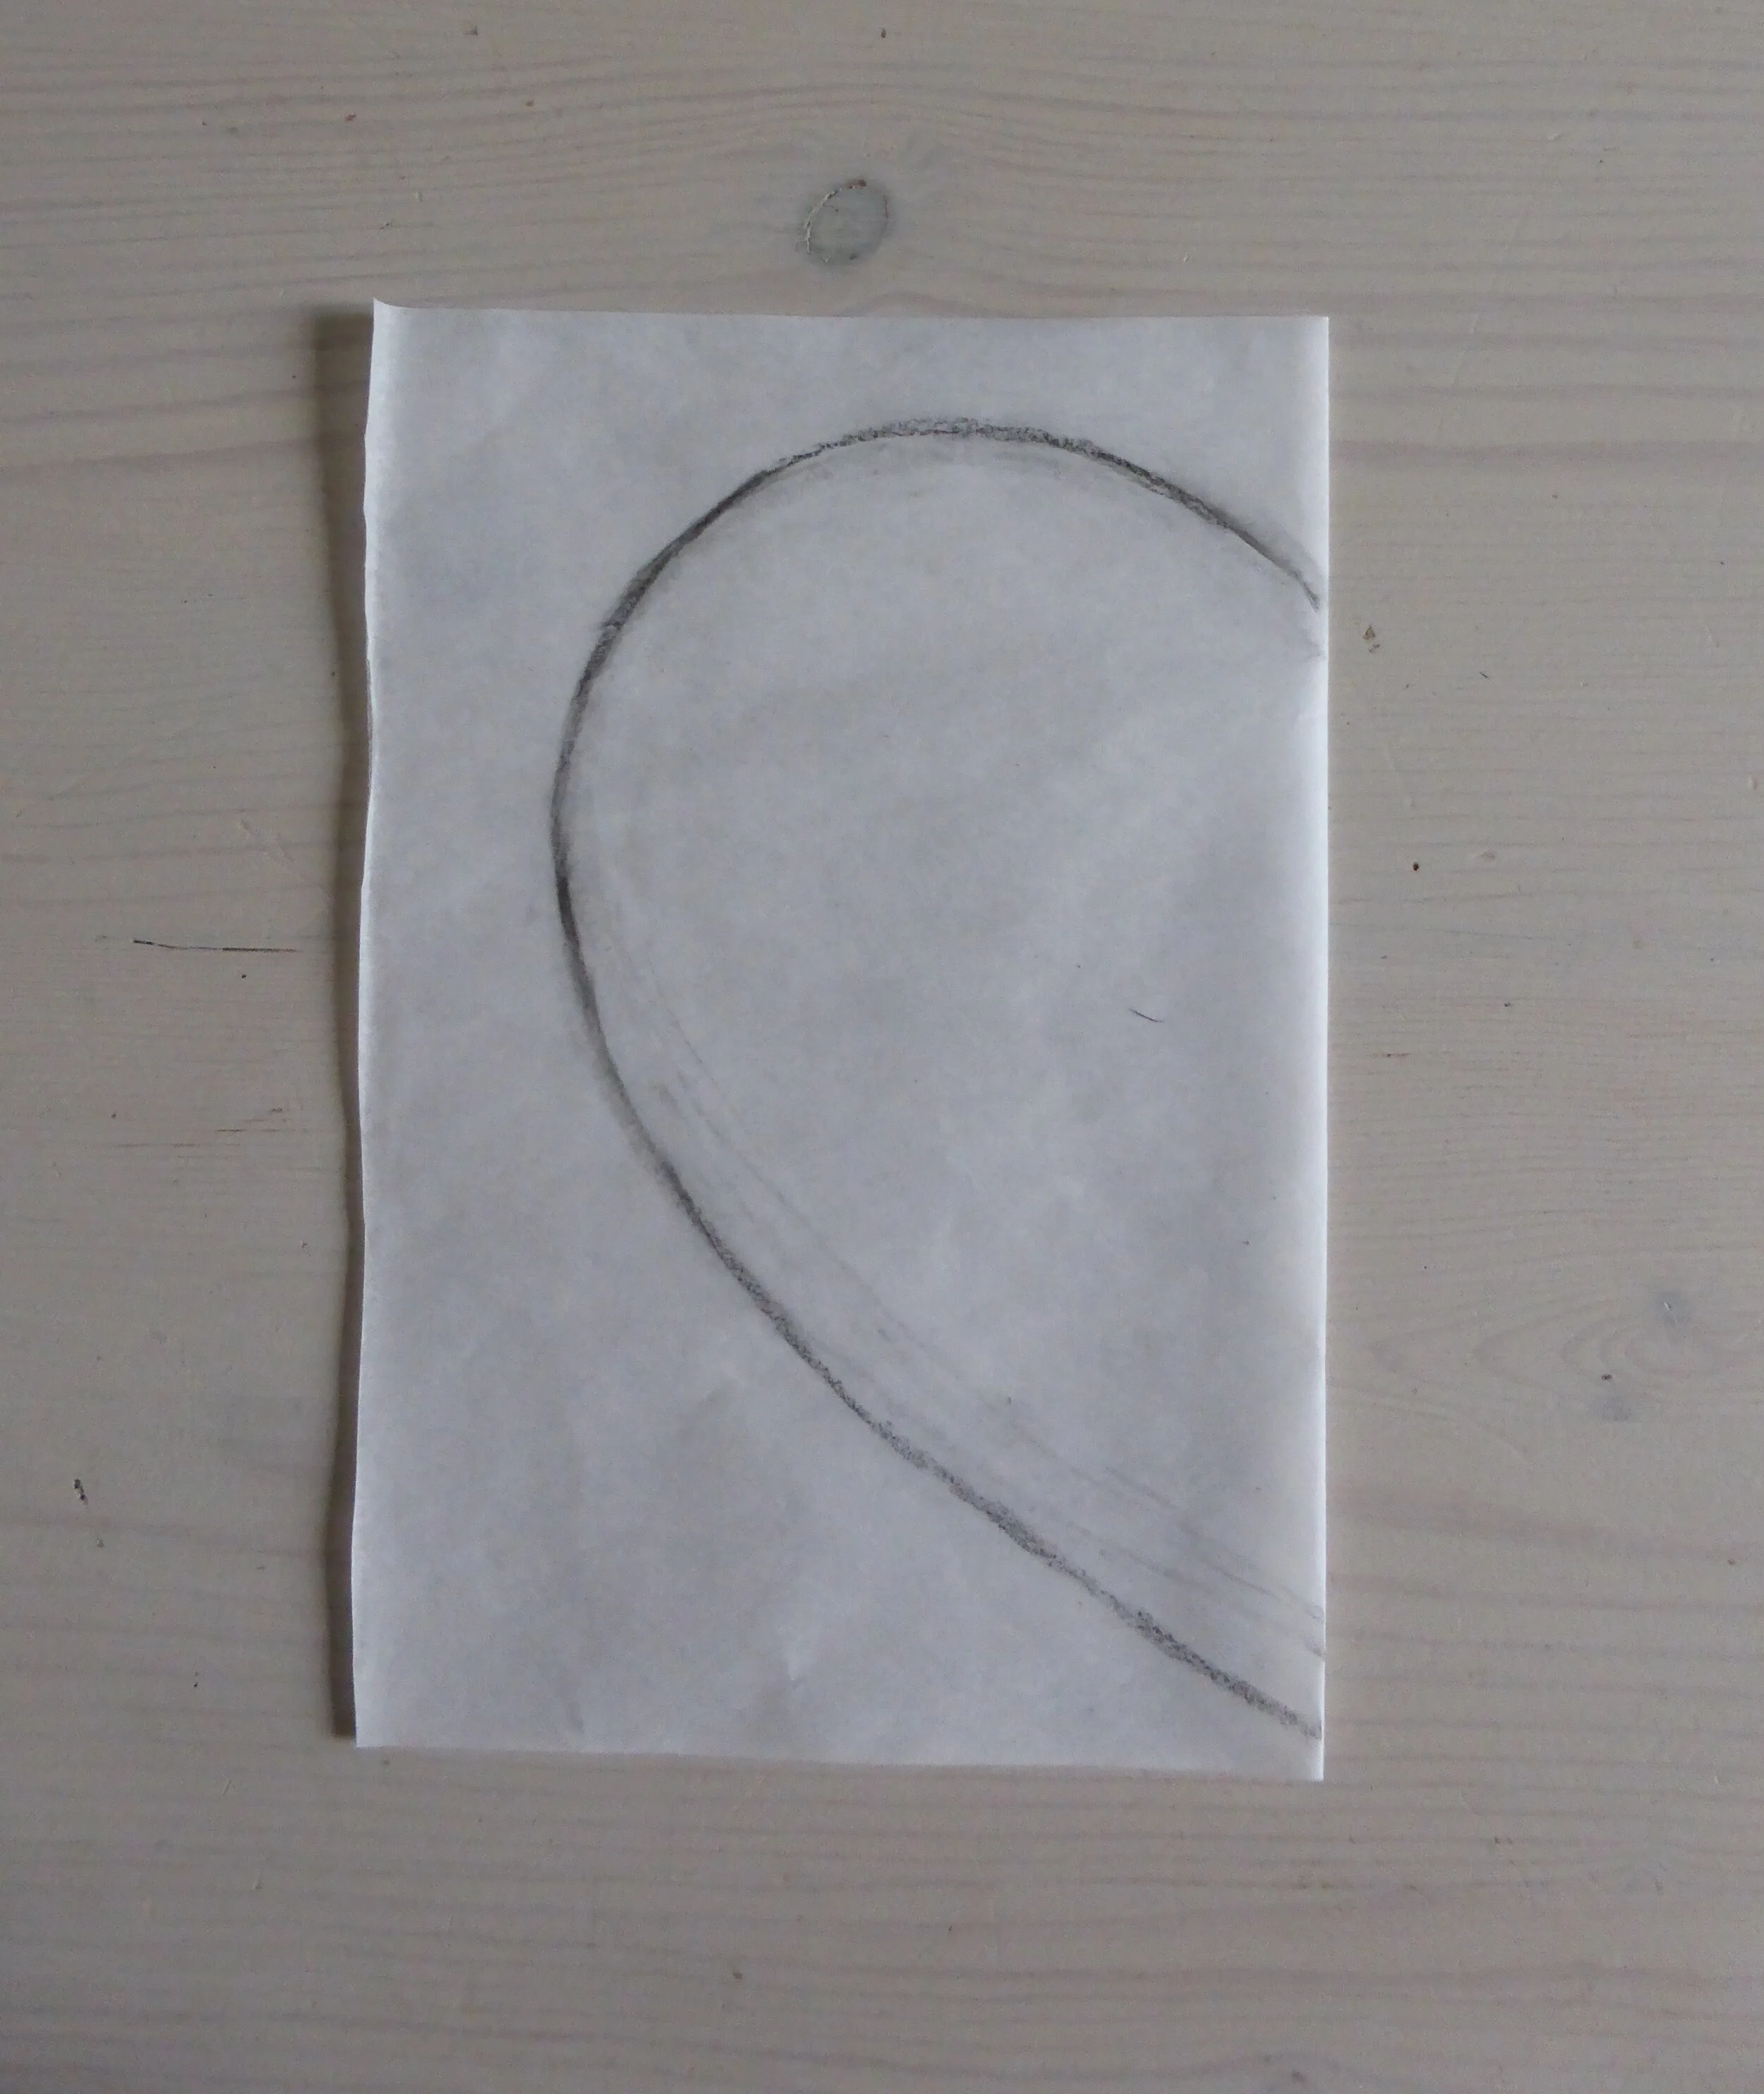
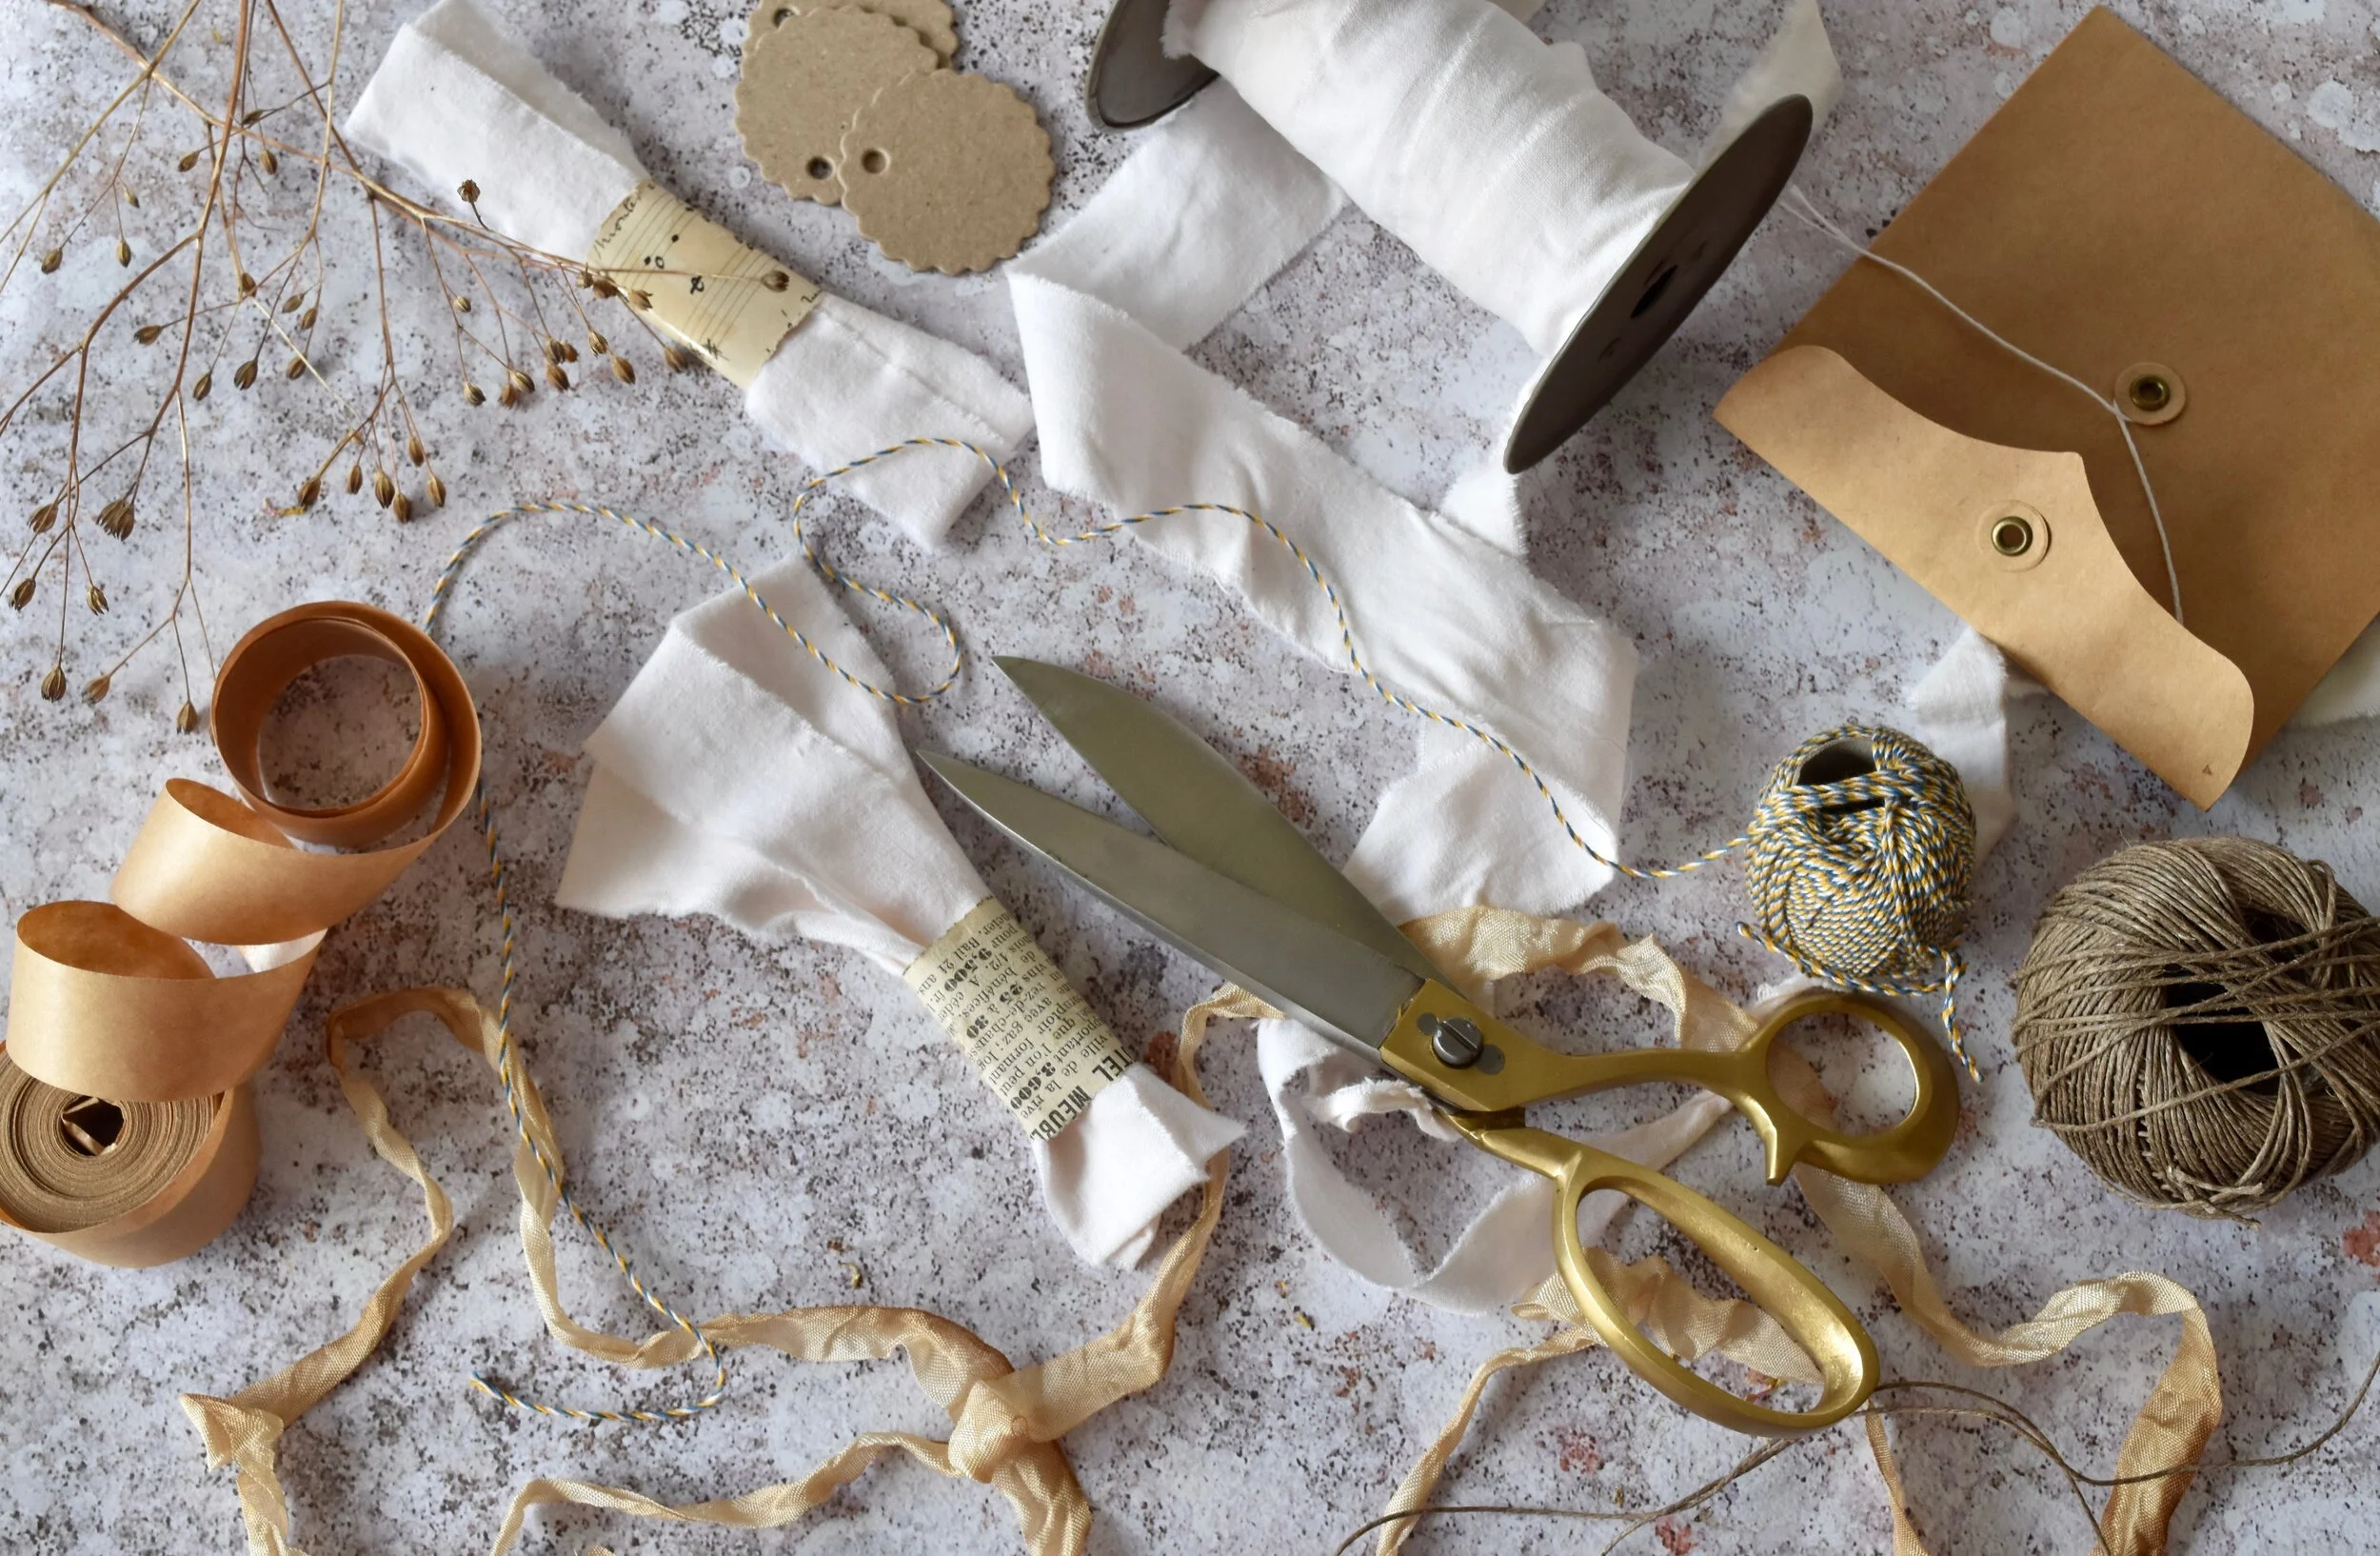
Moving forward to the actual wrapping, it’s about keeping materials once manufactured out of landfill for as long as possible and using product that can ultimately break down into compost. Starch based packing peanuts that dissolve in water are always great for padding. For fragile and bulky parcels often plastic bubble wrap has to be used, I reuse and when I source new it’s always recycled. So it can be reused keep the pieces as large as possible and fold for extra layers. There’s a stash of reusable materials that I have gathered along the way ready for sending out parcels, a collection of stationery, cardboard, paper and twine. And don’t overlook textiles I love a torn strip of tattered silk, course linen or a gaudy print cotton for tying a parcel. Lastly I have a selection of bespoke rubber stamps for stamping brand identity onto recycled paper and labels.

I’m forever hatching new ideas, the plan is guaranteed to evolve. While moving forward I intend encouraging others to reuse, spreading the word one parcel at a time. Let me know how you get on,watch this space, Ill be back!

If you like this post check out my posts on Plastic Free Kitchen , La Rentre: The Start of My Plastic Free Journey and Ditching The Plastic One Step At A Time: Herbal Tea Bag

Picnic Cutlery Roll

Crafts, AllAmanda Russell
18092019 p1 copy.JPG

I’m now more than a year into curbing my use of plastic in my life. I am pleased to report the challenge is going strong and the changes I’ve made are still in place.

Often, when I’m out and about I’ll pick up a take away and yet again with carry out boxes and cutlery I’m back to the single use plastic issues. If I sometimes decide to take a packed lunch with me it’ll need some planning.

Keen to continue with the changes in my life and so I am always prepared for take away picnics I came up with a cutlery roll project. A simple, sustainable, make that can be packed and ready for when I go out. In the spirit of the project the cutlery doesn’t need to be matching, seek out what you need from charity shops or car boots sales. For the roll I recycled a soft linen tea towel which when unrolled is ready to be used as a napkin or a placemat. Make a collection of several cutlery rolls for when others join you on a picnic. At the end of your meal stow the dirty utensils in the tea towel before taking home to wash.

finished cutlery roll.jpg

You will need:

  • Tea towel 50x60

  • 20cm elastic

  • 12mm button

  • Scissors

  • Needle and thread

Step by Step

Step 1

  • To mark the centre of one of one of the short sides of the tea towel, fold the two long sides together to meet, then mark the crease in the centre with a pin. On the wrong side, either side of the marked centre, unpick the hem by 2cm.

1 DSC_0293 21.04.41 (1).jpg

Step 2

  • Fold the elastic in half and push the cut ends under the hem. Sew the elastic securely to the tea towel under the hem, then stitch the hem back down.

2 DSC_0297 (1).jpg

Step 3

  • Right side up sew the button to the centre of the hemmed edge over the elastic.

3 DSC_0303 (1).jpg

Step 4

  • With the tea towel wrong side up, place the cutlery in the middle of the side opposite the button and elastic. Turn the tea towel to cover the cutlery by 10 cm.

4 DSC_0326 21.04.42 (1).jpg

Step 5

  • Then fold the right long side over to cover and repeat with the opposite side.

5 DSC_0311 21.04.42 (1).jpg

Step 6

  • To enclose the cutlery, tightly roll along the length of the tea towel.

6 DSC_0317 21.04.42 (1).jpg

Step 7

  • Pull the elastic around the rolled up tea towel, then pass the elastic loop over the button to secure.

7 DSC_0331 21.04.42 (1).jpg

Tip

  • Using elastic and a button keeps the cutlery wrapped tightly as well as accommodating different sized cutlery.

8 DSC_0324 21.04.42 (1).jpg

Granny Chic Tapestry Heart

Crafts, AllAmanda Russell

I love a sustainable crafty make to give for a gift so I have a stash of old tapestries to repurpose for a variety of craft projects. This gorgeous granny chic scrap project, made from a vintage rosy tapestry and a past its best by blanket, is a perfect valentine make. The heart is trimmed with charity shop vintage buttons and the sawdust for the stuffing came from a pet suppliers.

1 granny chic heart.JPG

You will Need:

  • Tapestry

  • Old blanket

  • Dylon Fabric Dye

  • Vilene Fusible web

  • Thread

  • Sawdust

  • Buttons

  • Thin black ribbon

  • Needle

  • Scissors

  • Iron and ironing board

1.JPG

1. First off, over dye the blanket a rich rose colour in the washing machine following the manufactures instructions.

2.JPG

2. Fold a paper-backed piece of fusible webbing in half, on one side of the fold line draw half a heart including a 1cm seam allowance, turn over the paper and trace the other side of the heart.

3.JPG

3. To stablise the tapestry place the fusible web on the reverse, position it over the image for the best possible effect, iron to fuse.

4.JPG

4. Cut the fused heart shape from tapestry then use as a template to cut the reverse from the wool blanket.

5.JPG

5. Right sides facing pin together the two hearts, sandwich a folded 15cm strip of ribbon for hanging between the two bumps at the top.

6.JPG

6. Use a sewing machine to sew around the edge, leave a 4cm opening on one side.

7.JPG

7. Turn the heart through the opening and stuff with sawdust.

8.JPG

8. Use a needle and thread to sew up the opening. Complete the project by sewing buttons around the edge to embellish.

2 Final Heart.jpeg

Dylon machine dye

Dylon.co.uk

Vilene paper backed fusible webbing

Vlieseline.com

If you like this post check out my posts on Laura Ashley, Drop in Seat Chair Makeover, Picnic Cutlery Roll, Envelope Notebook

Laura Ashley, Drop in Seat Chair Makeover

All, CraftsAmanda Russell
1 Amanda-1287.jpg

We all love a chic recycling project, it’s even better when it’s easy and sustainable too. When I was asked by the Laura Ashley team to design a project that fitted with their ethics I knew exactly which fabric I’d be calling in. I love the William Morris vibe to the Laura Ashley Willow Leaf Hedgerow pattern fabric which chimes really well with contemporary interior style.

In a house clearance shop I discovered an ugly brown drop in seat chair, ripe for a makeover. With the lyrical curvy lines of the seat back and legs the only thing stopping it from revealing its potential beauty and taking centre stage was a simple makeover.

5 Amanda-1295 copy.jpg

In this step by step project I show you how I transformed this chair into a stunning head turner using a lick of chalky pastel paint and new print fabric to cover the seat pad. To protect the new finish from any of the of the old wood treatments seeping through the new finish a couple of coats of stain stopper were applied before painting with the emulsion.

I hope you enjoy this renovation project to bring new life to an old and neglected chair as much as I did.

You will need:

  • Laura Ashley Pale Grey Green Matt Emulsion Paint

  • Laura Ashley Fabric Willow Leaf Hedgerow

  • Pliers

  • Screwdriver

  • Hammer

  • Tacks

  • Scissors

  • Paint brushes

  • Medium Weight Polyester Wadding

  • Zinsser Stain stopper paint

4 Amanda-1293 copy.jpg

Step by step

Step 1

  • Remove the seat pad from the chair frame, wipe chair over with a weak solution of warm water and washing up liquid.

LA chair before copy.JPG

Step 2

  • To protect the new finish from any of the of the old wood treatments seeping through and spoiling the new colour when the chair is dry paint with two coats of stain stopper.

2a LA stain stopper  IMG_0420.JPG

Step 3

  • When the chair is dry, apply two thin coats of emulsion.

3 LA chair IMG_0487.JPG

Step 4

  • Use a screw driver and pliers to remove the tacks securing the old covering fabric

4b LA chair.JPG

Step 5

  • Cut to polyester wadding to the size of the seat.

5a IMG_0501 b.JPG

Step 6

  • Cut out seat fabric with a 10cm overlap.

6b IMG_0503 b.JPG

Step 7

  • Place seat fabric right sides down, place wadding in the centre, before positioning the seat in the centre of the layered textiles. Fold the fabric over the seat edge, use a tack to secure the fabric, work from the middle of the frame towards the outside. Turn fabric and secure on all the seat edges.

7b IMG_0507 b.JPG

Step 8

  • To complete the first corner, fold the fabric into the corner of the seat then tack in place.

8b IMG_0518 b.JPG
8d IMG_0515 b.JPG

Step 9

  • Fold and turn the edge of the remaining fabric over the corner, then secure with a tack.

9a IMG_0513 b.JPG

Step 10

  • Repeat to finish all the remaining corners. Use scissors to trim off excess fabric.

10b IMG_0511 b.JPG

Tip

  • When you’ve finished applying the first coat of emulsion paint wrap the paint brush in kitchen film to prevent the bristles from drying out before you apply the following coat of paint.

  • This project is ideal for using up fabric off cuts left over from earlier projects.

2 Amanda-1292 copy.jpg

Envelope Notebook

Crafts, AllAmanda Russell

My theory of leading a more sustainable life goes like this. Don’t try to change too much in one go, successful change is about taking mini steps towards establishing new habits.

2C2A2446.jpg

I’m aware I use fresh clean paper for list writing and feel it’s something of an extravagant use of resources for something I will shortly be throwing away. As a stylist I’m a great list writer, it helps me get to the next place, a disposable task, rarely is a list for keeping. Of course I can list write on my mobile but I’m the kind of person who is better with constant physical reminders. With this in mind I decided to wean myself onto using scrap paper instead.

2C2A2447.jpg

I am intrigued by the printed patterns on the inside of envelopes. Questions crowd my mind, what does it mean, are they traditional patterns, where was the custom started?

Being a natural hoarder I can’t bring myself to bin this beauty, they are saved to use in lots of ways covering boxes, in collages or as gift tags.

2C2A2449.jpg

I am drawn into the magic of stories about how an inconsequential doodle on the back of an old envelope has lead the way to a great design. With this spirit in mind why would I want to use fresh paper for list writing and planning when I can use such beautiful paper which arrives at my door for free?

I re-purpose each of my treasured envelopes into two useful pieces of paper, using scissors to cut off the margins, over laps and folds. When I have a few, I stack them together, punch a hole in the corner and keep them together with a split ring clasp, a large safety pin, twine or whatever takes my fancy.

If you like this post check out my post on Kintsugi: The Glam Rock of Ceramic Repairs

Easy Wine Crate Shelf

Crafts, AllAmanda Russell

If you’re pressed for space this is a great little make that’ll give you plenty of added storage space and a stage to display special finds. Wine merchants are happy to part with these wooden crates for free or for a charitable donation. It only takes a lick of paint and bold geometric wallpaper to transform a discarded crate into a must have box shelf. I chose wallpaper from Harlequin, a roll will go a long way, there’s plenty left for covering lots of things like files, books and shelves.

You will need:

  • Wooden Wine box

  • Emulsion paint

  • Kaleidoscope wallpaper by Harlequin

  • PVA adhesive

  • Picture frame brackets Homebase

  • Paint brush

  • Scissors

  • Screw Driver

  • Electric drill black and decker

  • Masonery screws

winecrateshelfdetail.jpg

Step by steps:

1.Paint the exterior of the box with emulsion paint.

2. Mix pva with a little water to the consistency of double cream and paint the inside of the box to seal. Leave to dry.

3.When dry measure and cut wall paper to size.

4.Paint the reverse of the paper pieces and insides of the box with pva adhesive let down with a little water to the consistency of pouring cream

5. When dry, using the drill screw picture frame brackets to the reverse on the edge, drill holes in wall then screw completed box to the wall.

Here is another piece you might like, go take a look: Get Yourself an Asymetric Coffee Table

Quick Revamp for Drop-in Seat Chair

Crafts, AllAmanda Russell

This old chair was languishing in a charity shop, crying out for a hefty dose of TLC. For a super easy and quick transformation I painted it with a bright green paint and used contemporary print tea towel to cover the drop in seat.

drop-in-chair.jpg

You will need:

  • Old chair with drop in seat £10 at charity shop

  • Hammer

  • A staple gun with staples

  • Tea towel 10cm bigger than the seat

  • Dressmakers pins

  • Dressmakers scissors

  • Tarragon Glory 4 Emulsion paint by Dulux £15.99 homebase

  • Paintbrush

  • Sandpaper

drop-in-chair-detail.jpg

Step by steps:

  1. Remove the seat from the chair and put to one side.

  2. Sand the chair frame to give it a key so the paint will adhere.

  3. Paint the chair with a bright coloured emulsion. Leave to dry, it may need a second coat of paint if the wood is showing through.

  4. Remove the tacks from the edge of the chair seat, then take off the outer fabric.

  5. Use the old chair cover as a pattern and pin it on to the tea towel.

  6. Cut out a new seat cover. Place the new seat cover, right side facing down on a flat surface. Place the drop in section of the chair in the centre of the fabric.

  7. Starting in the middle of one side staple the new fabric into place. Work outwards from the center towards the outer edge then repeat with the other half.

  8. Repeat step seven on the opposite side of the seat, making sure you pull the fabric taught as you go. By starting in the center and working outwards you will stop the fabric twisting. Once two sides of the chair are completed repeat with the other two sides. At the corners, pleat and turn in the fabric to make a neat finish.

  9. Drop the new seat into the freshly painted chair.

Here is another piece you might like, go take a look: Stamp your own floral lampshade

Kintsugi: The Glam Rock of Ceramic Repairs

Crafts, AllAmanda Russell
IMG_0006.jpg

With its lush floral bouquet and wreaths, when my large blue and white transferware platter broke it was too special to throw away. A while before I was given a Kintsugi repair kit as a gift and my broken platter was the ideal candidate for a trial run of this technique.

The ancient art of Kintsugi, is the glam rock of ceramic repairs. This elegant method of repair was developed by the Japanese who believe a ceramic piece, once repaired is more beautiful than the formerly undamaged piece.

After repair the china will stand up to gentle use, clean by wiping over with a damp cloth. The platter is perfect for a huddle of plants, or to hold a selection of metze dishes or fresh fruit.

While gluing the pieces together an extra pair of helping hands can be useful to maneuver the china into place, particularly if they are large pieces.

DSC_0014.jpg

To get hold of your own Kintsugi Kit visit - https://humade.nl

1. Wash the broken china in warm soapy water to remove dirt and grease from the broken edges of the china, rinse and dry.

1. Wash the broken china in warm soapy water to remove dirt and grease from the broken edges of the china, rinse and dry.

2. Using a lolly stick mix together equal parts of the two part quick dry epoxy adhesive.

2. Using a lolly stick mix together equal parts of the two part quick dry epoxy adhesive.

3. Stir a small amount of the gold dust into the adhesive to colour it.

3. Stir a small amount of the gold dust into the adhesive to colour it.

4. Use the lolly stick to spread an even layer of gold adhesive along both broken edges of the china.5. Wait a minute for the adhesive to start going off before bringing both halves together and then holding together firmly until the adhesive has se…

4. Use the lolly stick to spread an even layer of gold adhesive along both broken edges of the china.

5. Wait a minute for the adhesive to start going off before bringing both halves together and then holding together firmly until the adhesive has set. Before the adhesive completely hardens brush over with gold dust.

6. When the adhesive is completely dry, bring a warm glow the gold adhesive by burnishing gently with a soft cloth.

6. When the adhesive is completely dry, bring a warm glow the gold adhesive by burnishing gently with a soft cloth.

IMG_0004_1.jpg

If you like this post check out my post on Envelope Notebook

Peter Pan Collar Blouse

Crafts, AllAmanda Russell
unnamed1 copy.jpg

With their crisp coolness I cant resist a mans poplin shirt. Here’s a beauty I transformed into a desirable Peter Pan collar blouse, perfect for long hot summer days. Using embroidery scissors and a stitch ripper I unpicked two shirts ready for remodeling, a striped one for the body and white for the collar. I traced the pattern for the shirt and collar from a favourite old blouse I’d had for several years.

You will need:

  • 2 old cotton shirts I for the body of the shirt another for collar

  • thread

  • pins

  • dress making and embroidery scissors

  • measuring tape

  • pencil

  • ruler

  • greaseproof paper for pattern making

  • stitch ripper

Steps:

1.         Cut three bias strips 3cm wide, 60cm long. Open out one of the sleeves, at the widest section make a 45 degree fold.

Fig 1.JPG

2.         Use a pencil to mark 3cm intervals along the fold line, pencil to draw a straight line joining the marks. To make bias strips, cut along the fold line, then along the drawn lines.

Fig 2.JPG

3.         To make long bias strips join strips together.

Fig 3.JPG

4.         Right sides together place 2 strips at 90 degrees to each other, sew to join

Fig 4.JPG

5.         Trim seam and press open.

Fig 5.JPG

6.         The back of the blouse is made from the front button opening of the old shirt. Pin the paper blouse pattern in position with a button at the top of the opening and allow for seam allowances.

Fig 6.JPG

7.         Cut the out front and back section, then sew together at the shoulder.

Fig 7.JPG

8.         Cut four collar pieces from the second shirt and 2 from bondable fabric stiffener. Iron fabric stiffener on the reverse side of two collar pieces. Pin and sew two collar pieces together, repeat with the remaining pieces. Trim the seam and cut notches on the curved seems, turn right sides out and press.

Fig 8.JPG

9.         Pin and tack the collar pieces in place on the neckline. Take a long strip of bias binding, pin and tack along the neck line over the collar edge, sew in place. Trim along sewing line, cutting notches along the curve.

Fig 9.JPG

10.   Fold the bias binding to tuck in the raw edge, fold again and pin and tack, before sewing down.

Fig 10.JPG

11.   Pin and sew bias binding around the armholes.

Fig 11.JPG

12.   Sew the side seems together, neatening edges with zigzag stitch. Finish the arm holes by turning the bias binding to cover raw edge, pin, tack and sew in place. Hem the bottom edge of the shirt, folding up by 2cm and press, then to neaten fold raw edge in on itself. 

Here is another piece you might like, go take a look: Star Light Canvas

Easy, DIY Roman Blind

Crafts, AllAmanda Russell

I couldn’t resist this print fabric and a roman blind is the perfect canvas for showing off the mid century design. Below I show you how to design and make your own really simple roman blind, lets do it right now!

You will need:

  • Pre-corded Roman Blind kit, I used one from John Lewis

  • Pins, needles, thread

  • Dressmaking scissors

  • Fabric, I used Villa Nova fabric

Measure the width and drop of your window for finished blind size. Add 1.5cm to the both sides and 6cm to the length, then cut out the fabric.

Wrong side up turn in the sides, fold the fabric over by 0.5cm and then a further 1cm, pin in place and sew down.

Take the loop tape off the head rail, turn the top of the blind over by 1cm, then pin the loop tape in place 0.5cm below the turn. Sew the loop tape in place along both edges.

To make the pocket for the bar on the lower edge fold the fabric up by 0.5cm then again by 4cm, sew in place.

To find the positions for the rod channels measure the length of the blind then divide into 6. Mark positions for the rod tape on the reverse of the blind, draw a light line from one side to the other.

To calculate the length of the channel tapes add 2cm to the width of the blind measurement then cut the channel tapes. Turn the side of the channel tape in by 1cm then using the lines you drew on the blind sew in position leaving one end of the channel open.

Cut the rods 2cm shorter than the width of the blind, insert into the channel through the opening. Turn in the tape by 1cm then close the opening by sewing onto the side of the blind, repeat for each rod.

Once you’ve made your Roman blind install it following your kit instructions, I used a pre-corded kit from John Lewis.

If you like this post check out my post on Quick Revamp for Drop-in Seat Chair

Must Have Boho Bench

Crafts, AllAmanda Russell

Transform a softwood bench into an on trend luxe padded seat by painting, dying, and a bit of sustainable up-cycling. Currently there are lots of tribal inspired fabrics out there so grab a bit of the action with this gorgeous upholstered bench.

boho-bench.jpg

You will need:

  • Nornas Ikea Bench

  • 2 meters thick wadding

  • Black paint

  • Paint brush

  • Dylon Goldfish Orange machine dye

  • Old velvet curtain

  • Old rug

  • Staple gun

  • Old duvet

  • Sewing machine and thread

  • Scissors

  • Saw

  • Iron and ironing board

  • Invisible marker pen Korbond

Step-by-Step

  1. Following the makers instructions dye the velvet and leave to dry.

  2. Saw off the edges of the bench so that there is no overhang.

  3. Paint the bench black and leave to dry.

  4. Cut a double layer of wadding the size of the bench top plus enough to drape over the edges. Cut away the corners and then staple the wadding to the underside of the bench.

  5. Press the velvet before using. Reverse side up drape the velvet over the bench, leaving enough for a 2cm seam allowance along the bottom edge.

  6. Fold the corners and mark with a pen remove the fabric and sew the corners down, then cut away the excess fabric

  7. Right sides out place the velvet over the wadding covered bench and staple the velvet into position on the underside.

  8. To make the cushion. Cut an old duvet to the size of the bench top.

  9. Cut the rug into two pieces, the size of the bench top plus 1 cm all the way round.

  10. Sew the old duvet round its edge to the wrong side of one piece of rug.

  11. With right sides facing sew the piece of rug with the duvet attached to the other piece of rug. Sew round three and a half sides.

  12. Turn the cover through the correct way and then slip stitch the opening closed.

Tips. To get straight edges when stapling, start from the middle out, staple in the middle of one side and s then staple on the opposite side, then staple from the middle out along one side and repeat with the opposite side, then do the other two sides in the same way.

Here is another piece you might like, go take a look Quick Revamp for Drop-in Seat Chair

Star Light Canvas

Crafts, AllAmanda Russell

As if you need to be reminded of the star you are, who could resist making a bright starry statement like this? A really simple project, with just a couple of halogen lighting chains, a canvas and emulsion paint my glittery star project will brighten up any room.

homestyle-makes-5-5.jpg

You will need-

Emulsion paint

2x Halogen Lighting chain

Paint brush

Paper

Masking tape

Electrical screw driver

Bradawl

1.Paint the canvas with pink matt emulsion paint

2. Draw a large star on a piece of paper then cut out, stick to the reverse of the canvas with a line of masking tape along each straight edge.

3. Work out where you want to have the lights, I had about three along each straight edge and one on each point end.

4. Start making the holes to push the lights through. With one hand supporting the front of the canvas press the bradawl through the masking tape on the reverse and make a pilot hole, next enlarge the hole with the screwdriver, don’t make it too large the light is held in by it. Press the light from the back through the hole to lodge just around the collar of the fitting. Continue round the star with the lights.

5. Hang the canvas up using Command hooks. Do not leave lights on when unattended.

Tip

Before putting the lights into the canvas decide where you want the cables to come out, mine was at the lower edge. I worked out the middle of the total number of light positions on the canvas, this was where I inserted the light at the end of the light chain.

If you like this post check out my post on making your own Christmas decorations 

Turn an old ladder into a contemporary Christmas tree

Crafts, AllAmanda Russell
christmas-tree-from-ladder.jpg

I made this picture perfect tree out of an old ladder with near-on zero prep, using a coat of chalk paint to cover ancient paint drips and to create a matte finish.

homestyle-makes-4-25.jpg

You will need-

  • Planed timber

  • Saw

  • Spirit level

  • Pencil

  • Drill

  • Screws

  • Crown Cloudburst matt emulsion paint, £11.99 for 2.5l, Maxwells DIY

  • Polyvine Chalk Paint Maker, £11.36, Amazon

  • Paintbrush

homestyle-makes-4-21.jpg
homestyle-makes-4-22.jpg

1. Put up the ladder and decide how steep you want the sides of the tree to be; you might have to remove the retaining cord. Mine was quite broad as I wanted to max out on the display area.

2. To make the back leg shelf supports, cut batten from 2.5cm x 5cm planed timber. With the spirit level balanced on the front step, extend the level line and mark where to locate the support batten on the back legs with pencil. Screw the battens in place.

3. These shelves projected 25cm beyond the edge of the step to give extra display space, but you could make yours shorter if you’d like. Decide on the length, then cut each shelf from planed wood. Screw in place on the front steps and back batten.


4. To make the chalk paint, mix 400ml Crown Cloudburst Matt Emulsion with 200ml Polyvine Chalk Paint Maker. Then, with a crosshatch strokes, paint the ladder Christmas tree and let dry before decorating.

homestyle-makes-4-23.jpg
homestyle-makes-4-24.jpg

If you like this post check out my funky feather wreath post

Learn to create your own decoupaged hand plates

Crafts, AllAmanda Russell

Who’d of thought charity shop find vintage plates could so easily be transformed into such elegant wall art. A really simple project, you will need an inkjet printer to make the transfer images. I found these gorgeous copyright free eighteenth century wood engraving designs for teaching hand language.

decoupagedhandplates.jpg

You will need

Charity shop plates

Inkjet Water slide decal pack clear

Sponge

Acrylic spray

Copy right free images

Scissors

Instructions –Select the images you want to use. Print them out in a variety of sizes, cut out using scissors then try them for size on the plates.2. Follow the manufacturer instructions print the images onto decal paper, then spray with acrylic var…

Instructions –

Select the images you want to use. Print them out in a variety of sizes, cut out using scissors then try them for size on the plates.

2. Follow the manufacturer instructions print the images onto decal paper, then spray with acrylic varnish. Apply a couple of coats covering the printing completely to seal, so it doesn’t break up in the water.

3. When the images are completely dry, cut out with scissors keeping close to the edge of the design. To help the images slide onto the plates sponge on a thin layer of water. Put the paper backed image into a bowl of warm water, leave for about 30 secs. Lift the edge of the image off one corner of the paper. Hold the image over the plate, gently curl the backing paper away and slide the image onto the plate. Use the sponge to pat out any bubbles or wrinkles in the image.

4. Leave til dry then mount in place on the wall using Command strips

Credits

Inkjet Water Slide Decal Pack clear: Specialist crafts LTD

Command Strip http: command.3m.co.uk

If you like this post check out my post on how to turn and old ladder into a contemporary Christmas tree

Make your own Funky Feather Christmas Wreath

Crafts, AllAmanda Russell

Who wouldn’t want this incredibly chic colourful feather wreath to bring bright carnival colour to your room? I show you how to make this unique wreath with the minimum of effort.

homestyle-makes-4-12.jpg

You will need:

Turkey Quills in assorted colours

Polystyrene wreath form

Glue gun

Fishing line

Command Hook

Satay stick

homestyle-makes-4-13.jpg

The secret to the wreath is to put the feathers in at an angle so they completely cover the white polystyrene form. Starting pressing in feathers on the outside edge, first, make a pilot hole in the edge of the wreath with a satay stick, press the feather into the hole, then squeeze on a blob of glue to hold. Add the feathers in staggered layers, about 3cm from the next one. Work from the outside to the inside edge moving, around the wreath with each new layer.

When finished decide which is the top of the wreath and tie around a loop of fishing nylon to invisible suspend the wreath from a removable Command hook.

I used:

Specialist Crafts: 3 packs Turkey Quills in assorted colours £6.17

Specialist Crafts: Polystyrene ring approx £1

If you like this check out my post on how to decoupage you own hand plates

Create your own handmade Christmas decorations

Crafts, AllAmanda Russell

This nifty little project making Christmas decorations, is one for people who have pets using old pet food containers. We are talking about those lightweight aluminium ones with a lip round them.

You will need:Clean pet food containersPatterned paperRibbonWooden picnic spoonsPVA gluePaintbrushAcrylic paintThin cardClear sticky tapeDouble sided tapeAcrylic paintFelt tip pens pencilScissors 

You will need:

Clean pet food containers

Patterned paper

Ribbon

Wooden picnic spoons

PVA glue

Paintbrush

Acrylic paint

Thin card

Clear sticky tape

Double sided tape

Acrylic paint

Felt tip pens pencil

Scissors


Instructions:First cover the inside of the container with the paper face down. Draw around the edge with a pencil. Take a pencil and extend the sideline of the square.2. Cut out the paper cross shape. Fold the side arms in to crease the paper. Paint…

Instructions:

First cover the inside of the container with the paper face down. Draw around the edge with a pencil. Take a pencil and extend the sideline of the square.

2. Cut out the paper cross shape. Fold the side arms in to crease the paper. Paint the reverse of the paper with a layer of PVA glue, put the paper into the tray, press the two shorter sides onto the tray, then press out the long sides onto the sides. Along the top edge of the tray cut deep nicks in the paper and wrap the paper over the edge to stick in place.

3. To cover the outside of the tray, take a contrast printed paper. Paper face down draw around the base of the tray, cut out square shape. Measure around the outside of the tray, add 1cm for overlap. Cut a strip of paper the measured length and 3cm wide. Paint with PVA glue then wrap around the tray cutting long nicks in the paper to ease around the curved corners, press the loose strips into place on the base, then glue the square of paper over to cover. Poor glitter onto a plate, paint the front edge of the tray with PVA and dip in glitter.

4. To make the portraits, if you like use scissors to trim the top of the spoon into a hairstyle, then paint the spoons with a base coat of white acrylic paint. While they are drying make the shoulders for the portraits. Cut a strip of thin card slightly narrower than the opening of the tray and about 2cm high, fold in half along the length then glue on printed paper.

5. Use acrylic paint to mix a variety of skin tone colours, paint the spoons. Leave to dry then use felt pens to draw on details. Use sticky tape to attach the portrait onto the shoulders. To keep the portrait in position cut a narrow support strut from thin card about 4cm long, fold in both ends by 1cm, then tape one to the reverse of a portrait. Stick the shoulders to the bottom edge of the tray with double sided tape and tape the end of the support strut to the back of the tray. With the point of the scissors make a hole through the top edge of the tray. Cut a length of ribbon and pass one end through the hole and tape in place.

If you like this check out my post on making a star light canvas

How to make Mattisse inspired wall art

Crafts, AllAmanda Russell

Create a bold Matisse inspired fabric wall art. Use simple motifs to make an impactful piece of wall art.

You Will Need

  • Canvas, £8, Hobbycraft

  • Tracing paper

  • Bondaweb £3.90 Akaban

  • Fabric scraps

  • Stapler

  • Pencil, paper and tracing paper

  • Command Strips from £2.70 B&Q

Step-by-step

  1. Place the canvas on a large piece of paper and draw around the edge of the canvas, add 10cm to each side.

  2. Draw your design on the paper and mark each colour. Using the tracing paper trace the shape for each colour.

  3. Iron paper backed Bondaweb to the reverse of fabric scraps. Cut out the shapes, then remove backing paper and iron to bond in position. Use a sewing machine to sew around the edge of the fabric shapes.

  4. Place the fabric image on the canvas and stretch the fabric over the edge, use the stapler to secure the fabric at the back.

  5. Hang on the wall using Command Strips

Tips

  • When stapling the fabric on start from the middle and work towards the outer edge so there are no creases in the fabric

If you liked this post why not read my post on making your own  Bang on Trend Super Easy Picture Shelf

If you liked this post why not read my post on making your own  Bang on Trend Super Easy Picture Shelf

Get Yourself an Asymetric Coffee Table

Crafts, AllAmanda Russell

Have yourself an enviable conversation piece coffee table by transforming a very ordinary coffee table with a new asymmetrical top and a lick of paint.

You Will Need

  • Lisabo Tabe Ikea

  • 20mm MDF

  • Black and Decker electric jig saw and drill

  • Paint

  • Varnish

  • Wood filler

  • Screws

  1. Using the jig saw cut the table top over hang off the table. Draw the shape of the new table top on the MDF. Cut out with the jigsaw. Sand the edges of the table and MDF.

  2. Paint the MDF table top blush and the legs graphite.

  3. Place the MDF table top on the table, drill through the new top into the old top then screw down.

  4. Fill screw holes with two part filler when dry sand and retouch paint.

  5. When dry paint the whole table with quick dry

Tip

  • This table gives lots of space for styling a table scape, I love the zingy saffron I chose. For a new look, change your styling accessories with the season.

If you like this post why not check out my post on Stamping your own Floral Lampshade

Stamp your own floral lampshade

Crafts, AllAmanda Russell

I love simple bold classic 60s florals and designed a print in a bright vibrant green for a large lampshade. This is a very simple way to create your own bespoke piece of designer homeware.

You will already have many of the things you need for this low-tech hand printing project and there are only a couple of specialize products you will need.

You will need:

  • Plain drum lampshade

  • Dylon fabric paints in Green and Yellow from

  • Acrylic block

  • Tracing paper

  • Pencil

  • Rubber

  • Masking tape

  • Glue stick

  • Hobby foam sheet

  • Car wash sponge

  • Scissors

  • OHP pen (overhead projector pen)

  • Masking tape

Step by Step

  1. Measure the lampshade and draw a design to fit, then trace onto tracing paper. Use a permanent OHP pen to mark the center back of the acrylic block. Place the design under the acrylic block and trace onto the reverse side of the block with the OHP pen.

  2. To transfer the image onto the foam sheet, place the tracing paper design face down on foam, and then scribble over the back with a soft pencil.

  3. Cut out your design from the foam sheet using scissors and a craft knife. Stick the cut out pieces in position on the acrylic block using a glue stick.

  4. Place a line of masking tape around the top and bottom edges of the lampshade.

  5. Mix up your fabric-printing colour, I made a lime green by mixing the yellow with the green about half a pot for this design. For the fabric paint applicator cut a piece 3cm cubed from the car wash sponge. Dab one side of the foam in the fabric paint until it is evenly coated. Then dab the fabric paint onto the design block and print on paper to check colour.

  6. Start printing onto the lampshade, beginning at the seam, reloading the block with paint after each impression.

Tip

  • Transparent acrylic blocks take the headache out of positioning the block especially when printing repeat designs.

If you like this blog post why not read my post on Creating a Retro Tiled Coffee Table

Bang on Trend Super Easy Picture Shelf

Crafts, AllAmanda Russell

Have you ever marvelled at curated collections of pictures and wondered how you can move them about without damaging your walls? This great little picture shelf is the answer, use it to display your own curated collection of pictures, it’s easy to move them around again and again whenever you want to change the look.

You Will Need

  • Wood strip and beading

  • Brass picture hooks

  • White matt emulsion paint

  • Electric Drill Black and Decker

  • Rawl plugless screws

  • Panel pins

  1. Measure the wood strip and beading and use a saw to cut both pieces of wood to the same length.

  2. Place the beading strip in the centre of the wood strip.

  3. Hammer in position using panel pins.

  4. Paint with white emulsion.

  5. Screw the brass picture hooks on the back edge.

  6. Mark and drill holes for screws on the wall, then screw the shelf in place.

Tip

  • Paint the shelf with the same colour as the walls so it blends into the room

If you like this post why not take a look at How to create your own vintage letter