Soul Food Studio

Christmas Interior Styling with Vintage Constance Spry Style Vases

All, StylingAmanda Russell
1.jpg

At last it’s time to get the house ready for the festive season ahead and yes it has to include my large collection of Constance Spry style mantle vases.

When she was unable to find the vases she wanted, visionary Bohemian florist Constance Spry commissioned The Fulham Pottery to create a collection of her designs. These were based on her sketches of the Roman, Greek and Phoenician vessels she saw in Tunisia while holidaying with her artist lover Gluck. The vases were perfect for her loose asymmetric flower arrangements with their wide boat shape and splayed foot. The most popular designs of these unconventional vessels were copied and reproduced for the mass market in the British potteries. Perfect for making a bold statement, add style to any interior with the cool and classic shapes of Constance Spry style vases.

The signature style of floral designer Constance Spry is visually extravagant yet thrifty of purse a style that fits well with the festive season. From the 30s into the 60s the Avant Garde florist dominated British floristry bringing her innovative approach to the flowers of royalty and high society. Her teachings and floristry books reflect her democratic vision elevating her to an icon for housewives hungry for her thrift and clever design style. Her book ‘A millionaire for a few pence’ reflects her teaching that something original and stylish can be created for next to nothing.

2.jpg

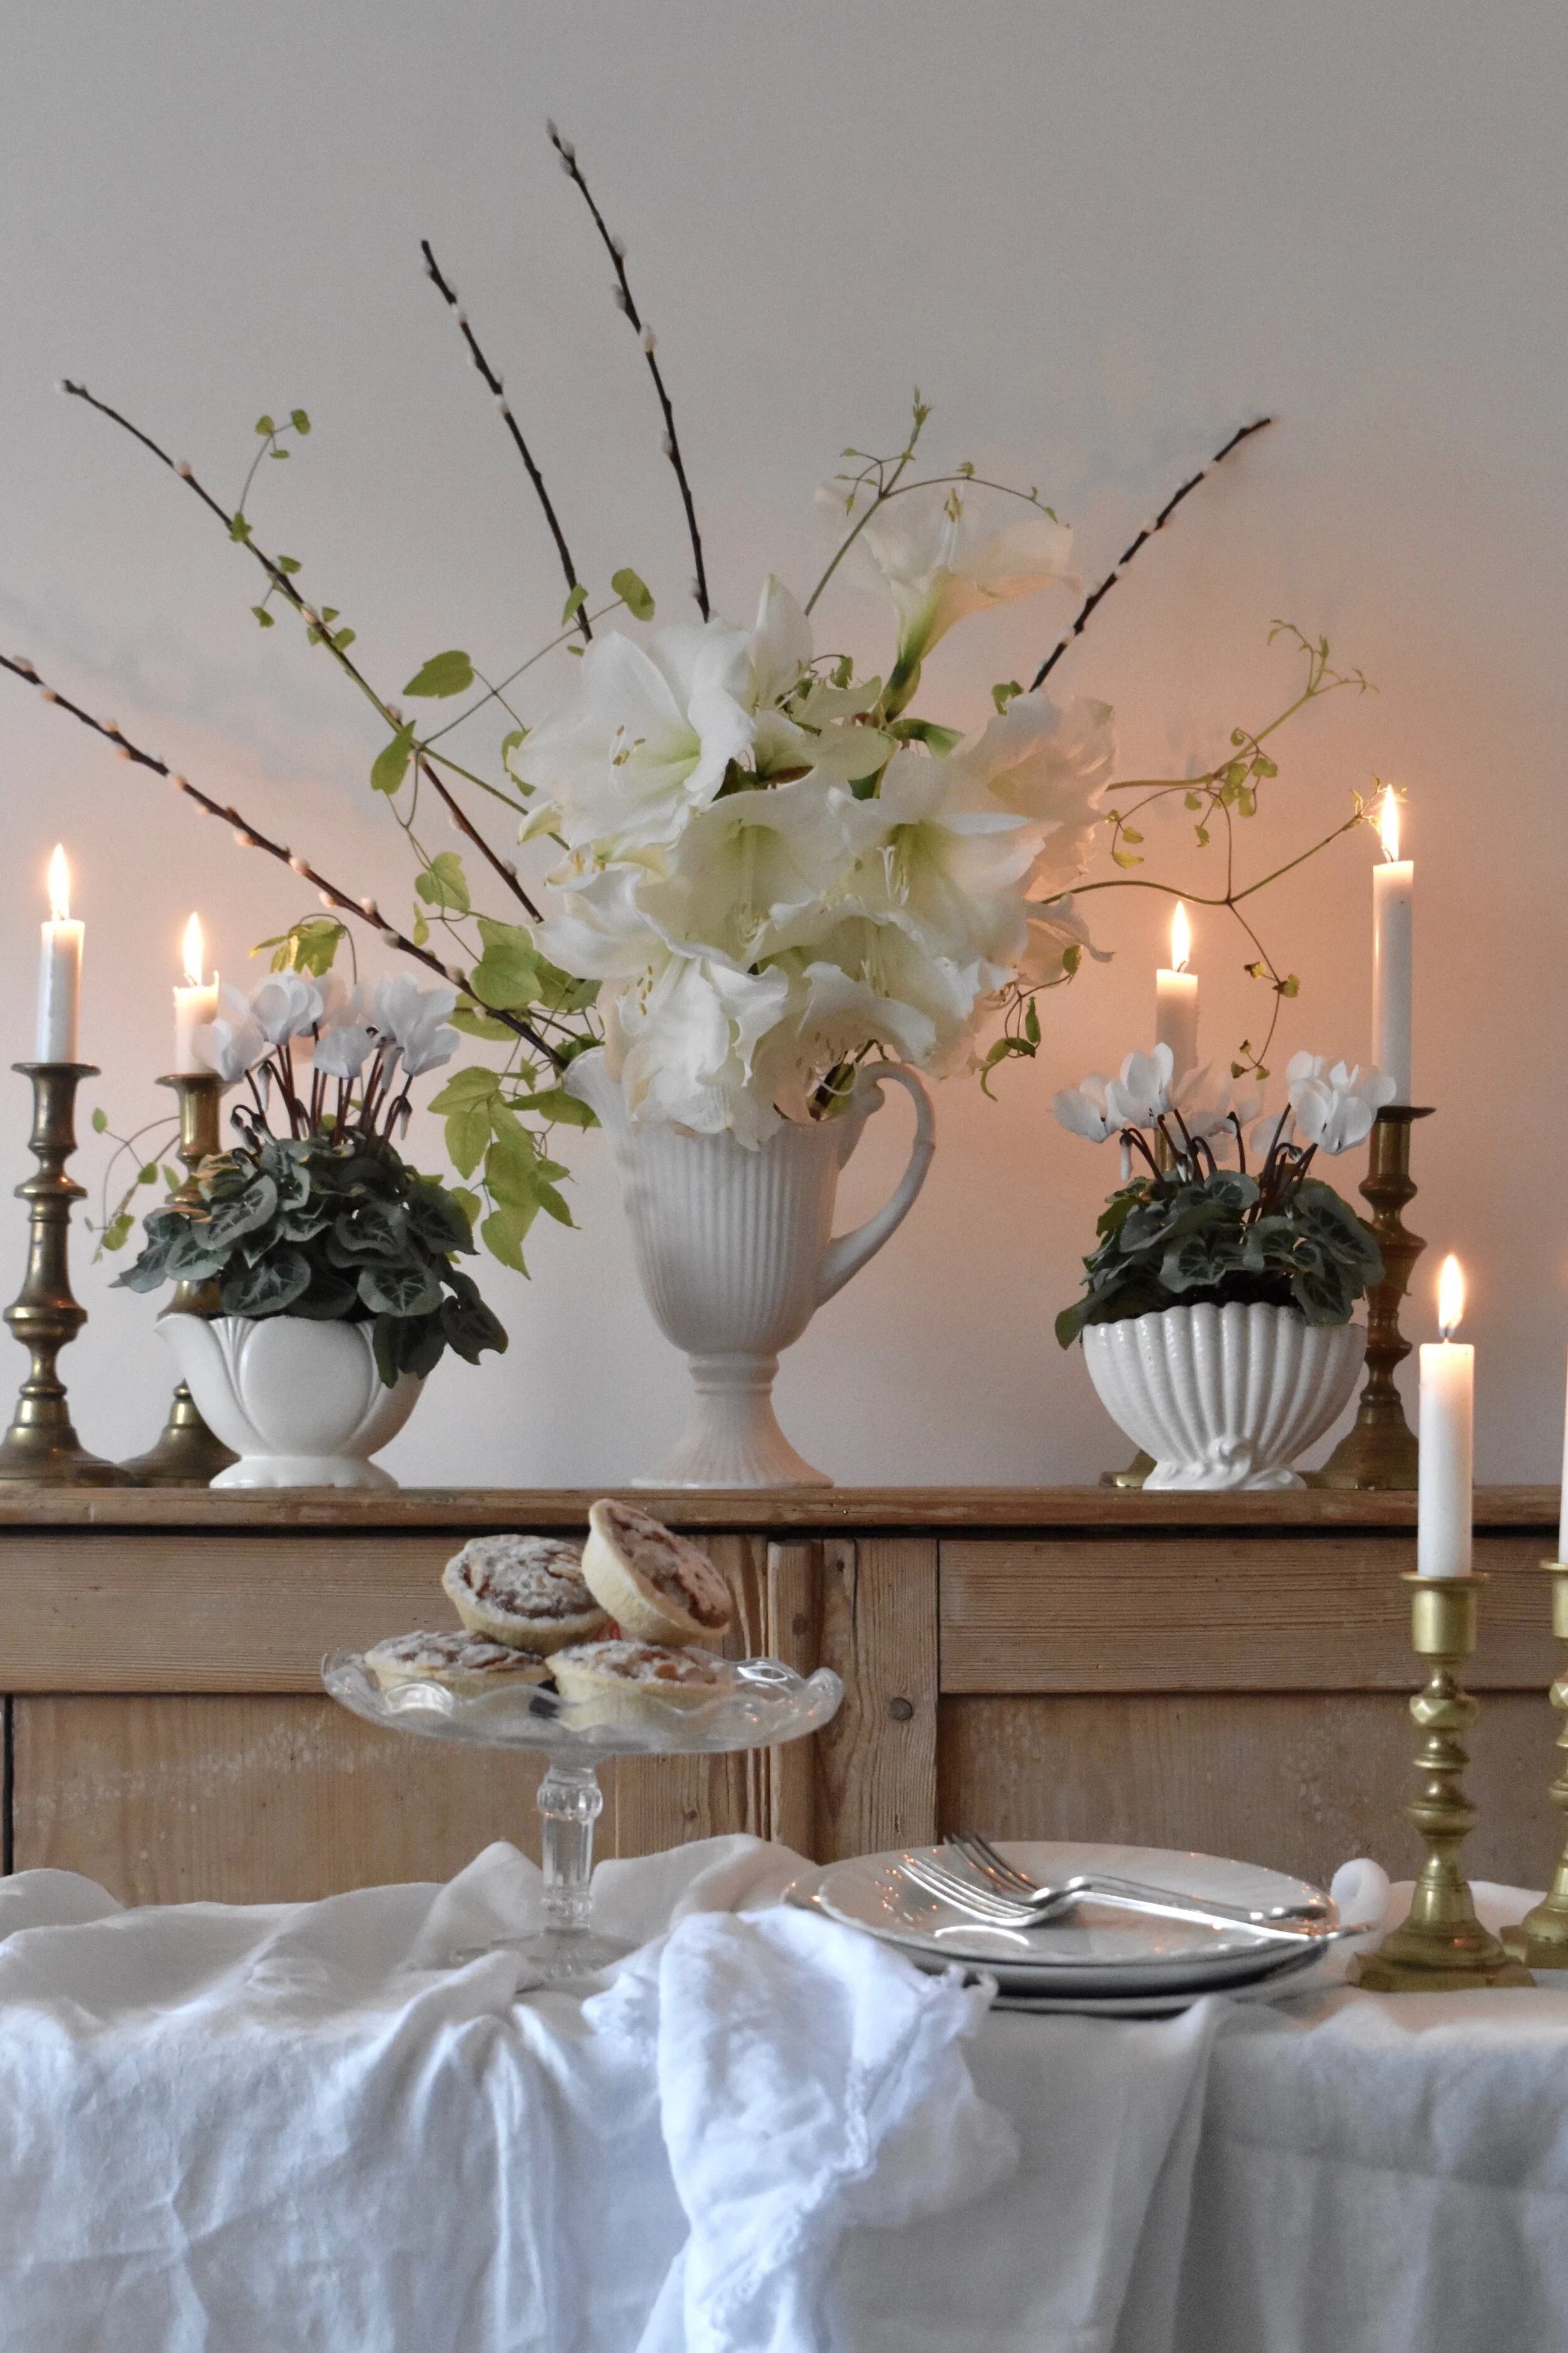
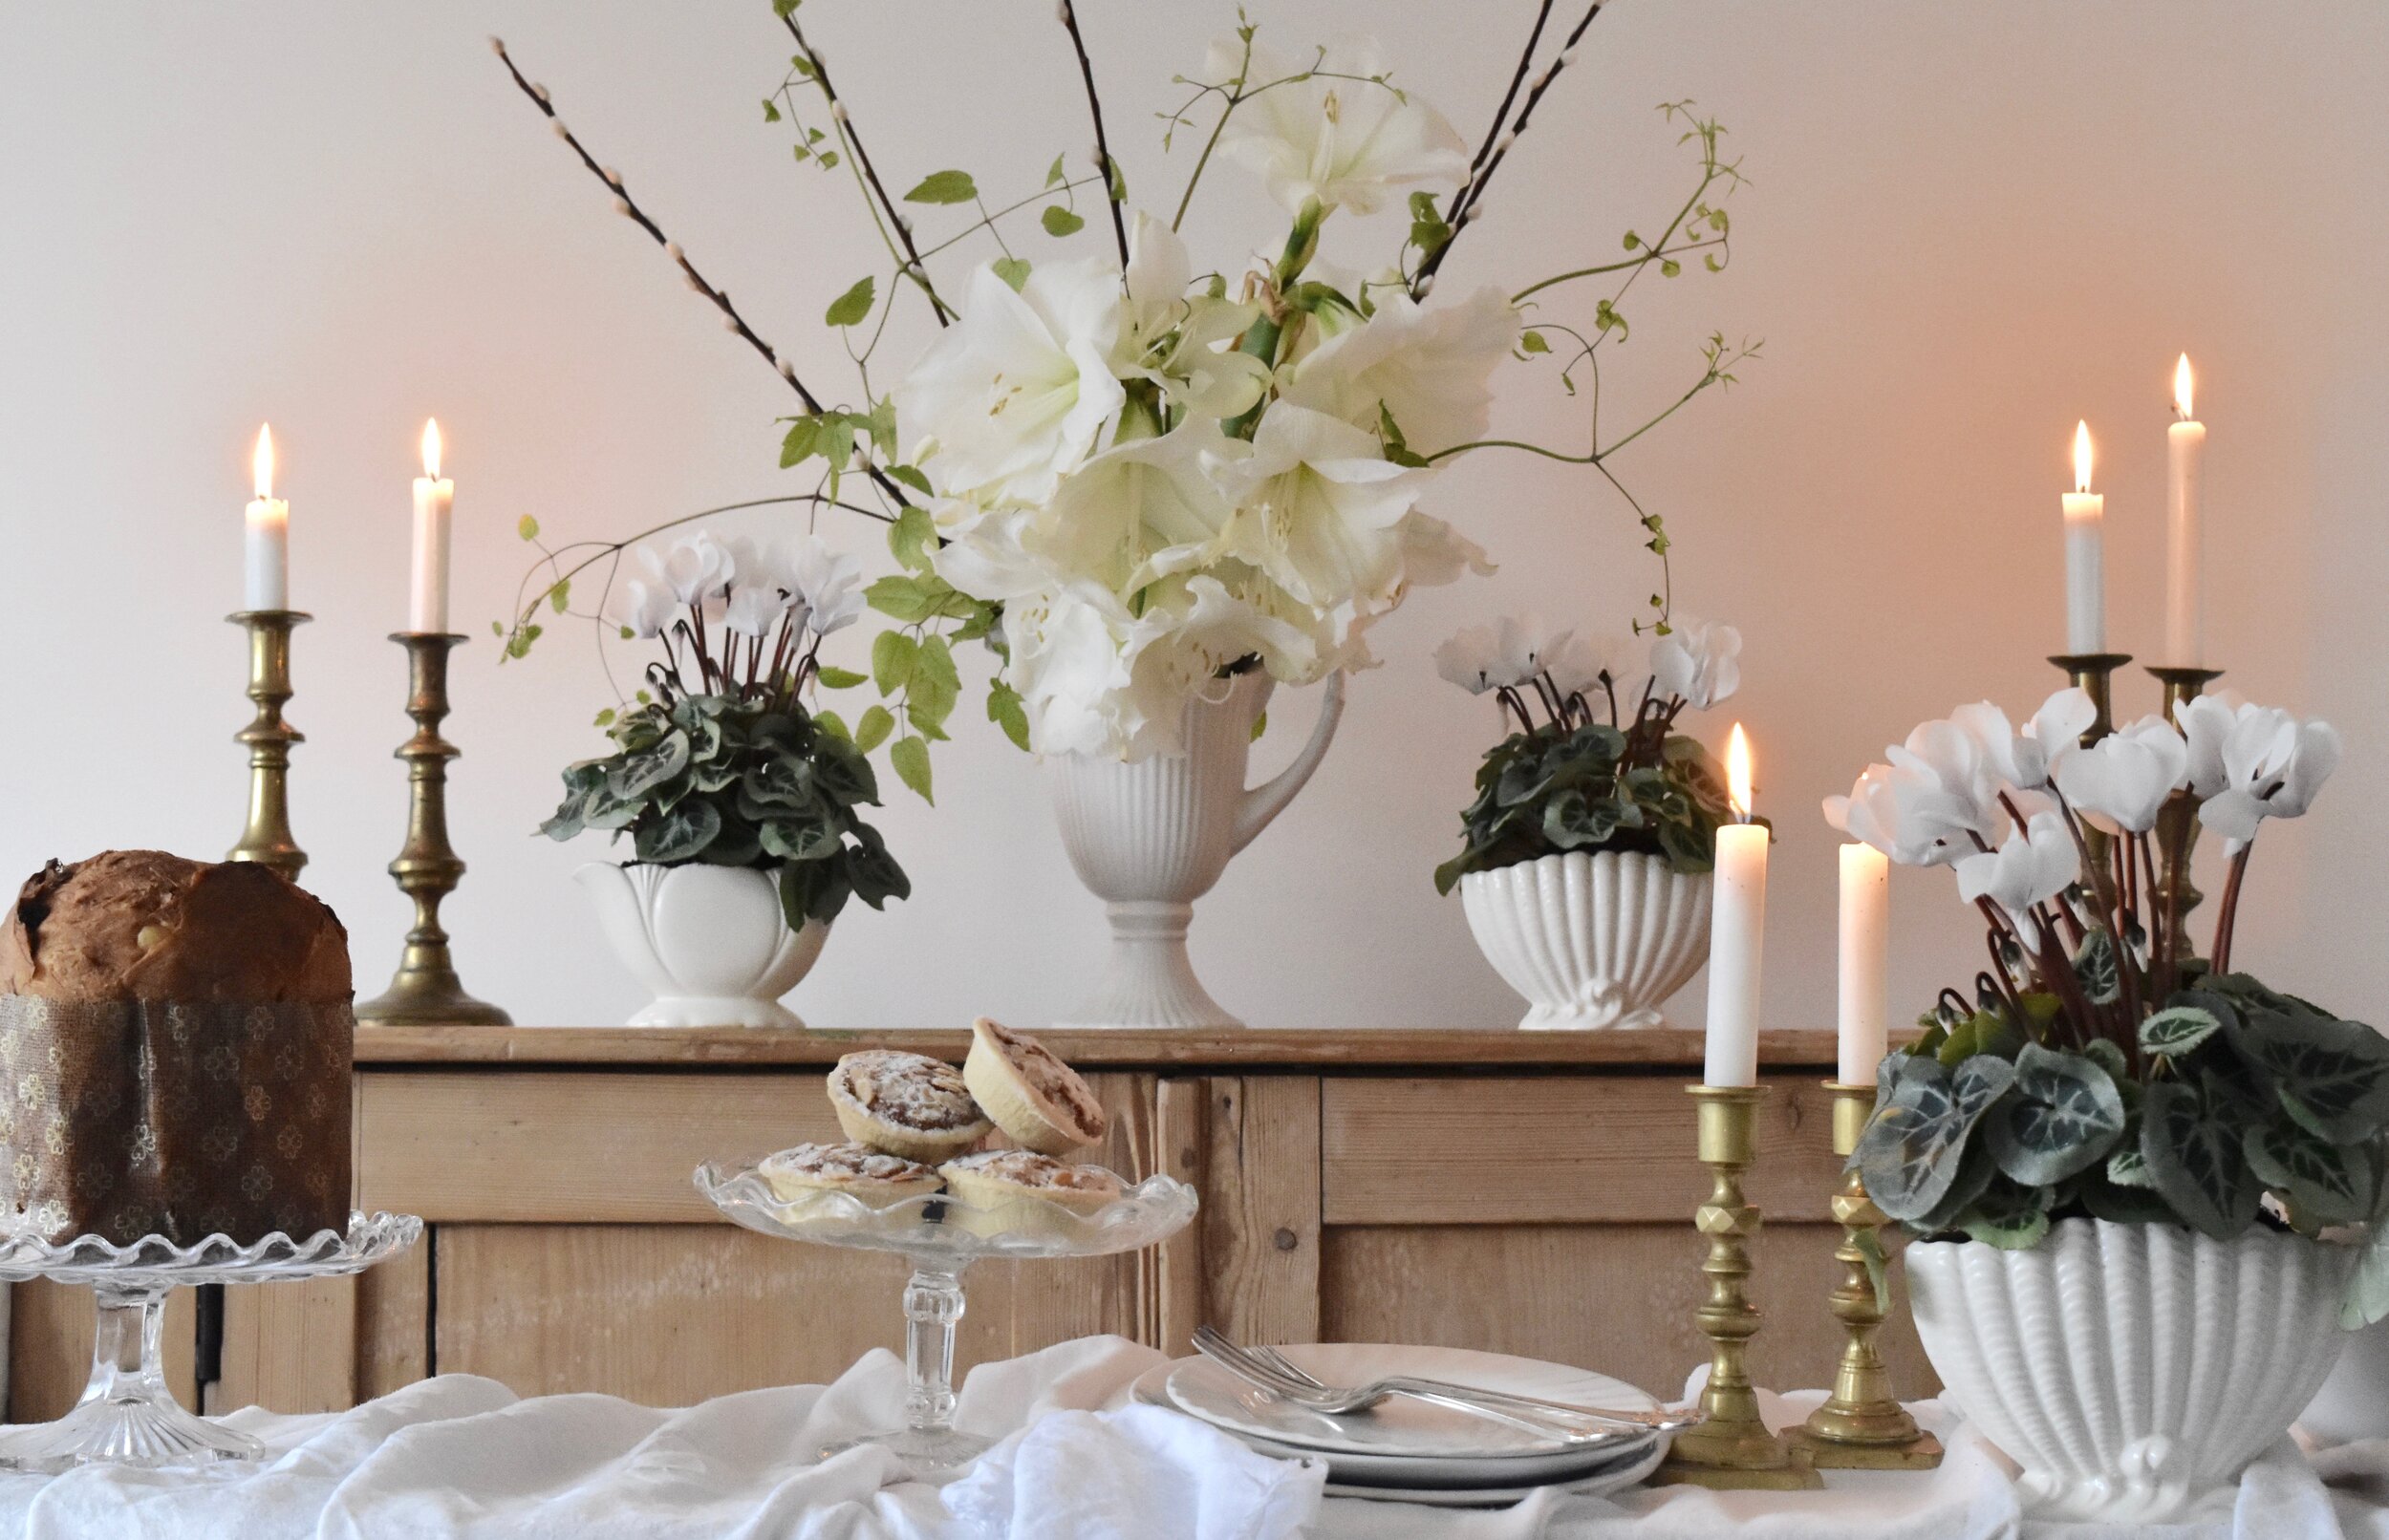
Increasingly contemporary floral designers are moving away from imported flowers, and they have adopted the concept of thoughtful flowers. As it was in the past they are embracing the sustainable trend of home grown flowers rather than imported, choosing to source seasonal and local flowers. Rest assured even the simplest of arrangements of British grown flowers can be stunning and impactful, generous groups of seasonal flowering plants will carry you well into to the new year. Pack low Constance Spry style vases with flowering plants like cyclamen with their pretty marbled leaves and their sweet perfume. A simple sheath of amaryllis combined with pussy willow and the last brave twirls of clematis shooting out of a large ewer will be long lasting while making a spectacular statement.

3.jpg

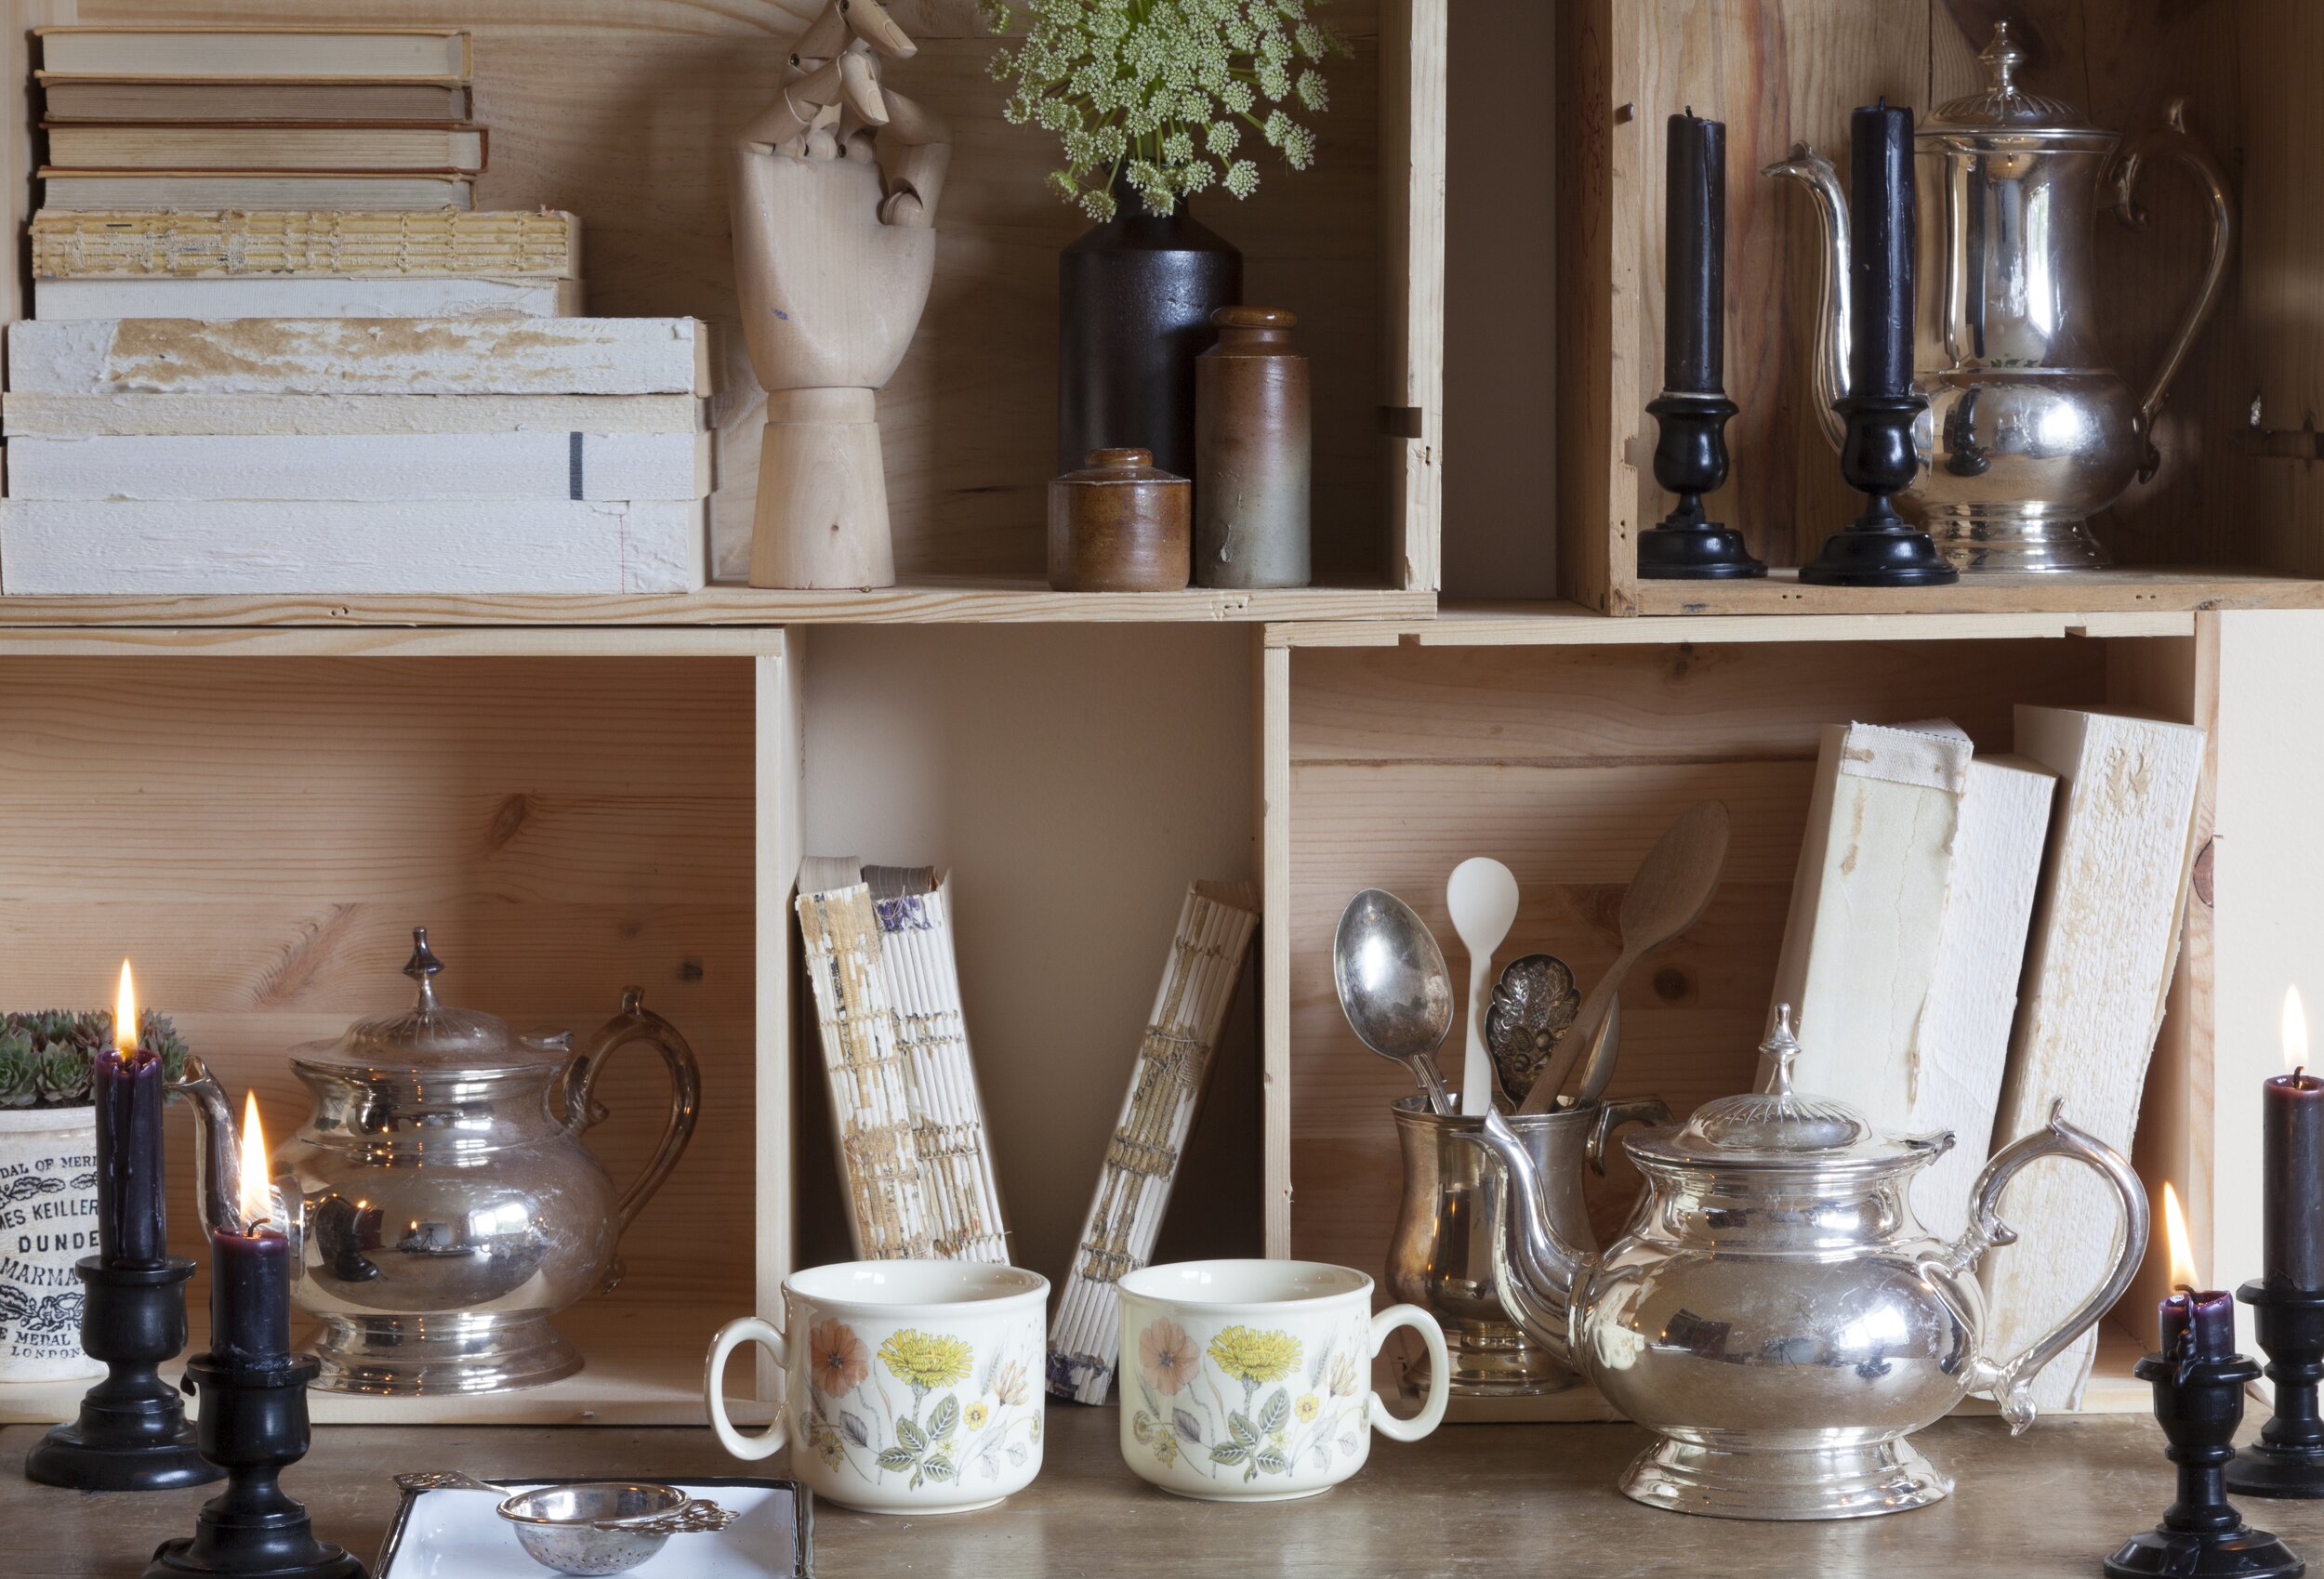
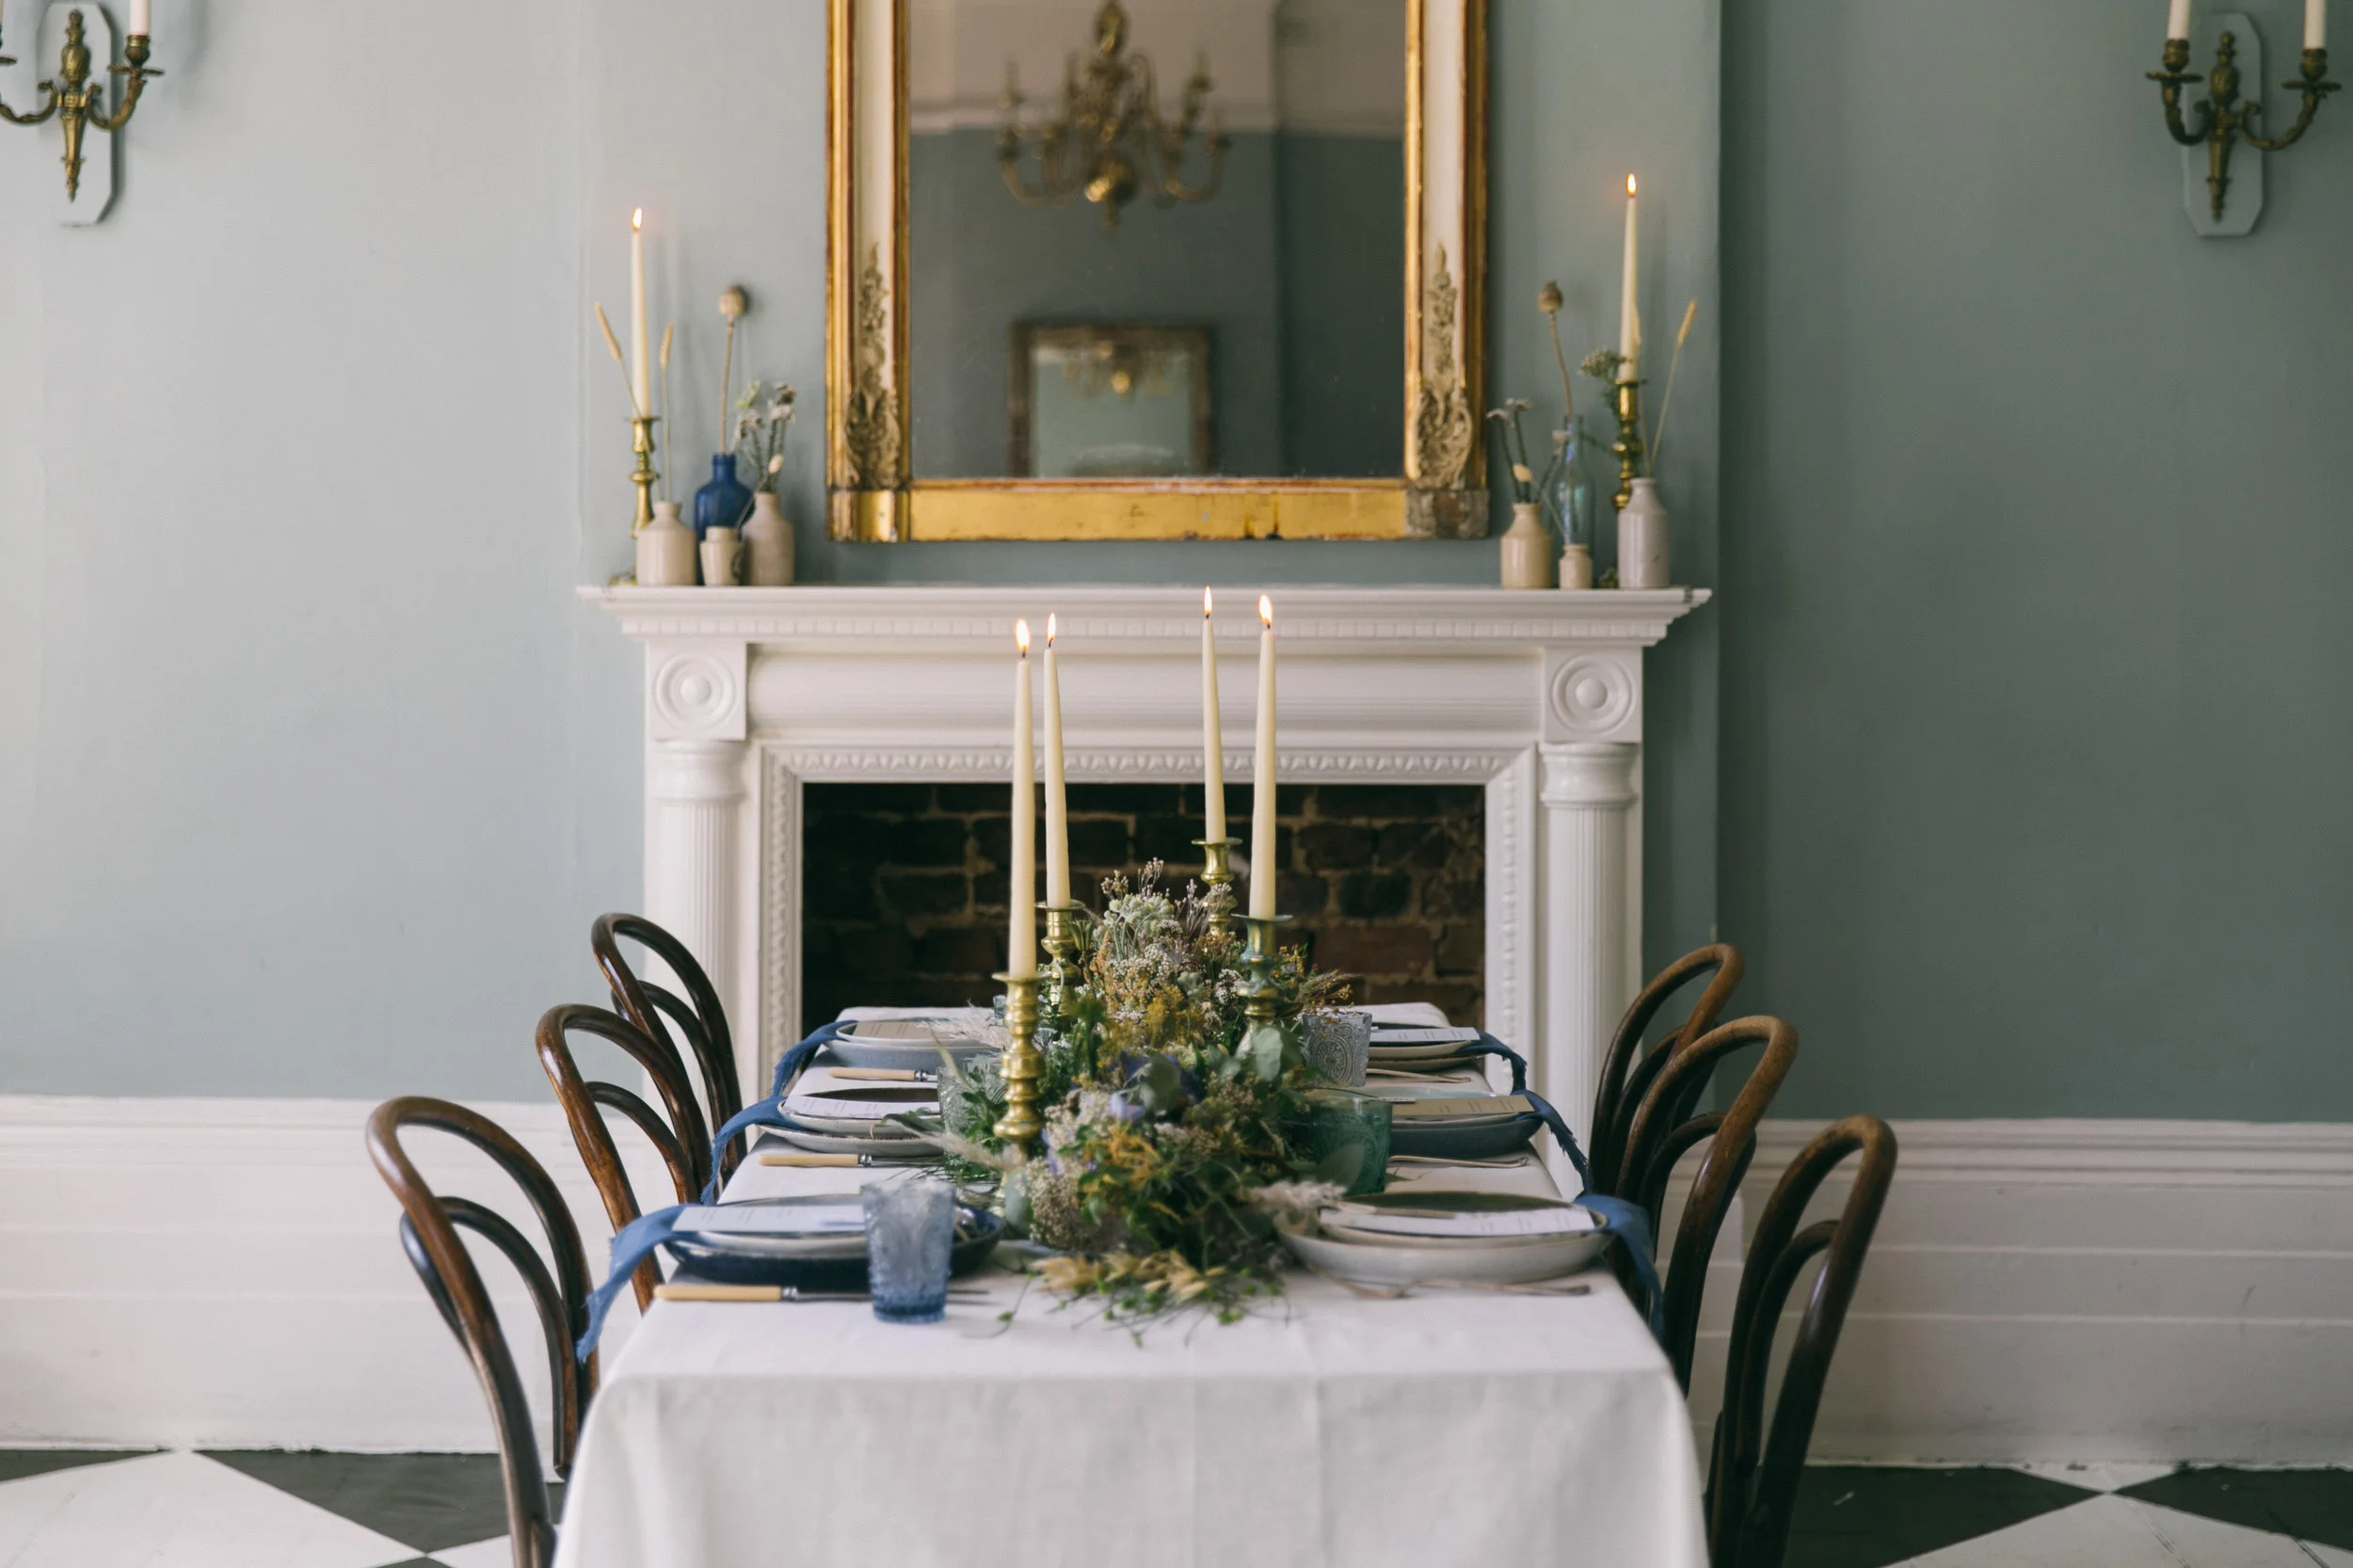
For a continuously evolving seasonal display generously fill a classic Constance Spry style mantle vase with a carpet of moss then stud with seasonal bulbs. When the blooms begin to shoot up, add gnarly twigs to support the stems ready for flowering. Hanging miniature vintage glass bottles are ideal for holding fresh berries and fragrant fresh flowers grown from bulbs. Then bling up the twinkle with a crowd of candlesticks and simple white candles.

4.jpg

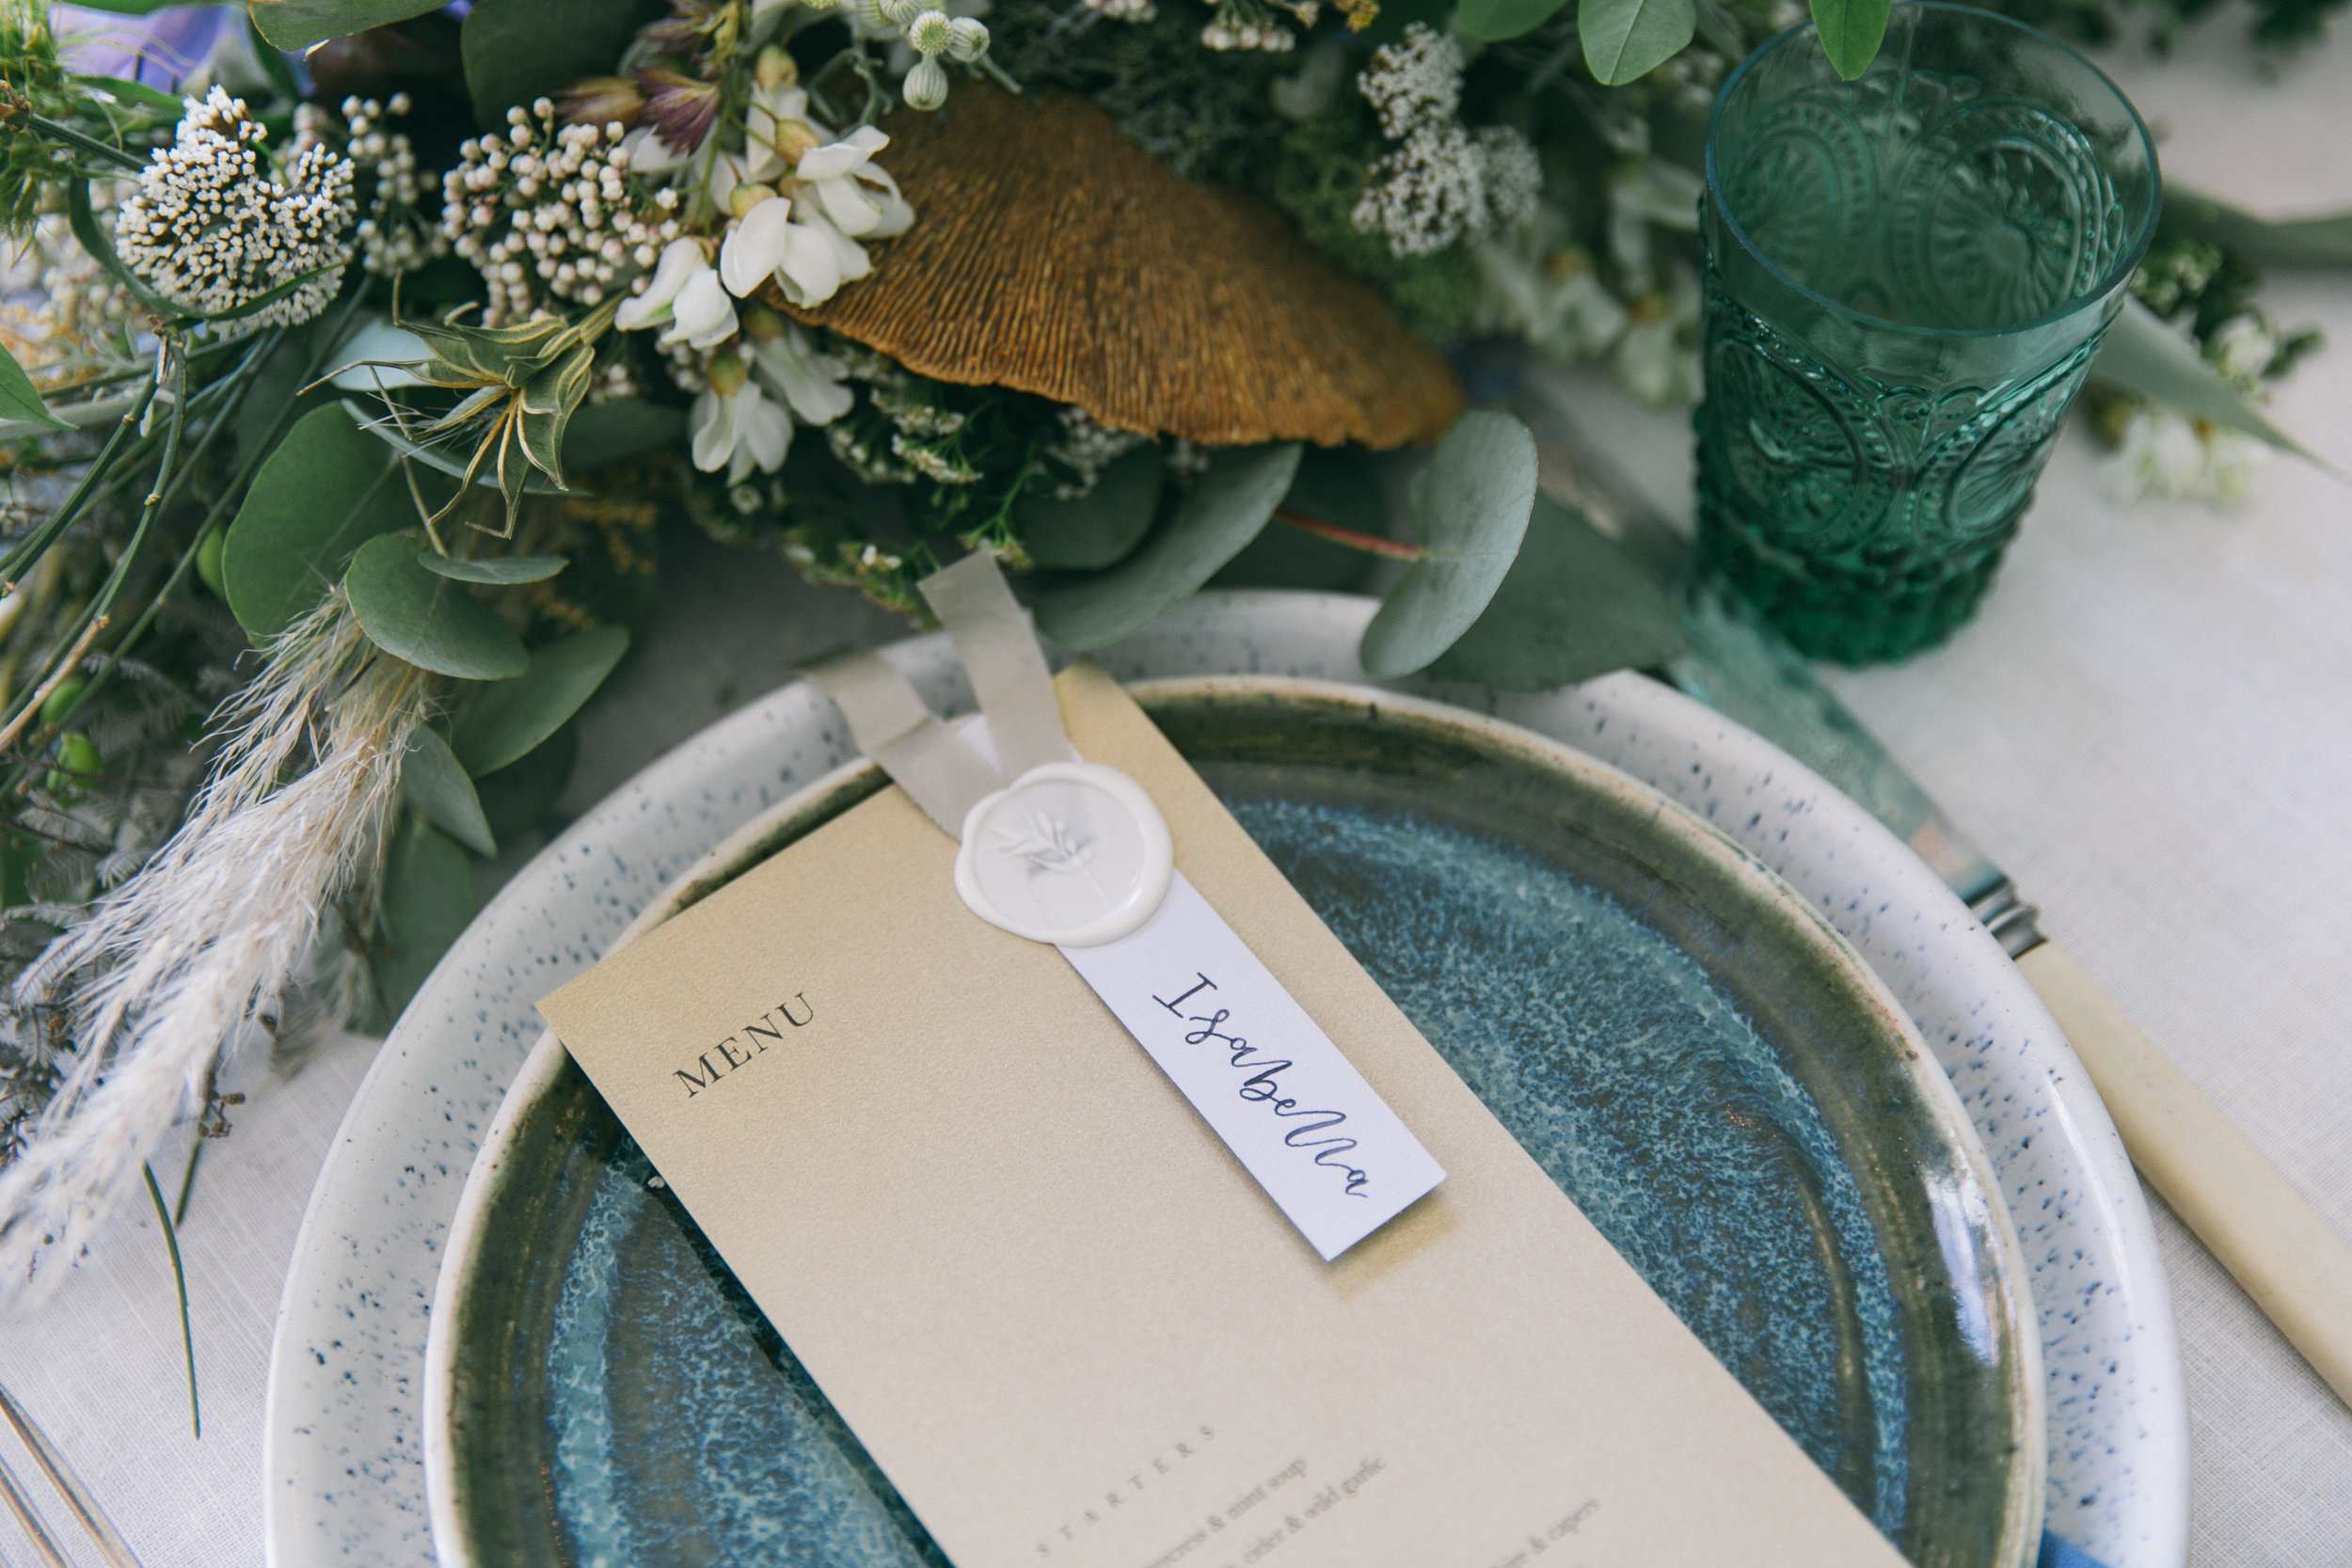
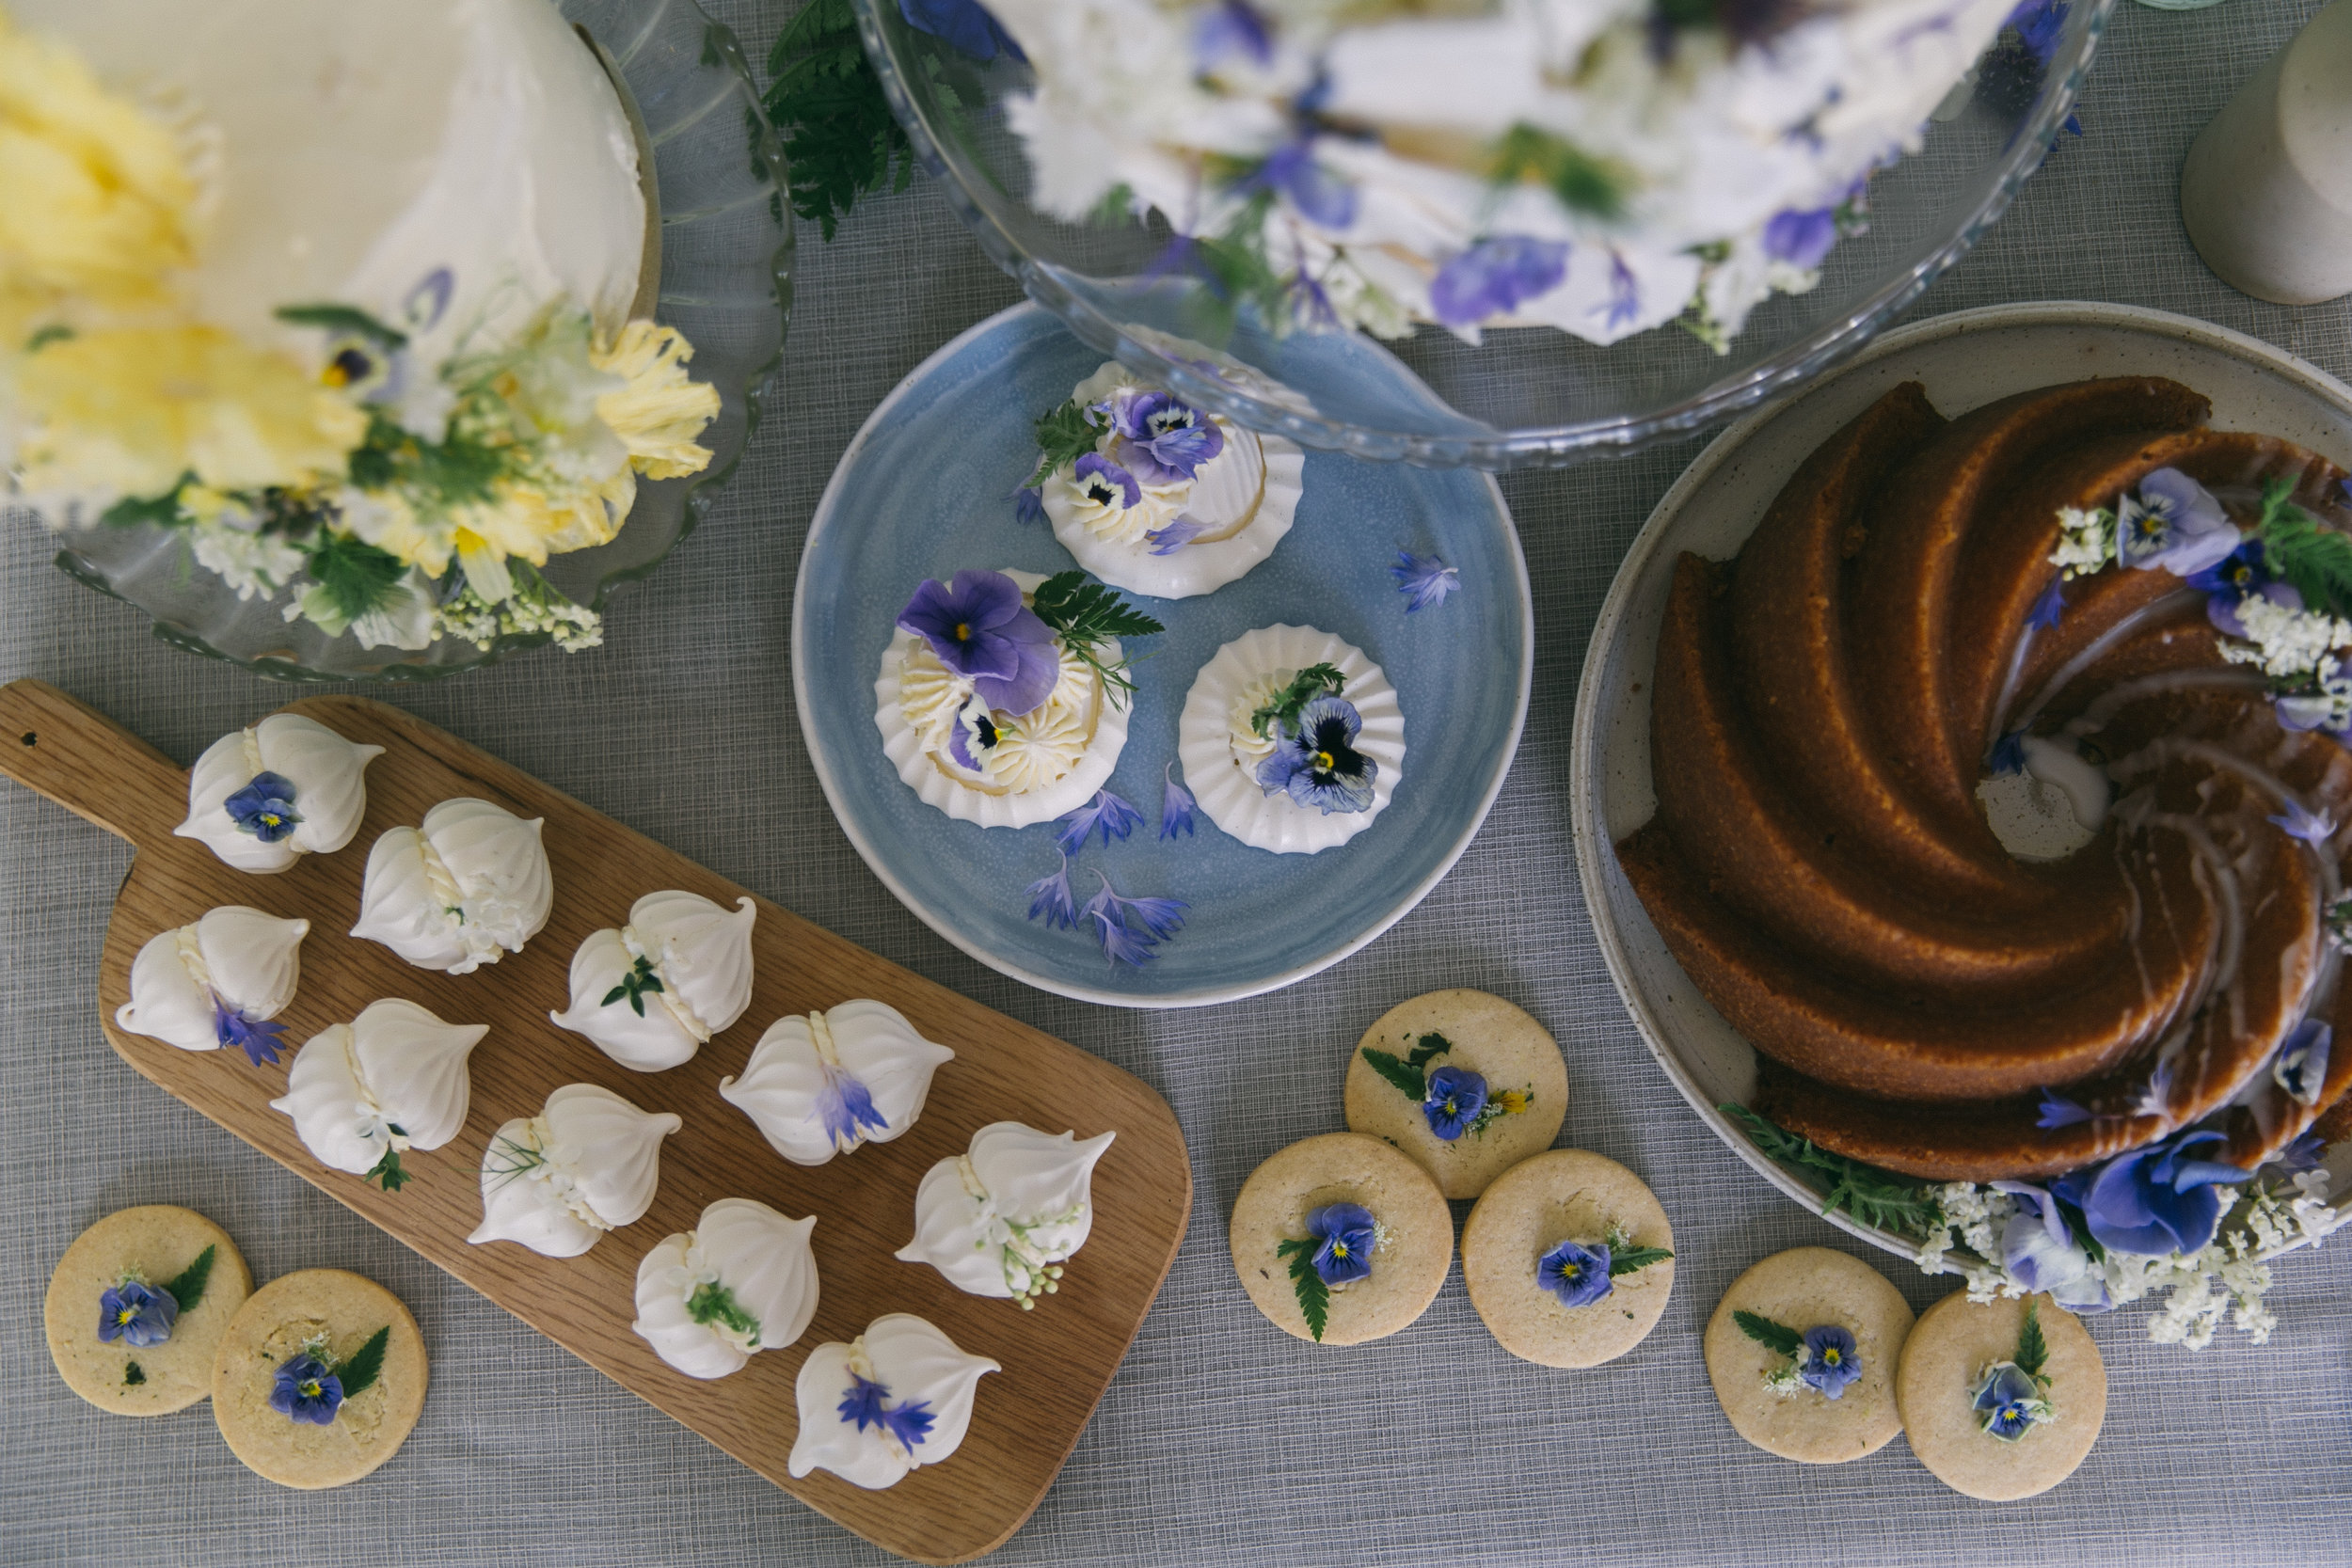
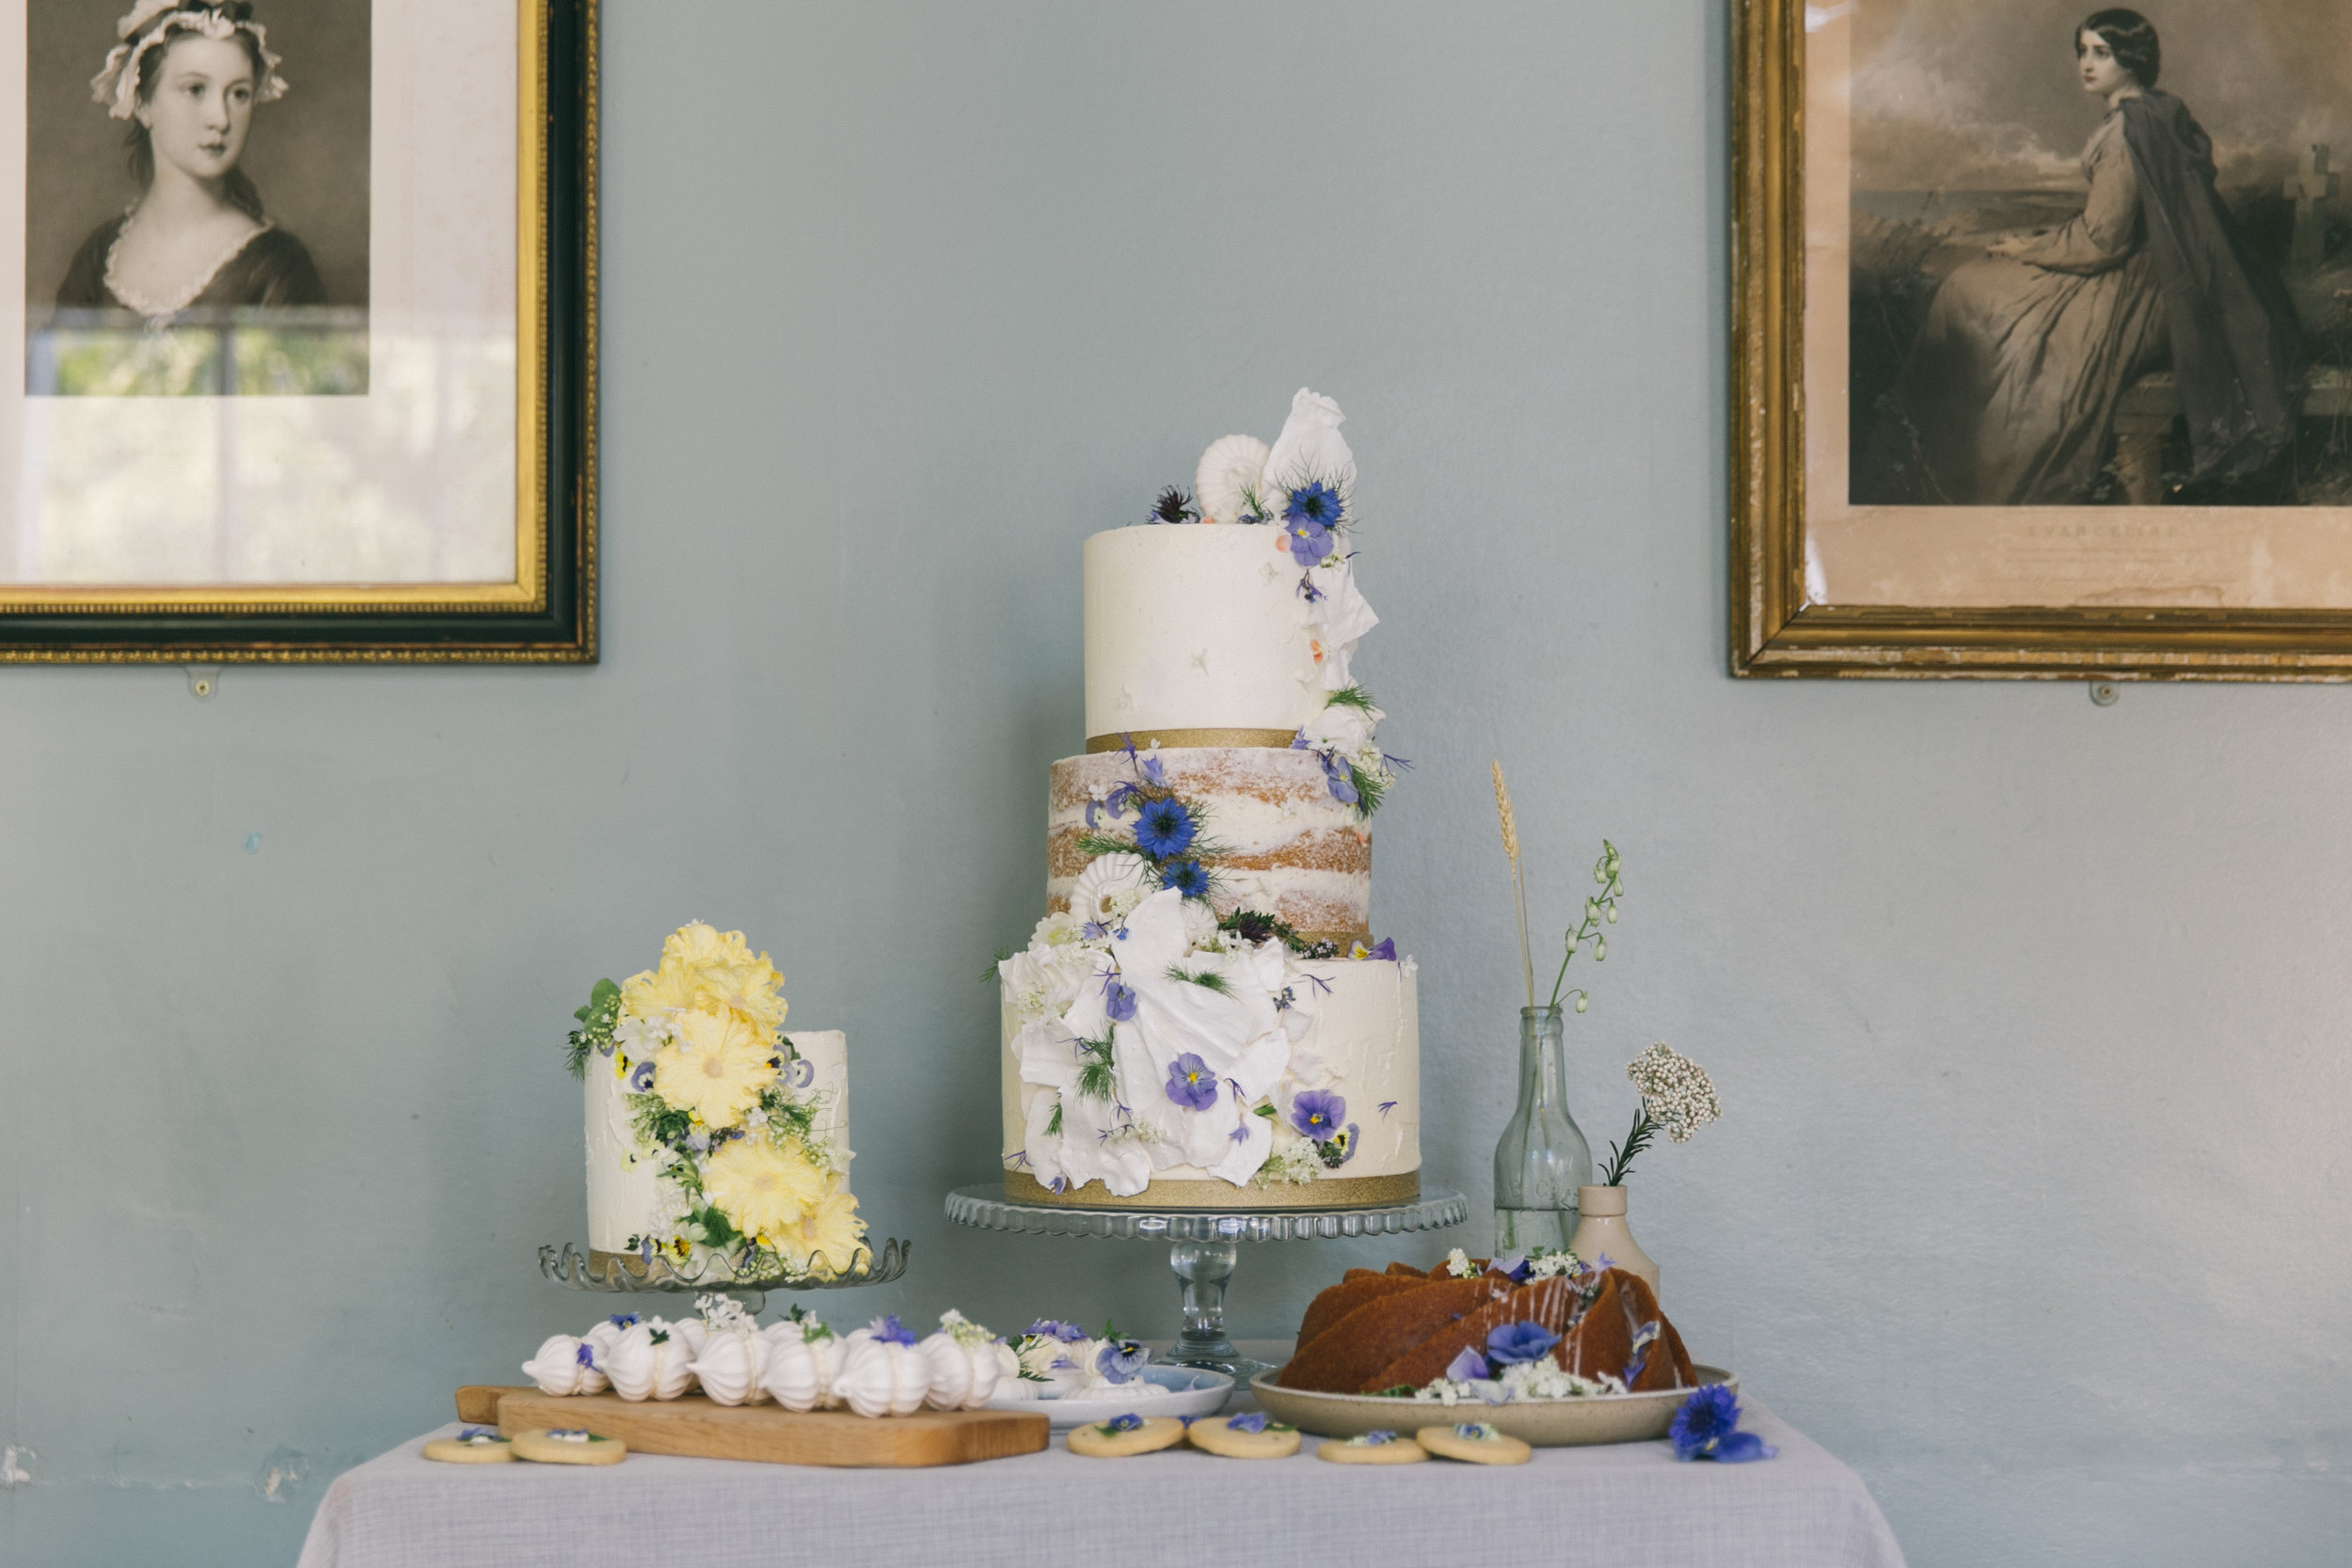
For a more flamboyant style follow Constance Spry example and seek inspiration from still life compositions of the Dutch Masters. The rich sensual layering of texture, exotica and colour, are perfect for a vintage Christmas. Known for plundering her clients cupboards and attics for suitable vessels the economy in creating a scheme like this lies in the adaptable ethos that a mismatched collection of vintage is good. Follow suit and gather together a collection of vintage vessels to hold jewel like collections of sweets, fruit, nuts and glass decanter of cordials to decorate your festive table. At the centre place a Constance Spry style vase filled with a generous collection of flowers and foliage. Choose flowers in large bunches and bright colours, lilies and chrysanthemums are plentiful, add in hedgerow foliage with seasonal holly and ivy. A dramatic collection of candlesticks with a bold harlequin collection of coloured candles will bring more sparkle. Keep thinking outside the box, design a series of vignettes, for a stunning centrepiece, at its simplest, fill a Constance Spry style gondola vase with a tumble of seasonal fruits with citrus and bay leaves not forgetting a bright jingle of gold doubloons.


@amandarusselldesign

Amandarusselldesign.co.uk

Soulfoodstudio.com

If you like this post check out my posts on Simple Styling Tips Using Plants, Constance Spry Vases for Everyone and Styling your Dartmouth Flower Urns.


Carving out New Beginnings

Living, AllAmanda Russell
journal 1.jpg

I find this time of year exciting, so full of potential. Usually I’d be saying grab the opportunity and start something new, this year feels very different.

New beginnings is a recurring theme throughout the year. I’m not afraid of starting a new project or the inevitable adjusting to move along, the knowledge that achieving a goal is a meandering path rather than a straight line softens the pain.

Personally the start of the school year could well be my favourite time for initiating change, it carries the feeling of starting a new book or a clean page. My life has been governed by the rhythm of the school year, first off with my education and later with that of my children. And since they’ve long ago flown the nest the bliss of choice is not lost on me, travels are invariably planned during the quiet periods outside school holidays. Typically this is when I seek out workshops to develop new skills, often with the added bonus of visiting an undiscovered corner with new landscapes, architecture and museums.

journal 2.jpg

A couple of years ago I sparked massive ongoing change, by selling the family home and grabbing the opportunity to live somewhere new. Of course that wasn’t the start, there was the job of getting the old house ready for market, along with all the tidying and clearing it out. Finding a property took time with all the usual glitches. Early this year, when at last, the renovations of the new house drew to a close I was ready to welcome more change along with all it brings. With a worldwide pandemic raging, life turned out how none of us had imagined, and there’s been continuous universal fast pace change to the fabric of all our lives.

This autumn I feel it’s time to take a moment and luxuriate in this shift to the new normal that’s been carved out around me. Not necessarily planned, I revel in the joy of the changes, goodness, its been a hideous journey for so many, but what an adrenalin packed adventure we’ve had. I’m taking stock, auditing life, with an eye on living with purpose and self-growth.

So what have the major shifts been in my life? When I decided to move I started to examine my life and to make sustainable changes to carry forward. These remain in place and now’s the time to roll them in with the new normal. My aim was to achieve a more sustainable and thoughtful way of life, by making small adjustments, resulting in less impact on the environment.

During the long months of shielding, the situation threw up new changes that I will keep as I move forward. The main one is online shopping reflected in my shop Soulfood Studio which was buzzing. Essential online shopping has streamlined my life. Grocery stores can have the repetition of supplying and delivering everyday products, with the frustration of searching out stray products left to the pickers. Squeaky fresh vegetables, gathered early, are left on my doorstep, as is loo roll and the laundry product is posted through the letter box. Though in the past I looked forward to grocery shopping I marvel at the liberation, the energy and time saved by delegating the chore. Now I look forward to topping up seasonal produce while enjoying a trip to the local farmers market with the chance of meeting friends. Currently travel abroad for many remains off the agenda, so there are planned staycations, along with an ongoing project of cycling and finding what’s on my new doorstep.

I’ve learnt in these recent months joy is about what’s in my head. Life doesn’t have to be perfect, just as good as I can make it.

journal 3.jpg

Spreading The Word One Parcel At A Time: Sustainable Packaging, Sending My Babies Out Into The World

Crafts, AllAmanda Russell
packaging .jpg

The stock in my shop is vintage, antique and sustainable. I’m always charmed by the story attached to vintage items, as it adds another layer of unique richness. It feels good to find new homes for the preloved treasures I’ve sourced and sending them out to be reloved is the start of a whole new chapter.

If this is the story of the stock in my shop, then it follows the journey and continues reflecting this in the new home and beyond. It feels right that I should put as much thought into the packaging at the end of their time with me.

Don’t we all love the unwrapping, it’s one more exciting part of the buying experience. I remember the magic of gifts from my step grandmother. Wrapped in crunchy recycled tissue the parcels were often embellished with a gift tag cut from scraps of printed pictures, the wrapping secured with reused velvet ribbon, coloured twine or glossy embroidery floss. I remember the heady excitement of wondering what precious surprises were carefully nestled in the layers of crinkled paper.

Our resources are a precious commodity to be used sparingly and where ever possible given new life. Surely designing a packaging livery that reflects the company’s sustainable ethos and reusing packaging, can be as attractive as any using new materials? My mission is to create a parcel that brings delight, while still being desirable and mysterious. A theme that’s not rigid, so it can develop and flex according to the available materials as we go along. I’ve long been cutting out the plastic and packaging, now it’s time to show intention following through in the shop.

packaging 2.jpg

Learning by example is always solid. I’m not alone looking for a more sustainable way forward so I’ve turned my attention to checking out the parcels that arrive from online retailers. Silver antiques dealer Natasha @the_ urban_ vintage_ affair has a super positive blog about the do’s and don’ts of sustainable packaging. Hayley @shopivyjoan sources gorgeous vintage homewares and has a wonderful brand image as does the upmarket product designer extraordinaire Snowden @snowdenflood Both source packaging from suppliers Kite packaging who have a strong ethical message. And last but not least you might never buy packaging again by following the brilliant advice from Louisa, vintage garden and lifestyle online supplier @Sugdenanddaughters who puts out a message for unwanted packaging to her local community.

Moving forward to the actual wrapping, it’s about keeping materials once manufactured out of landfill for as long as possible and using product that can ultimately break down into compost. Starch based packing peanuts that dissolve in water are always great for padding. For fragile and bulky parcels often plastic bubble wrap has to be used, I reuse and when I source new it’s always recycled. So it can be reused keep the pieces as large as possible and fold for extra layers. There’s a stash of reusable materials that I have gathered along the way ready for sending out parcels, a collection of stationery, cardboard, paper and twine. And don’t overlook textiles I love a torn strip of tattered silk, course linen or a gaudy print cotton for tying a parcel. Lastly I have a selection of bespoke rubber stamps for stamping brand identity onto recycled paper and labels.

I’m forever hatching new ideas, the plan is guaranteed to evolve. While moving forward I intend encouraging others to reuse, spreading the word one parcel at a time. Let me know how you get on,watch this space, Ill be back!

If you like this post check out my posts on Plastic Free Kitchen , La Rentre: The Start of My Plastic Free Journey and Ditching The Plastic One Step At A Time: Herbal Tea Bag

Picnic Cutlery Roll

Crafts, AllAmanda Russell
18092019 p1 copy.JPG

I’m now more than a year into curbing my use of plastic in my life. I am pleased to report the challenge is going strong and the changes I’ve made are still in place.

Often, when I’m out and about I’ll pick up a take away and yet again with carry out boxes and cutlery I’m back to the single use plastic issues. If I sometimes decide to take a packed lunch with me it’ll need some planning.

Keen to continue with the changes in my life and so I am always prepared for take away picnics I came up with a cutlery roll project. A simple, sustainable, make that can be packed and ready for when I go out. In the spirit of the project the cutlery doesn’t need to be matching, seek out what you need from charity shops or car boots sales. For the roll I recycled a soft linen tea towel which when unrolled is ready to be used as a napkin or a placemat. Make a collection of several cutlery rolls for when others join you on a picnic. At the end of your meal stow the dirty utensils in the tea towel before taking home to wash.

finished cutlery roll.jpg

You will need:

  • Tea towel 50x60

  • 20cm elastic

  • 12mm button

  • Scissors

  • Needle and thread

Step by Step

Step 1

  • To mark the centre of one of one of the short sides of the tea towel, fold the two long sides together to meet, then mark the crease in the centre with a pin. On the wrong side, either side of the marked centre, unpick the hem by 2cm.

1 DSC_0293 21.04.41 (1).jpg

Step 2

  • Fold the elastic in half and push the cut ends under the hem. Sew the elastic securely to the tea towel under the hem, then stitch the hem back down.

2 DSC_0297 (1).jpg

Step 3

  • Right side up sew the button to the centre of the hemmed edge over the elastic.

3 DSC_0303 (1).jpg

Step 4

  • With the tea towel wrong side up, place the cutlery in the middle of the side opposite the button and elastic. Turn the tea towel to cover the cutlery by 10 cm.

4 DSC_0326 21.04.42 (1).jpg

Step 5

  • Then fold the right long side over to cover and repeat with the opposite side.

5 DSC_0311 21.04.42 (1).jpg

Step 6

  • To enclose the cutlery, tightly roll along the length of the tea towel.

6 DSC_0317 21.04.42 (1).jpg

Step 7

  • Pull the elastic around the rolled up tea towel, then pass the elastic loop over the button to secure.

7 DSC_0331 21.04.42 (1).jpg

Tip

  • Using elastic and a button keeps the cutlery wrapped tightly as well as accommodating different sized cutlery.

8 DSC_0324 21.04.42 (1).jpg

Granny Chic Tapestry Heart

Crafts, AllAmanda Russell

I love a sustainable crafty make to give for a gift so I have a stash of old tapestries to repurpose for a variety of craft projects. This gorgeous granny chic scrap project, made from a vintage rosy tapestry and a past its best by blanket, is a perfect valentine make. The heart is trimmed with charity shop vintage buttons and the sawdust for the stuffing came from a pet suppliers.

1 granny chic heart.JPG

You will Need:

  • Tapestry

  • Old blanket

  • Dylon Fabric Dye

  • Vilene Fusible web

  • Thread

  • Sawdust

  • Buttons

  • Thin black ribbon

  • Needle

  • Scissors

  • Iron and ironing board

1.JPG

1. First off, over dye the blanket a rich rose colour in the washing machine following the manufactures instructions.

2.JPG

2. Fold a paper-backed piece of fusible webbing in half, on one side of the fold line draw half a heart including a 1cm seam allowance, turn over the paper and trace the other side of the heart.

3.JPG

3. To stablise the tapestry place the fusible web on the reverse, position it over the image for the best possible effect, iron to fuse.

4.JPG

4. Cut the fused heart shape from tapestry then use as a template to cut the reverse from the wool blanket.

5.JPG

5. Right sides facing pin together the two hearts, sandwich a folded 15cm strip of ribbon for hanging between the two bumps at the top.

6.JPG

6. Use a sewing machine to sew around the edge, leave a 4cm opening on one side.

7.JPG

7. Turn the heart through the opening and stuff with sawdust.

8.JPG

8. Use a needle and thread to sew up the opening. Complete the project by sewing buttons around the edge to embellish.

2 Final Heart.jpeg

Dylon machine dye

Dylon.co.uk

Vilene paper backed fusible webbing

Vlieseline.com

If you like this post check out my posts on Laura Ashley, Drop in Seat Chair Makeover, Picnic Cutlery Roll, Envelope Notebook

Ditching The Plastic One Step At A Time: Herbal Tea Bags

Living, AllAmanda Russell
1 Herbal tea .jpg

I’m always looking for simple ways of editing plastic out of my life. I was distressed and felt mislead when I discovered tea bags have plastic in them, like many I had assumed they are made of paper. With my days punctuated by continuous cups of mint tea, all too often I stretch for the convenience of the bag variety. With fresh herbs growing by my back door it’s the next natural step to cut out the middle man and find sustainable solution to using bagged herb tea. Are you with me, lets break out those tea pots and get back to making our favourite proper cuppa.

Amanda large tea pot .jpg

Aaah yes, we must be practically unanimous in agreeing there’s nothing more reviving than a fresh brew. To prepare a very simple tisane, pinch off a few chosen herb leaves, place in a cup, pour over boiling water and leave to infuse for a couple of minutes. Follow the same principle using a tea pot, warm by swilling with boiling water, place fresh leaves in the warmed pot then pour over hot water and leave to brew before pouring into cups. For all herbal brews taste before sweetening, if needed swirl in a blob of honey.

2 herbal tea copy.jpg

It’s always exciting spotting the first sprigs of mint and lemon balm in the garden, from spring, through summer and autumn there is a continuous and reliable crop of sweet smelling leaves to harvest. As well as mint and lemon balm try spikes of lavender flowers. With its intense and magical aroma strongly scented lemon verbena is a winner, it isn’t frost hardy so grow this scented bushy plant in a pot making it easy to relocate for protection in colder months. I’d like to try fresh lime blossom as well as camomile, in the summer I’m looking forward to putting that right. Later in the year after the garden has closed down try dried herbs or a delicious steeped infusion of chopped fresh with a slice of lemon.

Amanda-1707 copy 2.jpg

Before you start using fresh herbs source them from a reliable nursery or be sure to check them out using a plant identification book, or better still ask an expert for help.

3 herbal tea copy.jpg

Laura Ashley, Drop in Seat Chair Makeover

All, CraftsAmanda Russell
1 Amanda-1287.jpg

We all love a chic recycling project, it’s even better when it’s easy and sustainable too. When I was asked by the Laura Ashley team to design a project that fitted with their ethics I knew exactly which fabric I’d be calling in. I love the William Morris vibe to the Laura Ashley Willow Leaf Hedgerow pattern fabric which chimes really well with contemporary interior style.

In a house clearance shop I discovered an ugly brown drop in seat chair, ripe for a makeover. With the lyrical curvy lines of the seat back and legs the only thing stopping it from revealing its potential beauty and taking centre stage was a simple makeover.

5 Amanda-1295 copy.jpg

In this step by step project I show you how I transformed this chair into a stunning head turner using a lick of chalky pastel paint and new print fabric to cover the seat pad. To protect the new finish from any of the of the old wood treatments seeping through the new finish a couple of coats of stain stopper were applied before painting with the emulsion.

I hope you enjoy this renovation project to bring new life to an old and neglected chair as much as I did.

You will need:

  • Laura Ashley Pale Grey Green Matt Emulsion Paint

  • Laura Ashley Fabric Willow Leaf Hedgerow

  • Pliers

  • Screwdriver

  • Hammer

  • Tacks

  • Scissors

  • Paint brushes

  • Medium Weight Polyester Wadding

  • Zinsser Stain stopper paint

4 Amanda-1293 copy.jpg

Step by step

Step 1

  • Remove the seat pad from the chair frame, wipe chair over with a weak solution of warm water and washing up liquid.

LA chair before copy.JPG

Step 2

  • To protect the new finish from any of the of the old wood treatments seeping through and spoiling the new colour when the chair is dry paint with two coats of stain stopper.

2a LA stain stopper  IMG_0420.JPG

Step 3

  • When the chair is dry, apply two thin coats of emulsion.

3 LA chair IMG_0487.JPG

Step 4

  • Use a screw driver and pliers to remove the tacks securing the old covering fabric

4b LA chair.JPG

Step 5

  • Cut to polyester wadding to the size of the seat.

5a IMG_0501 b.JPG

Step 6

  • Cut out seat fabric with a 10cm overlap.

6b IMG_0503 b.JPG

Step 7

  • Place seat fabric right sides down, place wadding in the centre, before positioning the seat in the centre of the layered textiles. Fold the fabric over the seat edge, use a tack to secure the fabric, work from the middle of the frame towards the outside. Turn fabric and secure on all the seat edges.

7b IMG_0507 b.JPG

Step 8

  • To complete the first corner, fold the fabric into the corner of the seat then tack in place.

8b IMG_0518 b.JPG
8d IMG_0515 b.JPG

Step 9

  • Fold and turn the edge of the remaining fabric over the corner, then secure with a tack.

9a IMG_0513 b.JPG

Step 10

  • Repeat to finish all the remaining corners. Use scissors to trim off excess fabric.

10b IMG_0511 b.JPG

Tip

  • When you’ve finished applying the first coat of emulsion paint wrap the paint brush in kitchen film to prevent the bristles from drying out before you apply the following coat of paint.

  • This project is ideal for using up fabric off cuts left over from earlier projects.

2 Amanda-1292 copy.jpg

Book Review: The Wild Remedy: How Nature Mends Us, A Diary by Emma Mitchell

Book Reviews, AllAmanda Russell
The Wild Remedy: How Nature Mends Us, A Diary by Emma Mitchell

With many huge life changing events happening I was aware I could become anxious and easily blown off course so I was excited to read writer Emma Mitchells’ beautiful new book ‘The Wild Remedy’. In this book she takes the brave step to talk openly about her 25 years of living with depression, known to her as ‘the dark slug’. It’s been a long time coming, at last mental awareness has hit the radar, and now it is something we can openly acknowledge and talk about. Walking the paths and landscape surrounding her Fenland cottage she shows a new way of coping with depression, marking time through the year, celebrating the natural wonders as they unfold with her own original drawings and photographs.

Diary like, each month of the year has its’ own chapter, which includes delightful and detailed wildlife descriptions. With her gentle, quirky writing style she shares her excitement as each natural event unfolds and reveals itself. In March she describes the joy of heading off up the coast to spot a murmuration of starlings. Like having a conversation with a friend her tales reignite my own memories of a teenage evening watching their unconcerned graceful balletic swoops and swerves above the clanking din of London’s’ Leicester Square. Through her text we also learn how in some cases nature watching can be as effective as drug therapy to treat depression and how she uses it to help protect her from the dark clutches of depression.

IMG_0005.jpg

Through her very personal journey, recording the impact of nature on mood, she talks of the science involved in these shifts, highlighting a variety of research backed ways in which this occurs. Along with her walks and nature observations, botanical drawing is another tool that helps her keep depression in check. Bearing this in mind, wishing to bring a little more calm into my life and reconnect with drawing to I went along to her book event in Waterstones, the evening included a botanical drawing workshop. In the past I drew forever, I loved the necessary stillness that came with it, there’s nothing quite like a moment taken for a closely observed sketch with coloured pencils or washing water colour over a pencil drawing. Emma enthusiastically described the observation process needed to accurately draw and record plants and flowers. By breaking the process into simple steps, she created another gateway into being in the moment.

As much as I wanted to sit down and devour this book in one greedy sitting, I’m going to eke the pleasure out, over months with frequent repeat visits in the following years. At those times when I seek calm I’m looking forward to having the luxury of dipping in and stealing a moment of quiet between its’ pages.

The Wild Remedy: How Nature Mends Us, A Diary by Emma Mitchell

Published by: Michael O’Mara Books Ltd

Price: £14.99

https://www.mombooks.com/book/the-wild-remedy/?imprint=1

Waterstones

https://www.waterstones.com/events/search/term/

Emma’s Instagram Page

https://www.instagram.com/silverpebble2/

Here is another book review you might like, go take a look: Book Review - Making Winter: A Creative Guide for Surviving the Winter Months by Emma Mitchel

Plastic Free Kitchen

Living, AllAmanda Russell

With the beginning of the year I’m thinking about the months ahead and the changes I want to put in place. I’ve talked about sustainability, which for me is a whole lot about choosing products carefully and most importantly ditching the plastic. I’ve been making the changes incrementally, taking small steps, one change at a time.

2C2A2473.jpg

I was nervous about embracing changes in the kitchen, would the plastic free solutions I turned to be as effective as the tried and tested? I’ve been happily surprised by the results. I’ve ditched plastic scrubbing brushes, pan scrubbers and synthetic cloths in favour of a natural alternative. I have no problem giving cotton kitchen cloths a boil wish, and for less than the price of a plastic pan brush I can buy a replacement head for my wooden dish brush. No more plastic pan brushes and synthetic cloths going to sit in landfill for hundreds of years is a huge win for me.

2C2A2482.jpg

When I buy washing up liquid I go to a shop that will refill my old container, to me, that’s potentially far fewer plastic bottle floating about in the sea. I’m currently trying alternative cleaning products, I’ll keep you up to date on what I find and how the products work.

And how’s it going, I hear you ask? So far, yes, I am please the changes I have made have been ones I can stick to. I am having a little celebration, though I recognise there’s still lots to do, keep watching me. Have you made changes, how have you found switching to plastic fee?

Here is another blog on plastic free, go take a look: La Rentre: The Start of My Plastic Free Journey

From the Ordinary to the Extraordinary with Statement Lighting

Interior, AllAmanda Russell

Don’t we all want a statement home? Interiors speak volumes about our characters. Too often its easy to get trapped by what fashion dictates and and the expected. Lifting a room from the ordinary to the extraordinary takes boldness and can be made to happen in a variety of ways.

IMG_0002_2.jpg

At this time of year with friends coming to our homes its a perfect time to get a shot of humour into our space. I can’t think of anything better than this bulb bearing monkey to bring a bit of light to a dark corner.

If you like this post check out my post on Simple Styling Tips Using Plants

Book Review: Mad About the House by Kate Watson-Smyth

Book Reviews, AllAmanda Russell
IMG_0002.jpg

With a big move coming up I was more than delighted when a review copy of Mad About The House by Kate Watson-Smyth arrived. With over 15 years writing about interiors there’s not much journalist Watson-Smyth doesn’t know about putting together a great interior. It’s a complete, how to on defining your own unique interior style to make your home work for you. Between the covers there a mine of practical good sense tips as well as advice on how to bring that extra edge of wow to your interiors.

Though I’m a designer, stylist and have forever been involved in interiors it certainly doesn’t mean I‘m not still hungry for new ways to make a house into a stylish home. Rest assured this is not glossy coffee table book packed with out of budget fashionable interior images. It’s rather more a work book, future proofed with drawings and carefully chosen photographs, coupled with good solid classic interiors advice to guide you towards defining your interior style.

The book is divided into three sections, the first leads you through the minefield of finding inspiration on the way to defining your style, which includes invaluable information on using colour. To guarantee the success of your interior projects the middle section contains a chapter on every room in the house, each covers details specific to the function of the room, along with lighting, storage and furniture. The crowning glory is found in the last section where Watson-Smyth gives the low down on top design hacks gleaned over her many years of experience.

Creating a stylish home to feel proud of doesn’t necessarily mean splashing the cash and expending eye wateringly large sums of money. This book is there to guide you through sometimes difficult style and decorating dilemmas. It helps you target the look you want to achieve in your home to reflect your own personal style while spending your budget wisely.

Mad About The House by Kate Watson-Smyth is published by Pavilion.

https://www.pavilionbooks.com/book/mad-about-th

Here is another book review you might like, go take a look: Book Review - Making Winter: A Creative Guide for Surviving the Winter Months by Emma Mitchell

Simple Styling Tips Using Plants

Styling, AllAmanda RussellComment

Plants greenery and flowers bring life to any space, it’s about rotating them and presenting them in different ways preventing spaces from becoming static

Photo 08-01-2017, 14 35 27.jpg

I’m a big fan of groups, putting together a arrangement of contrasting shaped succulents on a beautiful antique plate highlights their differences making a bold statement.

The same goes for when flowers and leaves are scarce in the winter garden. Just taking one of each to display in antique medicine bottles is enough to bring the garden in, making a welcome relief in the darker months.

Photo 17-01-2017, 09 20 38.jpg

Don’t forget rules are made to broken, don’t underestimate the joy that splendid isolation can bring to a skeleton sprig picked from the winter wayside.

If you like this post check out my post on Styling Interiors with Plants

Envelope Notebook

Crafts, AllAmanda Russell

My theory of leading a more sustainable life goes like this. Don’t try to change too much in one go, successful change is about taking mini steps towards establishing new habits.

2C2A2446.jpg

I’m aware I use fresh clean paper for list writing and feel it’s something of an extravagant use of resources for something I will shortly be throwing away. As a stylist I’m a great list writer, it helps me get to the next place, a disposable task, rarely is a list for keeping. Of course I can list write on my mobile but I’m the kind of person who is better with constant physical reminders. With this in mind I decided to wean myself onto using scrap paper instead.

2C2A2447.jpg

I am intrigued by the printed patterns on the inside of envelopes. Questions crowd my mind, what does it mean, are they traditional patterns, where was the custom started?

Being a natural hoarder I can’t bring myself to bin this beauty, they are saved to use in lots of ways covering boxes, in collages or as gift tags.

2C2A2449.jpg

I am drawn into the magic of stories about how an inconsequential doodle on the back of an old envelope has lead the way to a great design. With this spirit in mind why would I want to use fresh paper for list writing and planning when I can use such beautiful paper which arrives at my door for free?

I re-purpose each of my treasured envelopes into two useful pieces of paper, using scissors to cut off the margins, over laps and folds. When I have a few, I stack them together, punch a hole in the corner and keep them together with a split ring clasp, a large safety pin, twine or whatever takes my fancy.

If you like this post check out my post on Kintsugi: The Glam Rock of Ceramic Repairs

Easy Wine Crate Shelf

Crafts, AllAmanda Russell

If you’re pressed for space this is a great little make that’ll give you plenty of added storage space and a stage to display special finds. Wine merchants are happy to part with these wooden crates for free or for a charitable donation. It only takes a lick of paint and bold geometric wallpaper to transform a discarded crate into a must have box shelf. I chose wallpaper from Harlequin, a roll will go a long way, there’s plenty left for covering lots of things like files, books and shelves.

You will need:

  • Wooden Wine box

  • Emulsion paint

  • Kaleidoscope wallpaper by Harlequin

  • PVA adhesive

  • Picture frame brackets Homebase

  • Paint brush

  • Scissors

  • Screw Driver

  • Electric drill black and decker

  • Masonery screws

winecrateshelfdetail.jpg

Step by steps:

1.Paint the exterior of the box with emulsion paint.

2. Mix pva with a little water to the consistency of double cream and paint the inside of the box to seal. Leave to dry.

3.When dry measure and cut wall paper to size.

4.Paint the reverse of the paper pieces and insides of the box with pva adhesive let down with a little water to the consistency of pouring cream

5. When dry, using the drill screw picture frame brackets to the reverse on the edge, drill holes in wall then screw completed box to the wall.

Here is another piece you might like, go take a look: Get Yourself an Asymetric Coffee Table

Quick Revamp for Drop-in Seat Chair

Crafts, AllAmanda Russell

This old chair was languishing in a charity shop, crying out for a hefty dose of TLC. For a super easy and quick transformation I painted it with a bright green paint and used contemporary print tea towel to cover the drop in seat.

drop-in-chair.jpg

You will need:

  • Old chair with drop in seat £10 at charity shop

  • Hammer

  • A staple gun with staples

  • Tea towel 10cm bigger than the seat

  • Dressmakers pins

  • Dressmakers scissors

  • Tarragon Glory 4 Emulsion paint by Dulux £15.99 homebase

  • Paintbrush

  • Sandpaper

drop-in-chair-detail.jpg

Step by steps:

  1. Remove the seat from the chair and put to one side.

  2. Sand the chair frame to give it a key so the paint will adhere.

  3. Paint the chair with a bright coloured emulsion. Leave to dry, it may need a second coat of paint if the wood is showing through.

  4. Remove the tacks from the edge of the chair seat, then take off the outer fabric.

  5. Use the old chair cover as a pattern and pin it on to the tea towel.

  6. Cut out a new seat cover. Place the new seat cover, right side facing down on a flat surface. Place the drop in section of the chair in the centre of the fabric.

  7. Starting in the middle of one side staple the new fabric into place. Work outwards from the center towards the outer edge then repeat with the other half.

  8. Repeat step seven on the opposite side of the seat, making sure you pull the fabric taught as you go. By starting in the center and working outwards you will stop the fabric twisting. Once two sides of the chair are completed repeat with the other two sides. At the corners, pleat and turn in the fabric to make a neat finish.

  9. Drop the new seat into the freshly painted chair.

Here is another piece you might like, go take a look: Stamp your own floral lampshade

‘Love My Dress’' Blog Post

Styling, AllAmanda Russell

The wonderful ‘Love My Dress’ has featured ‘A Beautiful Shoreline Wedding’ by stylist Nancy Straughan using some of the vintage Stoneware vases from my shop!

25-Seashore-and-coastal-inspired-wedding-table-setting-ideas-by-stylist-Nancy-Straughan.jpg

From the blog… ‘I stumbled upon some of these images on Nancy’s gorgeous Instagram account and knew that I had to share with all of you. Inspired by the colours of the shoreline and with subtle and elegant hints of the coast, these styling ideas are completely relatable and achievable for your own wedding.

“After deciding that I wanted to launch my styling company back in December 2017, I took to Instagram stories to see if anyone would like to be involved in a shoreline inspired styled shoot. I was blown away by the generous responses as I never really believed that anyone would be so kind to donate their time and skills to my project.” to read the full blog post click here!

23-Seashore-and-coastal-inspired-wedding-table-setting-ideas-by-stylist-Nancy-Straughan.jpg

If you like this post check out my post on Spring Flower Living Wall: Kokedama Inspiration

La Rentre: The Start of My Plastic Free Journey

Living, AllAmanda RussellComment

Returning from the summer break, to school and work brings the wonderful feeling of new beginnings, there’s nothing like it to restore the resolve and tackle projects with vigor and confidence. Though this event repeats through our lives strangely we don’t have a name for it, in France it’s called, La Rentre.

2C2A2469.jpg

With the enforced a break, foot off the accelerator, leaves clear space to reflect on the direction life is taking. Since seeing images of the polluted sea with the drifting islands of plastic debris harming both the environment and wildlife, I’ve been mulling over how to make the changes and embrace a plastic free life. There’s the itch to throw myself into a passion of dramatic change, discarding old ways in favor of new, but I know from experience that’s a risky strategy, set the bar too high and there’s the risk of abandoning the short lived changes. I’m in favour of making easy to adopt, incremental changes that can be absorbed into life to seamlessly create a new version of normal.

2C2A2463.jpg

Following the route into a plastic free life I’m thinking, small changes for easy wins. The exciting part is that in the not too distant future the adjustments will feel normal, having been effortlessly absorbed into life. Giving up plastic carrier bags for reusable cloth tote bags was an easy win as was swapping disposable rollerball pens for newly resurrected fountain pens which was a joy. This is the beginning, there more changes in the pipeline, watch this space!

Please can you tell me about any changes you have to get closer to plastic free.

If you like this post check out my post on Going Backwards to go Forwards: Rediscovering the Joy of Writing with a Fountain Pen

Kintsugi: The Glam Rock of Ceramic Repairs

Crafts, AllAmanda Russell
IMG_0006.jpg

With its lush floral bouquet and wreaths, when my large blue and white transferware platter broke it was too special to throw away. A while before I was given a Kintsugi repair kit as a gift and my broken platter was the ideal candidate for a trial run of this technique.

The ancient art of Kintsugi, is the glam rock of ceramic repairs. This elegant method of repair was developed by the Japanese who believe a ceramic piece, once repaired is more beautiful than the formerly undamaged piece.

After repair the china will stand up to gentle use, clean by wiping over with a damp cloth. The platter is perfect for a huddle of plants, or to hold a selection of metze dishes or fresh fruit.

While gluing the pieces together an extra pair of helping hands can be useful to maneuver the china into place, particularly if they are large pieces.

DSC_0014.jpg

To get hold of your own Kintsugi Kit visit - https://humade.nl

1. Wash the broken china in warm soapy water to remove dirt and grease from the broken edges of the china, rinse and dry.

1. Wash the broken china in warm soapy water to remove dirt and grease from the broken edges of the china, rinse and dry.

2. Using a lolly stick mix together equal parts of the two part quick dry epoxy adhesive.

2. Using a lolly stick mix together equal parts of the two part quick dry epoxy adhesive.

3. Stir a small amount of the gold dust into the adhesive to colour it.

3. Stir a small amount of the gold dust into the adhesive to colour it.

4. Use the lolly stick to spread an even layer of gold adhesive along both broken edges of the china.5. Wait a minute for the adhesive to start going off before bringing both halves together and then holding together firmly until the adhesive has se…

4. Use the lolly stick to spread an even layer of gold adhesive along both broken edges of the china.

5. Wait a minute for the adhesive to start going off before bringing both halves together and then holding together firmly until the adhesive has set. Before the adhesive completely hardens brush over with gold dust.

6. When the adhesive is completely dry, bring a warm glow the gold adhesive by burnishing gently with a soft cloth.

6. When the adhesive is completely dry, bring a warm glow the gold adhesive by burnishing gently with a soft cloth.

IMG_0004_1.jpg

If you like this post check out my post on Envelope Notebook

Peter Pan Collar Blouse

Crafts, AllAmanda Russell
unnamed1 copy.jpg

With their crisp coolness I cant resist a mans poplin shirt. Here’s a beauty I transformed into a desirable Peter Pan collar blouse, perfect for long hot summer days. Using embroidery scissors and a stitch ripper I unpicked two shirts ready for remodeling, a striped one for the body and white for the collar. I traced the pattern for the shirt and collar from a favourite old blouse I’d had for several years.

You will need:

  • 2 old cotton shirts I for the body of the shirt another for collar

  • thread

  • pins

  • dress making and embroidery scissors

  • measuring tape

  • pencil

  • ruler

  • greaseproof paper for pattern making

  • stitch ripper

Steps:

1.         Cut three bias strips 3cm wide, 60cm long. Open out one of the sleeves, at the widest section make a 45 degree fold.

Fig 1.JPG

2.         Use a pencil to mark 3cm intervals along the fold line, pencil to draw a straight line joining the marks. To make bias strips, cut along the fold line, then along the drawn lines.

Fig 2.JPG

3.         To make long bias strips join strips together.

Fig 3.JPG

4.         Right sides together place 2 strips at 90 degrees to each other, sew to join

Fig 4.JPG

5.         Trim seam and press open.

Fig 5.JPG

6.         The back of the blouse is made from the front button opening of the old shirt. Pin the paper blouse pattern in position with a button at the top of the opening and allow for seam allowances.

Fig 6.JPG

7.         Cut the out front and back section, then sew together at the shoulder.

Fig 7.JPG

8.         Cut four collar pieces from the second shirt and 2 from bondable fabric stiffener. Iron fabric stiffener on the reverse side of two collar pieces. Pin and sew two collar pieces together, repeat with the remaining pieces. Trim the seam and cut notches on the curved seems, turn right sides out and press.

Fig 8.JPG

9.         Pin and tack the collar pieces in place on the neckline. Take a long strip of bias binding, pin and tack along the neck line over the collar edge, sew in place. Trim along sewing line, cutting notches along the curve.

Fig 9.JPG

10.   Fold the bias binding to tuck in the raw edge, fold again and pin and tack, before sewing down.

Fig 10.JPG

11.   Pin and sew bias binding around the armholes.

Fig 11.JPG

12.   Sew the side seems together, neatening edges with zigzag stitch. Finish the arm holes by turning the bias binding to cover raw edge, pin, tack and sew in place. Hem the bottom edge of the shirt, folding up by 2cm and press, then to neaten fold raw edge in on itself. 

Here is another piece you might like, go take a look: Star Light Canvas

Wild, Romantic Shoreline Wedding Styled by Nancy Staughan

Styling, AllAmanda Russell
Sea_Shore-021.jpg

When talented stylist Nancy Straughan puts her mind to a project you know it’s going to look stunning. With wedding season in full swing Nancy used her wealth of styling know how to create a beautiful otherworldly experience peppered with unexpected twists. Thinking outside the box stylist Nancy designed her take on the elegant romance of the Lady of the Lake combined with the raw passion of Wuthering Heights.

Sea_Shore-060.jpg

The first floor assembly room of The Drapers Arms a beautiful Georgian Islington pub is the ideal location for an intimate wedding venue. Here natural light streams in through the tall elegant sash windows, lighting up the duck egg blue room with its painted checkerboard floor, period fireplaces and dark bistro style chairs.

Sea_Shore-062.jpg

Elemental, the theme draws on a rich combination of bleached and watery tones combining them with a comprehensive collection of textures, from silks to twigs and coral, to fresh and dried flowers. To make her spell binding vision a reality she drew a group of skilled artisans around her, do check them out to see more beautiful work by them, details below.

Sea_Shore-046.jpg
Sea_Shore-086.jpg
Sea_Shore-101.jpg
Sea_Shore-100.jpg
Sea_Shore-092.jpg

Location

The Drapers Arms http://www.thedrapersarms.com


The People

Stylist, Nancy Straughan http://www.nancy-straughan.com

Stationery, Paper Knots http://www.paperknots.co.uk/

Photography, Caro Hutchins http://carohutchings.com/

Flowers, Hazel Gardiner https://www.hazelgardinerdesign.com/

Cake, My Little Cake Tin https://www.instagram.com/mylittlecaketin/

Props, Re-Found Objects https://www.re-foundobjects.com/

Extra crockery Limehouse

Ceramics http://www.limehouseceramics.com/

Stoneware bottles, Soulfoodstudio https://www.soulfoodstudio.com/shop/

Calligraphy and signage by Hannah Watt https://www.instagram.com/hannahlwatt/

Embroidery by very talented friend, Olivia


If you like this post check out my post on Constance Spry Vases for Everyone