Soul Food Studio

Book Review - Modern Lettering: A Guide to Modern Calligraphy and Hand Lettering by Rebecca Cahill Roots

Book Reviews, AllAmanda Russell
IMG_0002.jpg

With the infinity of the holiday season stretching away into the future, I get excited there’s time to get to grips with a new hobby. Packed with all the know how to improve my hand writing, Modern Lettering: A Guide to Modern Calligraphy and Hand Lettering by Rebecca Cahill Roots, arrived in the studio at a very opportune moment. 

All this time we’ve been beavering away behind computer screens we’ve all but abandoned our handwriting skills. Meanwhile the cult of celebrating the individual has been on the rise. With its lack of humanity and the predictable regularity of computer text, our neglected handwriting, is having a moment embracing the intervention of the human hand over machine. Rather than leaving our handwriting skills dormant there’s a big move to dust off the art form and use it to create beautiful and special projects, from the heart. Imagine being able to address envelopes in a stylish and eye catching way, writing special stationary for weddings, or designing unique invitations, this book gives you all the tools.

2C2A2440.jpg

Don’t be alarmed by the words calligraphy or hand lettering, this is the kind of lettering that excels because of its individual hand drawn quality. Within the covers you will find a complete manual to get you writing beautifully, its packed with insider know how along with plenty of detailed knowledge, making the learning process a whole lot easier. 

Full of quirky illustrations this practical workbook of how tos, gently eases you into hand lettering. Divided into sections, illustrated diagrams lead you through the basic tool kit and of the anatomy of the pen before you get started on mark making. There are practice pages for all the letters starting with how to form them including useful information on the names for each part of the letter. There are handy tips on making it your own, along with useful trouble shooting advice. 


IMG_0004.jpg

And the book isn’t limited to the mechanics of letter forming, once you have mastered the skill there’s plenty more help on designing your page, combining different styles while exploring a variety of media. The book finishes with a plethora of beautiful examples of projects using your new skills.

If you are ready to take on the satisfying challenge of smartening up your handwriting skills while getting the individual edge, look no further than this invaluable volume. It guarantees your new skill will elicit enthusiastic oohs and ahhs of envy and admiration.

Book: Modern Lettering: A Guide to Modern Calligraphy and Hand Lettering by Rebecca Cahill Roots

Published by Batsford

Price £14.99

 If you liked this book review then why not read my book review of Garden Style: Inspirational Styling for Your Outside Space by Selina Lake

Going Backwards to go Forwards: Rediscovering the Joy of Writing with a Fountain Pen

Living, AllAmanda Russell
2C2A2443.jpg

With their generous flow of ink and near instant drying, my addiction to gel pens stretches back over many years. But, I miss using a fountain pen, the right nib brings the feeling it’s possible to write for miles. On a few occasions I have seriously tried to get back into using them, however I felt replacing empty gel pens for cartridges in landfill was neither sustainable nor tackling the root of the problem.

As an interior stylist, the constant flow of ‘bits’ through my life swiftly leads to an ugly build up and an urgent need to declutter. While tacking my accumulations of clutter in the studio, I inevitably uncovered my stash of old fountain pens. The question of what to do with them skated across my mind, closing the box and running away seemed attractive. A jumble of different makes, brings the inconvenient headache of both sourcing and storing a broad selection of refill cartridges, making fountain pens a complicated option to adopt.

2C2A2444.jpg

Lining up my cache of pens reminded me of the joy I have using them. Rather than ditching them I felt tackling the problem of keeping them charged with ink was worth one more shot. A recently invaluable discovery is Cult Pens, who stock a wide range of writing supplies and deliver speedily. I had a buzz of excitement as I ordered ink and reservoirs for the pens, a small change was about to become a reality on my journey towards a more sustainable life.

Making the swap back to using a fountain pen feels like a big win. There’s the aesthetic pleasure of holding a pen coupled with the delight of welcoming back an old friend, Waterman’s turquoise ink, in its design icon, quirky shaped bottle, that’s tip able for easy fill. A moment of peaceful reflection is brought to Sunday evening as I round up my pens, ready to fill for the week ahead. And incase of emergencies there’s always a few cartridges in a tin ready waiting in my bag.

If you like this post check out my post on Plastic Free Kitchen


Constance Spry Vases for Everyone

Styling, AllAmanda Russell

With her innovative approach society florist Constance Spry brought bohemian vision
to floristry from the 30s beyond the 50s into the 60s. A visionary, her books on flower
arranging and cooking influenced a generation of 50s housewives. Much copied,
mantle vases in her style became a must have for every 50s homemaker hungry for
her look.

IMG_0004.jpg

Their cool and classic designs are perfect for making a bold statement, adding style
to any interior. The vases often come in a family of sizes, a different one to cater for
all your floral needs, short or long stemmed.

IMG_0004.jpg

Follow the 30’s society florist example and add more than just flowers. Extend a
bunch of market or garden flowers and make them altogether more interesting by
mixing in gnarly twigs for height, vine trails for waft, infill with garden foliage then add
flowers.

IMG_0007_2.jpg

Or generously plant up with a cushion of moss studded through with spring bulbs, or
fill to overflowing with fresh fruit, with bunches of grapes and summer stoned fruit.
Ring the changes by displaying it empty, as a stand alone sculptural piece. Your
imagination is the only limit to how you choose to style your vase.

When you’re looking for these vintage pieces expect signs of wear. More often than
not the surface of the glaze will have slight crazing and there will be scattered iron
spots on the interior, which add to the character of ceramics of this age.

If you are interested in seeing more, go have a look in my shop, where theres a big
selection.

Book Review, Garden Style: Inspirational Styling for Your Outside Space by Selina Lake

Book Reviews, AllAmanda Russell
IMG_0002.jpg

With the recent upturn in the weather, once more it’s time to get back into the garden and embrace the wide-open spaces. With immaculate timing a review copy of the gorgeous Garden Style: Inspirational Styling for Your Outside Space by the talented stylist, Selina Lake, arrived in the studio. The garden has greened up, here I am falling in love with it all over again, ripe for any garden porn that comes my way.

IMG_0004.jpg

 Lakes style is approachable and practical, full of beautifully styled shots it is a wonderful book to reach for when you are looking for new inspiration. Divided into chapters, each covers a different theme. Garden Inspirations is the opening chapter, here Lake shows us the spaces and plants she enjoys, as well as encouraging the reader to look for places to help develop their own individual style. I love the chapter name, Decorating Your Garden, it includes advice on choosing furniture, rounding up ways to display plants and also how to get essential decorative details like lighting into the space. Further chapters are about creating garden rooms as well as relaxing and eating outdoors and the one that presses my buttons, wont be any surprise to my readers, as it’s all about Bringing the Outside In, including details on foraging and very usefully tips to help you create your very own cutting garden. 

IMG_0005.jpg

Lake envelopes us with the idea a garden is an extra space for escaping to, it’s your own other worldly corner. Peppered through out the text are useful style tips along with very doable, attractive projects, for instance, use small vintage bottles to hold posies to jazz up a picket fence. I suggest mixing up one of the recipes for botanical cocktails, settling down in a verdant corner to have a good read of this book, a beautiful and informative garden companion.


Garden Style: Inspirational Styling for Your Outside Space by Selina LakePhotography: Rachael WhitingRyland Peters and Small £19.99http://selinalake.co.ukhttp://www.rachelwhiting.co.uk

Garden Style: Inspirational Styling for Your Outside Space by Selina Lake

Photography: Rachael Whiting

Ryland Peters and Small £19.99

http://selinalake.co.uk

http://www.rachelwhiting.co.uk

If you liked this book review then why not read my book review of Mad About the House by Kate Watson-Smyth

Book Review: WREATHS: Fresh, Foraged & Dried Florals Arrangements by Katie Smyth & Terri Chandler

Book Reviews, AllAmanda Russell

Foraging flowers and foliage, is now a thing, we all delight at coming home with a handful of hedgerow discoveries, but how to make the most of our collection?

IMG_0002_1.jpg

I was sent a review copy of the book WREATHS: Fresh, Foraged & Dried Florals Arrangements by Katie Smyth & Terri Chandler. It gives a glimpse into the world of flower arrangers, Worm, packed with insider knowledge into how they achieve their original and contemporary approach to wreaths and flower installations. Exuberant and full of life, the can do flower company aims to bring the delight of natural foraged flowers to your home or venue.

With their characteristic enthusiasm they set out to demystify the art with a wealth of fresh new tips for constructing and building up original floral installations so they look their very best. Even if you are not into creating with flowers the book is a must for the beautiful images alone. Photographer Kristin Perers, creates serene moments of floral calm leaving us all wishing they were part of our lives.

IMG_0003_1.jpg

Liberated from more formal arrangements this book reflects the recent move away from monoculture flower arrangements towards a more seasonal approach, as often as possible, using foraged and farmed British flowers and foliage. People who know me will be aware I am always looking for new ways to bring the outside in and I love the crazy, mad, romantic almost Midsummers Night Dream vibe of Worm designs.

The detailed recipe for Meadow Ball, makes the concept approachable, I’m itching to sling a hook in the ceiling and get on with it. Another design I am keen to try is the Late Summer Chandelier, which uses a gnarled, ropey clematis vine as a base. The smell from the Giant Pine Wreath promises to deliver an intoxicating perfume, so that’s a must when the time comes round. And for sheer vibrancy the Autumnal Wreath would be the star at a Harvest or Thanksgiving celebration.

IMG_0005_1.jpg
Chair_Wreath170801_Worm10211.jpg

Dip into the pages of this beautiful book, Wreaths, with its glorious images and all the tools and know how to develop your own instinctive floral style,  you will be ready to create a wreath to celebrate each seasonal event when it comes along. 

WREATHS: Fresh, Foraged & Dried Florals Arrangements by Katie Smyth & Terri Chandler (Quadrille, £14.99)

Photography: Kristin Perers

Worm London http://www.wormlondon.com

Kristin Perers http://kristinperers.com

170725_Worm10085.jpg

If you liked this book review then why not read my book review of Modern Lettering: A Guide to Modern Calligraphy and Hand Lettering by Rebecca Cahill Roots

Styling Interiors with Plants

Styling, AllAmanda Russell
download.jpeg

Take your time and have fun styling with plants, here are a few tips to set you on your way.

  • Move plants around and give them a new spot so they don't look samey and static. Move them around and style up with a variety of hero objects, you might have a collection of pots, a favourite beach find or a treasure picked up on an adventure


  • Before you get cracking with the styling, first tidy up and clear your space. Remember beautiful styled images are about what's in front of the camera. You maybe very aware of the cluttered corner behind you, but so long as the view in the shot is clear, nobody else needs to be any the wiser. Tidying completed, gather together the pieces you have chosen to work with in one place.


  • To construct the narrative, choose plants of different heights, leaf shape and colour. Start to layer up the plants along with the hero object. The rich texture of green on green gives the hero a backdrop shine out from. Alternitively choose just one plant or a frond or leaf and display alone in a vintage ceramic vessel with a couple of shapely pieces. With space around, you will be able to observe the design and beauty of the plant and leaf construction.


  • Remember, be generous at all times. Try a variety of groupings, taking images as you go along a clear space where your hero sings in glorious isolation can have as much impact as a large curated collection.


  • Be brave, remember rules are there for breaking. Try a variety of groupings taking images as you go along. When you look back over them note how very slight changes to the styled arrangement can make a world of difference.

If you like this post check out my post on How to style your home using Sylvac Urns

Easy, DIY Roman Blind

Crafts, AllAmanda Russell

I couldn’t resist this print fabric and a roman blind is the perfect canvas for showing off the mid century design. Below I show you how to design and make your own really simple roman blind, lets do it right now!

You will need:

  • Pre-corded Roman Blind kit, I used one from John Lewis

  • Pins, needles, thread

  • Dressmaking scissors

  • Fabric, I used Villa Nova fabric

Measure the width and drop of your window for finished blind size. Add 1.5cm to the both sides and 6cm to the length, then cut out the fabric.

Wrong side up turn in the sides, fold the fabric over by 0.5cm and then a further 1cm, pin in place and sew down.

Take the loop tape off the head rail, turn the top of the blind over by 1cm, then pin the loop tape in place 0.5cm below the turn. Sew the loop tape in place along both edges.

To make the pocket for the bar on the lower edge fold the fabric up by 0.5cm then again by 4cm, sew in place.

To find the positions for the rod channels measure the length of the blind then divide into 6. Mark positions for the rod tape on the reverse of the blind, draw a light line from one side to the other.

To calculate the length of the channel tapes add 2cm to the width of the blind measurement then cut the channel tapes. Turn the side of the channel tape in by 1cm then using the lines you drew on the blind sew in position leaving one end of the channel open.

Cut the rods 2cm shorter than the width of the blind, insert into the channel through the opening. Turn in the tape by 1cm then close the opening by sewing onto the side of the blind, repeat for each rod.

Once you’ve made your Roman blind install it following your kit instructions, I used a pre-corded kit from John Lewis.

If you like this post check out my post on Quick Revamp for Drop-in Seat Chair

Must Have Boho Bench

Crafts, AllAmanda Russell

Transform a softwood bench into an on trend luxe padded seat by painting, dying, and a bit of sustainable up-cycling. Currently there are lots of tribal inspired fabrics out there so grab a bit of the action with this gorgeous upholstered bench.

boho-bench.jpg

You will need:

  • Nornas Ikea Bench

  • 2 meters thick wadding

  • Black paint

  • Paint brush

  • Dylon Goldfish Orange machine dye

  • Old velvet curtain

  • Old rug

  • Staple gun

  • Old duvet

  • Sewing machine and thread

  • Scissors

  • Saw

  • Iron and ironing board

  • Invisible marker pen Korbond

Step-by-Step

  1. Following the makers instructions dye the velvet and leave to dry.

  2. Saw off the edges of the bench so that there is no overhang.

  3. Paint the bench black and leave to dry.

  4. Cut a double layer of wadding the size of the bench top plus enough to drape over the edges. Cut away the corners and then staple the wadding to the underside of the bench.

  5. Press the velvet before using. Reverse side up drape the velvet over the bench, leaving enough for a 2cm seam allowance along the bottom edge.

  6. Fold the corners and mark with a pen remove the fabric and sew the corners down, then cut away the excess fabric

  7. Right sides out place the velvet over the wadding covered bench and staple the velvet into position on the underside.

  8. To make the cushion. Cut an old duvet to the size of the bench top.

  9. Cut the rug into two pieces, the size of the bench top plus 1 cm all the way round.

  10. Sew the old duvet round its edge to the wrong side of one piece of rug.

  11. With right sides facing sew the piece of rug with the duvet attached to the other piece of rug. Sew round three and a half sides.

  12. Turn the cover through the correct way and then slip stitch the opening closed.

Tips. To get straight edges when stapling, start from the middle out, staple in the middle of one side and s then staple on the opposite side, then staple from the middle out along one side and repeat with the opposite side, then do the other two sides in the same way.

Here is another piece you might like, go take a look Quick Revamp for Drop-in Seat Chair

Book Review - Making Winter: A Creative Guide for Surviving the Winter Months by Emma Mitchell

Book Reviews, AllAmanda Russell
Making Winter cover.jpg

Winter can be a tough time for many with the shrinking of daylight hours and the near constant grey weather Making Winter: A Creative Guide for Surviving the Winter Months by Emma Mitchell is a manual of creative projects designed to help keep the winter blues at bay. During winter months because of the lack of sunlight mood elevating serotonin is at lower levels often leading to gloomy moods, crafting is known to raise levels of serotonin which in turn helps boost mood. Drawing inspiration from the natural winter world Mitchell has designed a beautiful survival manual of simple craft projects calling on a variety of skills to help people escape low moods during the winter. With perfect timing, at the darkest time of year, the book arrived on my desk to be reviewed.

Making Winter p27.jpg
Making Winter p51.jpg

It is an attractive book with beautiful images of domestic cosines and creativity inspired by nature. Divided into chapters, each themed around the different phases of winter, there are several projects to fit the theme with clear step by step instructions. In High Days and Celebrations there's a recipe for streusel cake, a berry cocktail and woodland wreaths, it's a varied selection and none are too time consuming. I enjoyed the outdoors chapter Nature as Nurture, here Mitchell gently coaxes us out of the house, subtly persuading us with the promise of crafty joys such as preserving autumn leaves or making silver fossil pendants after a good walk observing nature. As a stylist I'm always trying to bring nature into interiors and there are lots of examples of this, and don't we all love spreading the love with specimen blooms in vintage bottles. There are also very beautiful crochet projects which I lust after, the hawthorn wrist warmers, with a bobbly berried design is very nearly enough to tempt me to pick up a hook and have a go.

Making Winter, with its beautiful images and full of plucky hope is a wonderful happiness manual to inspire, a great gift for a crafty friend, whether or not they find the winter months taxing.Making Winter: A Creative Guide for Surviving the Winter…

Making Winter, with its beautiful images and full of plucky hope is a wonderful happiness manual to inspire, a great gift for a crafty friend, whether or not they find the winter months taxing.

Making Winter: A Creative Guide for Surviving the Winter Months by Emma Mitchell, out now in hardback, priced £14.99 (LOM Art).

If you liked this book review then why not read my book review of Making Concrete Pots, bowls, and Platters by Hester van Overbeek

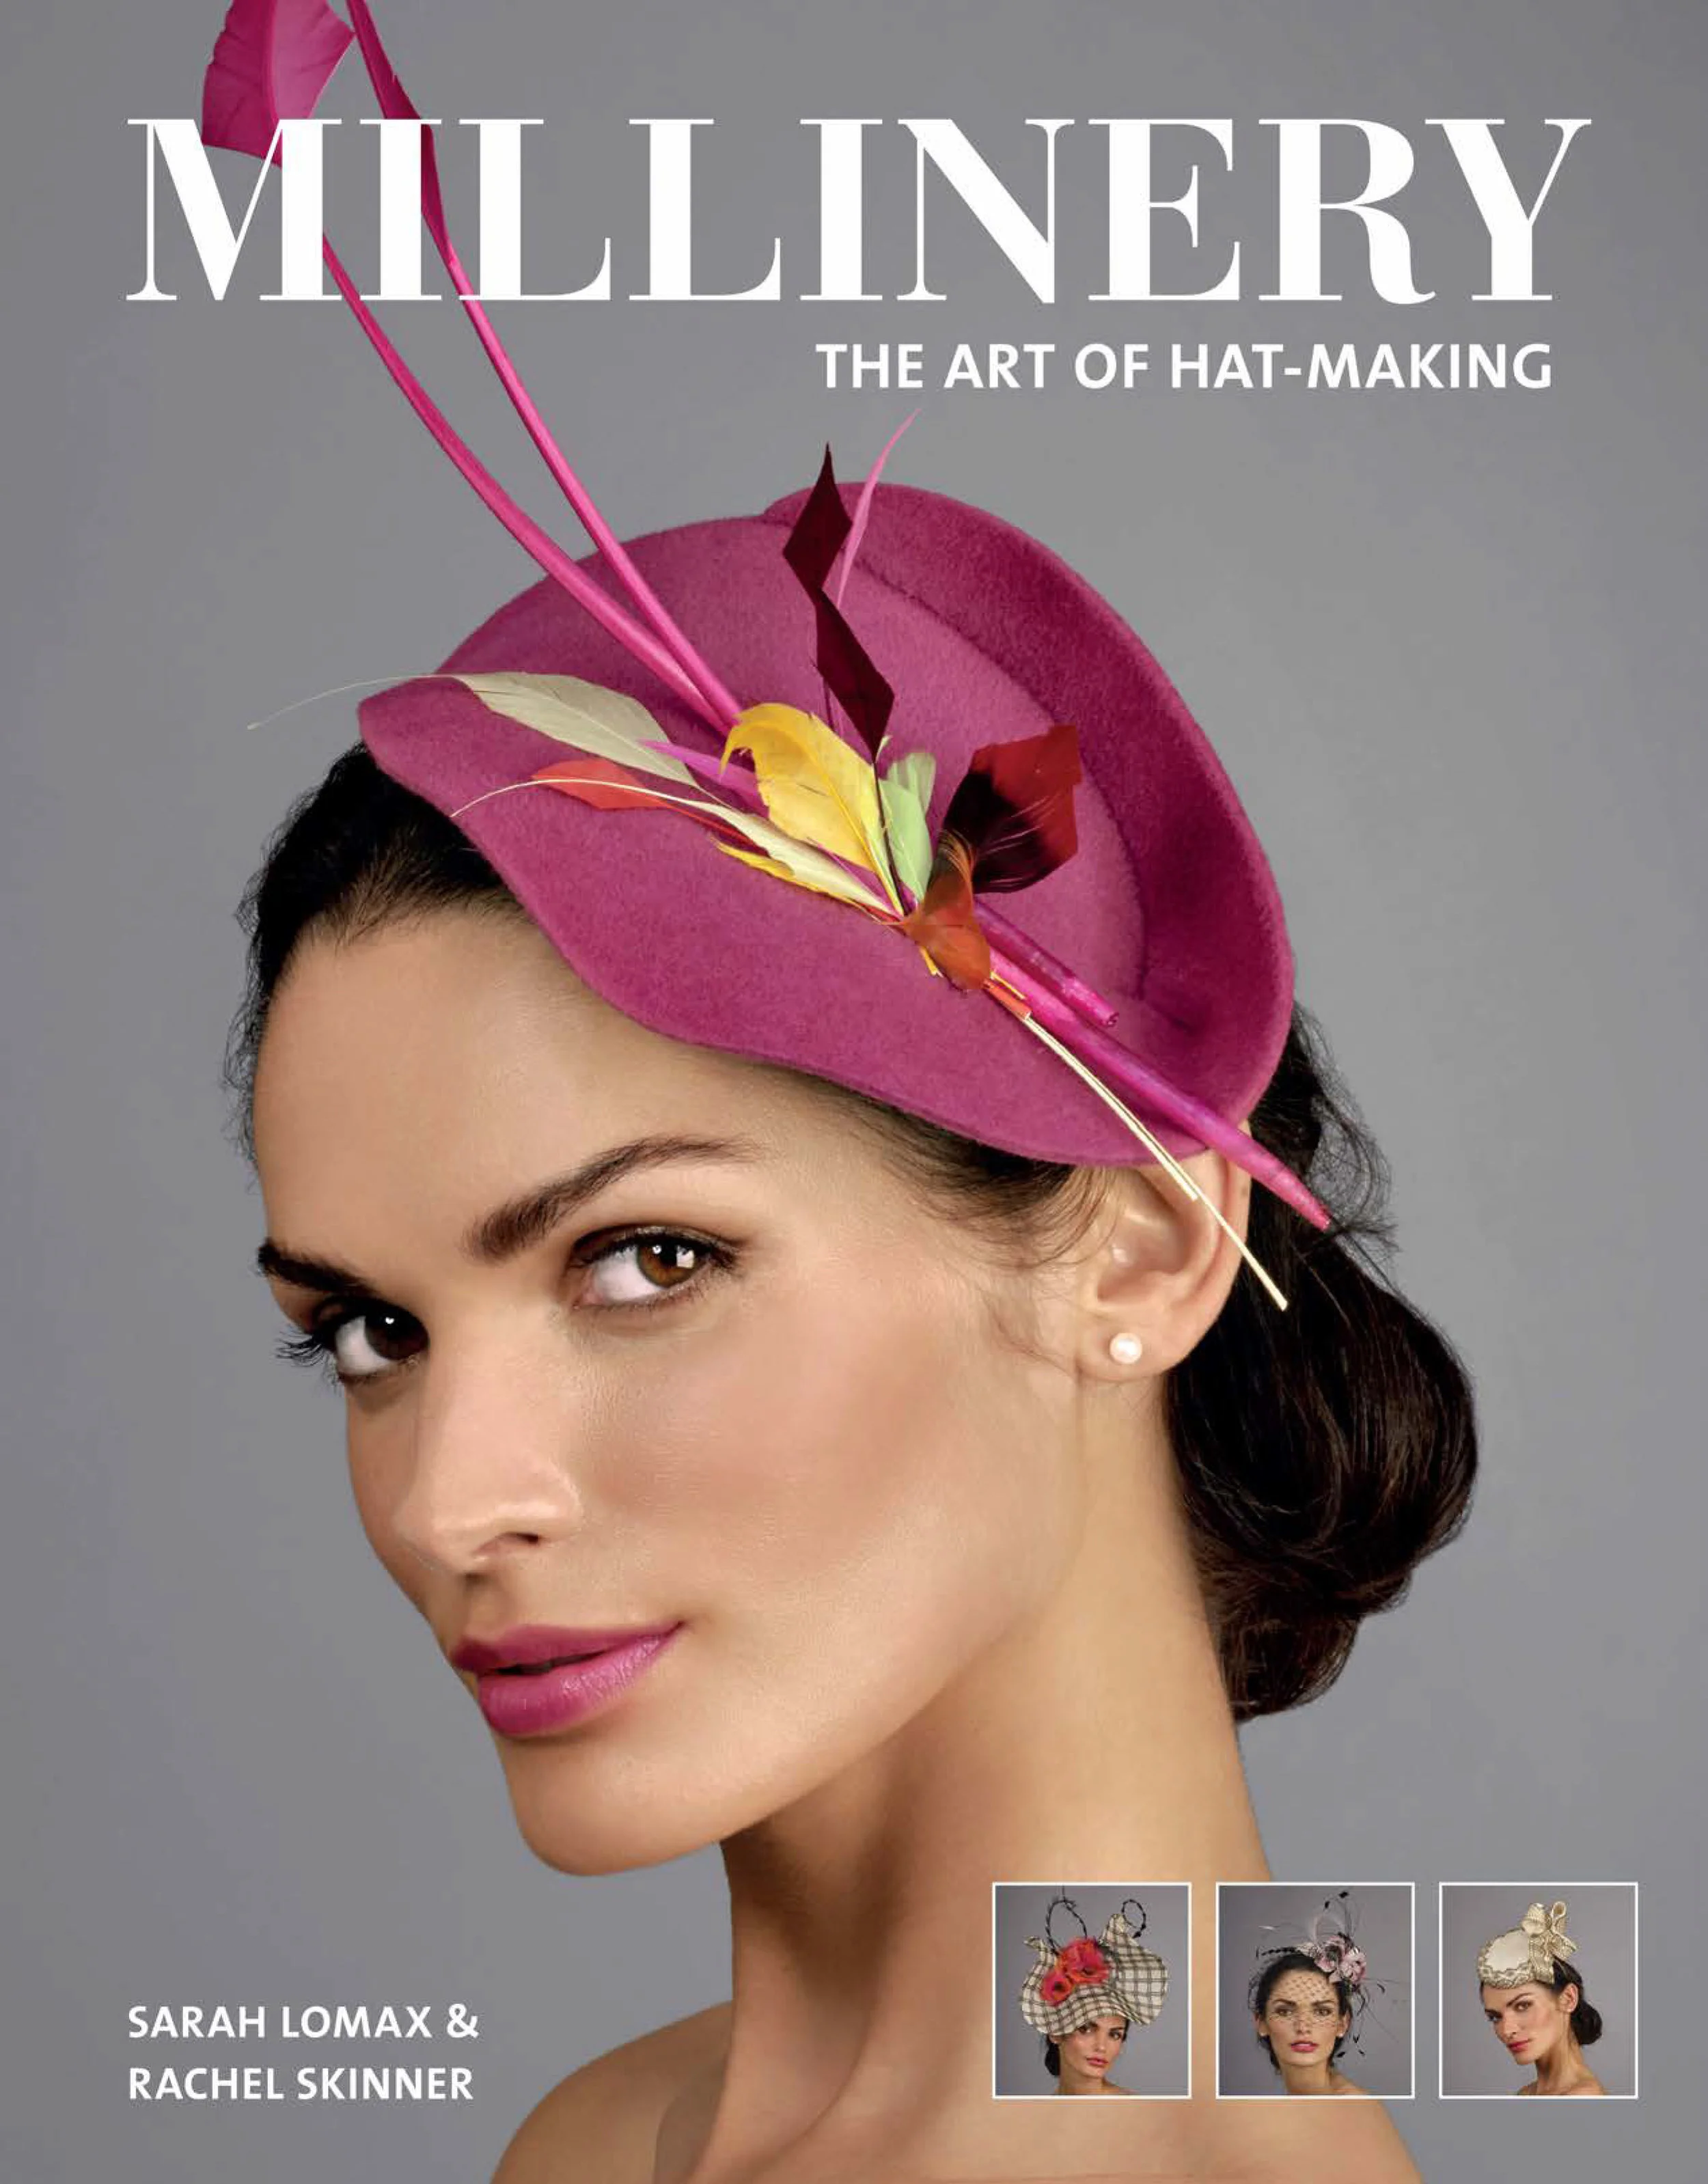
Book Review - Millinery, The Art of Hat-Making by Sarah Lomax and Rachel Skinner

Book Reviews, AllAmanda Russell
9781784943547_hi res.jpg

Now more than ever we all want to learn new crafts and skills and the New Year is as good a time as any to start mastering one. Sadly, hat wearing has been relegated to special occasion wear, the book Millinery, The Art of Hat-Making by Sarah Lomax and Rachel Skinner has a varied collection and wearing one to top off a carefully curated outfit is made a real possibility. With its beautiful timeless illustrations, variety of hat designs and detailed techniques it gives plenty of information to help you get started creating your own unique hats. After a detailed browsing of this book, as an eclectic designer, maker, I felt fired up with ideas for the many possible occasions for sporting a distinctive and elegant hat.

PeakedCapWB.jpg

Have you ever wondered how a hat shape is made from a flat piece of fine woven straw or how to create a distinctive trim that is guaranteed to lift a bought hat from ordinary to extraordinary? With a wide choice of hat shapes and embellishment to create, Millinery is the book for you. A beautifully designed volume it is divided into two sections. The first covers the nitty gritty with equipment, materials and techniques each supported by text and images. The second section has twelve very different hat projects with easy to follow step by step instructions. Choose from soft sewn hats to a gorgeous feather creation to a full on felt trilby. I am drawn in by the detail, and long for a neat feathered tear drop, complete with the swish and flourish of a long plume. 

hats89488.jpg

Emphatically, yes, I would recommend Millinery, as it gives a glimpse into the art form and plenty of information for you to successfully make your own high-end millinery. With its wealth of inspiration and variety of techniques it won't be long before you have created a unique hat collection.

FeltTriblyWB.jpg
Millinery, The Art of Hat-Making by Sarah Lomax and Rachel SkinnerPublished by GMC £16.99Available from www.thegmcgroup.comIf you like this book review why not read my review of The Gentleman’s Wardrobe: Vintage Style Projects for the Modern Man by …

Millinery, The Art of Hat-Making by Sarah Lomax and Rachel Skinner

Published by GMC £16.99

Available from www.thegmcgroup.com

If you like this book review why not read my review of The Gentleman’s Wardrobe: Vintage Style Projects for the Modern Man by Vanessa Mooncie

Star Light Canvas

Crafts, AllAmanda Russell

As if you need to be reminded of the star you are, who could resist making a bright starry statement like this? A really simple project, with just a couple of halogen lighting chains, a canvas and emulsion paint my glittery star project will brighten up any room.

homestyle-makes-5-5.jpg

You will need-

Emulsion paint

2x Halogen Lighting chain

Paint brush

Paper

Masking tape

Electrical screw driver

Bradawl

1.Paint the canvas with pink matt emulsion paint

2. Draw a large star on a piece of paper then cut out, stick to the reverse of the canvas with a line of masking tape along each straight edge.

3. Work out where you want to have the lights, I had about three along each straight edge and one on each point end.

4. Start making the holes to push the lights through. With one hand supporting the front of the canvas press the bradawl through the masking tape on the reverse and make a pilot hole, next enlarge the hole with the screwdriver, don’t make it too large the light is held in by it. Press the light from the back through the hole to lodge just around the collar of the fitting. Continue round the star with the lights.

5. Hang the canvas up using Command hooks. Do not leave lights on when unattended.

Tip

Before putting the lights into the canvas decide where you want the cables to come out, mine was at the lower edge. I worked out the middle of the total number of light positions on the canvas, this was where I inserted the light at the end of the light chain.

If you like this post check out my post on making your own Christmas decorations 

Turn an old ladder into a contemporary Christmas tree

Crafts, AllAmanda Russell
christmas-tree-from-ladder.jpg

I made this picture perfect tree out of an old ladder with near-on zero prep, using a coat of chalk paint to cover ancient paint drips and to create a matte finish.

homestyle-makes-4-25.jpg

You will need-

  • Planed timber

  • Saw

  • Spirit level

  • Pencil

  • Drill

  • Screws

  • Crown Cloudburst matt emulsion paint, £11.99 for 2.5l, Maxwells DIY

  • Polyvine Chalk Paint Maker, £11.36, Amazon

  • Paintbrush

homestyle-makes-4-21.jpg
homestyle-makes-4-22.jpg

1. Put up the ladder and decide how steep you want the sides of the tree to be; you might have to remove the retaining cord. Mine was quite broad as I wanted to max out on the display area.

2. To make the back leg shelf supports, cut batten from 2.5cm x 5cm planed timber. With the spirit level balanced on the front step, extend the level line and mark where to locate the support batten on the back legs with pencil. Screw the battens in place.

3. These shelves projected 25cm beyond the edge of the step to give extra display space, but you could make yours shorter if you’d like. Decide on the length, then cut each shelf from planed wood. Screw in place on the front steps and back batten.


4. To make the chalk paint, mix 400ml Crown Cloudburst Matt Emulsion with 200ml Polyvine Chalk Paint Maker. Then, with a crosshatch strokes, paint the ladder Christmas tree and let dry before decorating.

homestyle-makes-4-23.jpg
homestyle-makes-4-24.jpg

If you like this post check out my funky feather wreath post

Learn to create your own decoupaged hand plates

Crafts, AllAmanda Russell

Who’d of thought charity shop find vintage plates could so easily be transformed into such elegant wall art. A really simple project, you will need an inkjet printer to make the transfer images. I found these gorgeous copyright free eighteenth century wood engraving designs for teaching hand language.

decoupagedhandplates.jpg

You will need

Charity shop plates

Inkjet Water slide decal pack clear

Sponge

Acrylic spray

Copy right free images

Scissors

Instructions –Select the images you want to use. Print them out in a variety of sizes, cut out using scissors then try them for size on the plates.2. Follow the manufacturer instructions print the images onto decal paper, then spray with acrylic var…

Instructions –

Select the images you want to use. Print them out in a variety of sizes, cut out using scissors then try them for size on the plates.

2. Follow the manufacturer instructions print the images onto decal paper, then spray with acrylic varnish. Apply a couple of coats covering the printing completely to seal, so it doesn’t break up in the water.

3. When the images are completely dry, cut out with scissors keeping close to the edge of the design. To help the images slide onto the plates sponge on a thin layer of water. Put the paper backed image into a bowl of warm water, leave for about 30 secs. Lift the edge of the image off one corner of the paper. Hold the image over the plate, gently curl the backing paper away and slide the image onto the plate. Use the sponge to pat out any bubbles or wrinkles in the image.

4. Leave til dry then mount in place on the wall using Command strips

Credits

Inkjet Water Slide Decal Pack clear: Specialist crafts LTD

Command Strip http: command.3m.co.uk

If you like this post check out my post on how to turn and old ladder into a contemporary Christmas tree

Make your own Funky Feather Christmas Wreath

Crafts, AllAmanda Russell

Who wouldn’t want this incredibly chic colourful feather wreath to bring bright carnival colour to your room? I show you how to make this unique wreath with the minimum of effort.

homestyle-makes-4-12.jpg

You will need:

Turkey Quills in assorted colours

Polystyrene wreath form

Glue gun

Fishing line

Command Hook

Satay stick

homestyle-makes-4-13.jpg

The secret to the wreath is to put the feathers in at an angle so they completely cover the white polystyrene form. Starting pressing in feathers on the outside edge, first, make a pilot hole in the edge of the wreath with a satay stick, press the feather into the hole, then squeeze on a blob of glue to hold. Add the feathers in staggered layers, about 3cm from the next one. Work from the outside to the inside edge moving, around the wreath with each new layer.

When finished decide which is the top of the wreath and tie around a loop of fishing nylon to invisible suspend the wreath from a removable Command hook.

I used:

Specialist Crafts: 3 packs Turkey Quills in assorted colours £6.17

Specialist Crafts: Polystyrene ring approx £1

If you like this check out my post on how to decoupage you own hand plates

Create your own handmade Christmas decorations

Crafts, AllAmanda Russell

This nifty little project making Christmas decorations, is one for people who have pets using old pet food containers. We are talking about those lightweight aluminium ones with a lip round them.

You will need:Clean pet food containersPatterned paperRibbonWooden picnic spoonsPVA gluePaintbrushAcrylic paintThin cardClear sticky tapeDouble sided tapeAcrylic paintFelt tip pens pencilScissors 

You will need:

Clean pet food containers

Patterned paper

Ribbon

Wooden picnic spoons

PVA glue

Paintbrush

Acrylic paint

Thin card

Clear sticky tape

Double sided tape

Acrylic paint

Felt tip pens pencil

Scissors


Instructions:First cover the inside of the container with the paper face down. Draw around the edge with a pencil. Take a pencil and extend the sideline of the square.2. Cut out the paper cross shape. Fold the side arms in to crease the paper. Paint…

Instructions:

First cover the inside of the container with the paper face down. Draw around the edge with a pencil. Take a pencil and extend the sideline of the square.

2. Cut out the paper cross shape. Fold the side arms in to crease the paper. Paint the reverse of the paper with a layer of PVA glue, put the paper into the tray, press the two shorter sides onto the tray, then press out the long sides onto the sides. Along the top edge of the tray cut deep nicks in the paper and wrap the paper over the edge to stick in place.

3. To cover the outside of the tray, take a contrast printed paper. Paper face down draw around the base of the tray, cut out square shape. Measure around the outside of the tray, add 1cm for overlap. Cut a strip of paper the measured length and 3cm wide. Paint with PVA glue then wrap around the tray cutting long nicks in the paper to ease around the curved corners, press the loose strips into place on the base, then glue the square of paper over to cover. Poor glitter onto a plate, paint the front edge of the tray with PVA and dip in glitter.

4. To make the portraits, if you like use scissors to trim the top of the spoon into a hairstyle, then paint the spoons with a base coat of white acrylic paint. While they are drying make the shoulders for the portraits. Cut a strip of thin card slightly narrower than the opening of the tray and about 2cm high, fold in half along the length then glue on printed paper.

5. Use acrylic paint to mix a variety of skin tone colours, paint the spoons. Leave to dry then use felt pens to draw on details. Use sticky tape to attach the portrait onto the shoulders. To keep the portrait in position cut a narrow support strut from thin card about 4cm long, fold in both ends by 1cm, then tape one to the reverse of a portrait. Stick the shoulders to the bottom edge of the tray with double sided tape and tape the end of the support strut to the back of the tray. With the point of the scissors make a hole through the top edge of the tray. Cut a length of ribbon and pass one end through the hole and tape in place.

If you like this check out my post on making a star light canvas

Styling your Dartmouth Flower Urns

Interior, Styling, AllAmanda Russell
Pedestal vases were inspired by the 30s to the 50s ceramics designs of the international household name, high society florist, Constance Spry. The most popular designs were copied and reproduced in the 50s for the thousands of housewives who read he…

Pedestal vases were inspired by the 30s to the 50s ceramics designs of the international household name, high society florist, Constance Spry. The most popular designs were copied and reproduced in the 50s for the thousands of housewives who read her books. To style an interior treat as a stand alone gorgeous sculptural statement piece, or fill with grasses, flowers, trails and twiggery.

IMG_0007_1.jpg

If you enjoyed reading this blog post, why not read my post on How to style your home using Sylvac Urns

The Gentleman’s Wardrobe: Vintage Style Projects for the Modern Man by Vanessa Mooncie

Book Reviews, AllAmanda Russell
GentsWardrobe_Cvr.jpg

I was really excited when The Gentleman's Wardrobe by Vanessa Mooncie arrived on my desk. I'm a designer maker and creating a capsule wardrobe that sums up your own unique style, seems like a very fine thing. There are lots of sources out there for women but what about the men? The book does just what it says on the cover with all the know how to make an entire gentleman's wardrobe. The garment collection was inspired by old black and white family photos showing beautifully dressed relatives taking great care over their immaculate appearance.

0B4A0745.jpg

This is a beautiful book packed with a wealth of contemporary lifestyle fashion plate images to give you all the inspiration you need to get cracking. The 14 projects cover a wide range of skills, there's an elegant garment or accessory for everyone to make following the easy step by step instructions and sewing patterns. All levels of sewing are covered from simple beginners projects like a cravat and for makers with a higher level of expertise there are more complex garments such as shirts and jackets. With a wide range of projects all styles are catered for, choose a different fabric and change the style of garment to create a unique expression of yourself.

0B4A1607.jpg

With its indepth knowledge and lots of attractive fashion images it's an easy and approachable way to start building a stylish gentleman's wardrobe. Flicking through the pages a young man with beginners sewing skills was blown away by the idea of making his own silk dressing gown and I was taken with the images for making a tweed flat cap. Whether you are a maker yourself or want to give this book as a gift it's the perfect book to turn to for both reference and a source of projects. With ideas for a quick project or something that will take longer this book would win long term space on my book shelf and remain there long after today’s love of vintage fashion has been superceded.

The Gentleman’s Wardrobe by Vanessa Mooncie

Published by GMC £16.99

Available from www.thegmcgroup.com

8C6C8373_2.jpg

If you liked this post why not read my book review of Quintessential Baking by Frances Quinn

How to make Mattisse inspired wall art

Crafts, AllAmanda Russell

Create a bold Matisse inspired fabric wall art. Use simple motifs to make an impactful piece of wall art.

You Will Need

  • Canvas, £8, Hobbycraft

  • Tracing paper

  • Bondaweb £3.90 Akaban

  • Fabric scraps

  • Stapler

  • Pencil, paper and tracing paper

  • Command Strips from £2.70 B&Q

Step-by-step

  1. Place the canvas on a large piece of paper and draw around the edge of the canvas, add 10cm to each side.

  2. Draw your design on the paper and mark each colour. Using the tracing paper trace the shape for each colour.

  3. Iron paper backed Bondaweb to the reverse of fabric scraps. Cut out the shapes, then remove backing paper and iron to bond in position. Use a sewing machine to sew around the edge of the fabric shapes.

  4. Place the fabric image on the canvas and stretch the fabric over the edge, use the stapler to secure the fabric at the back.

  5. Hang on the wall using Command Strips

Tips

  • When stapling the fabric on start from the middle and work towards the outer edge so there are no creases in the fabric

If you liked this post why not read my post on making your own  Bang on Trend Super Easy Picture Shelf

If you liked this post why not read my post on making your own  Bang on Trend Super Easy Picture Shelf

Book Review: House of Cards By Sarah Hamilton

Book Reviews, AllAmanda Russell
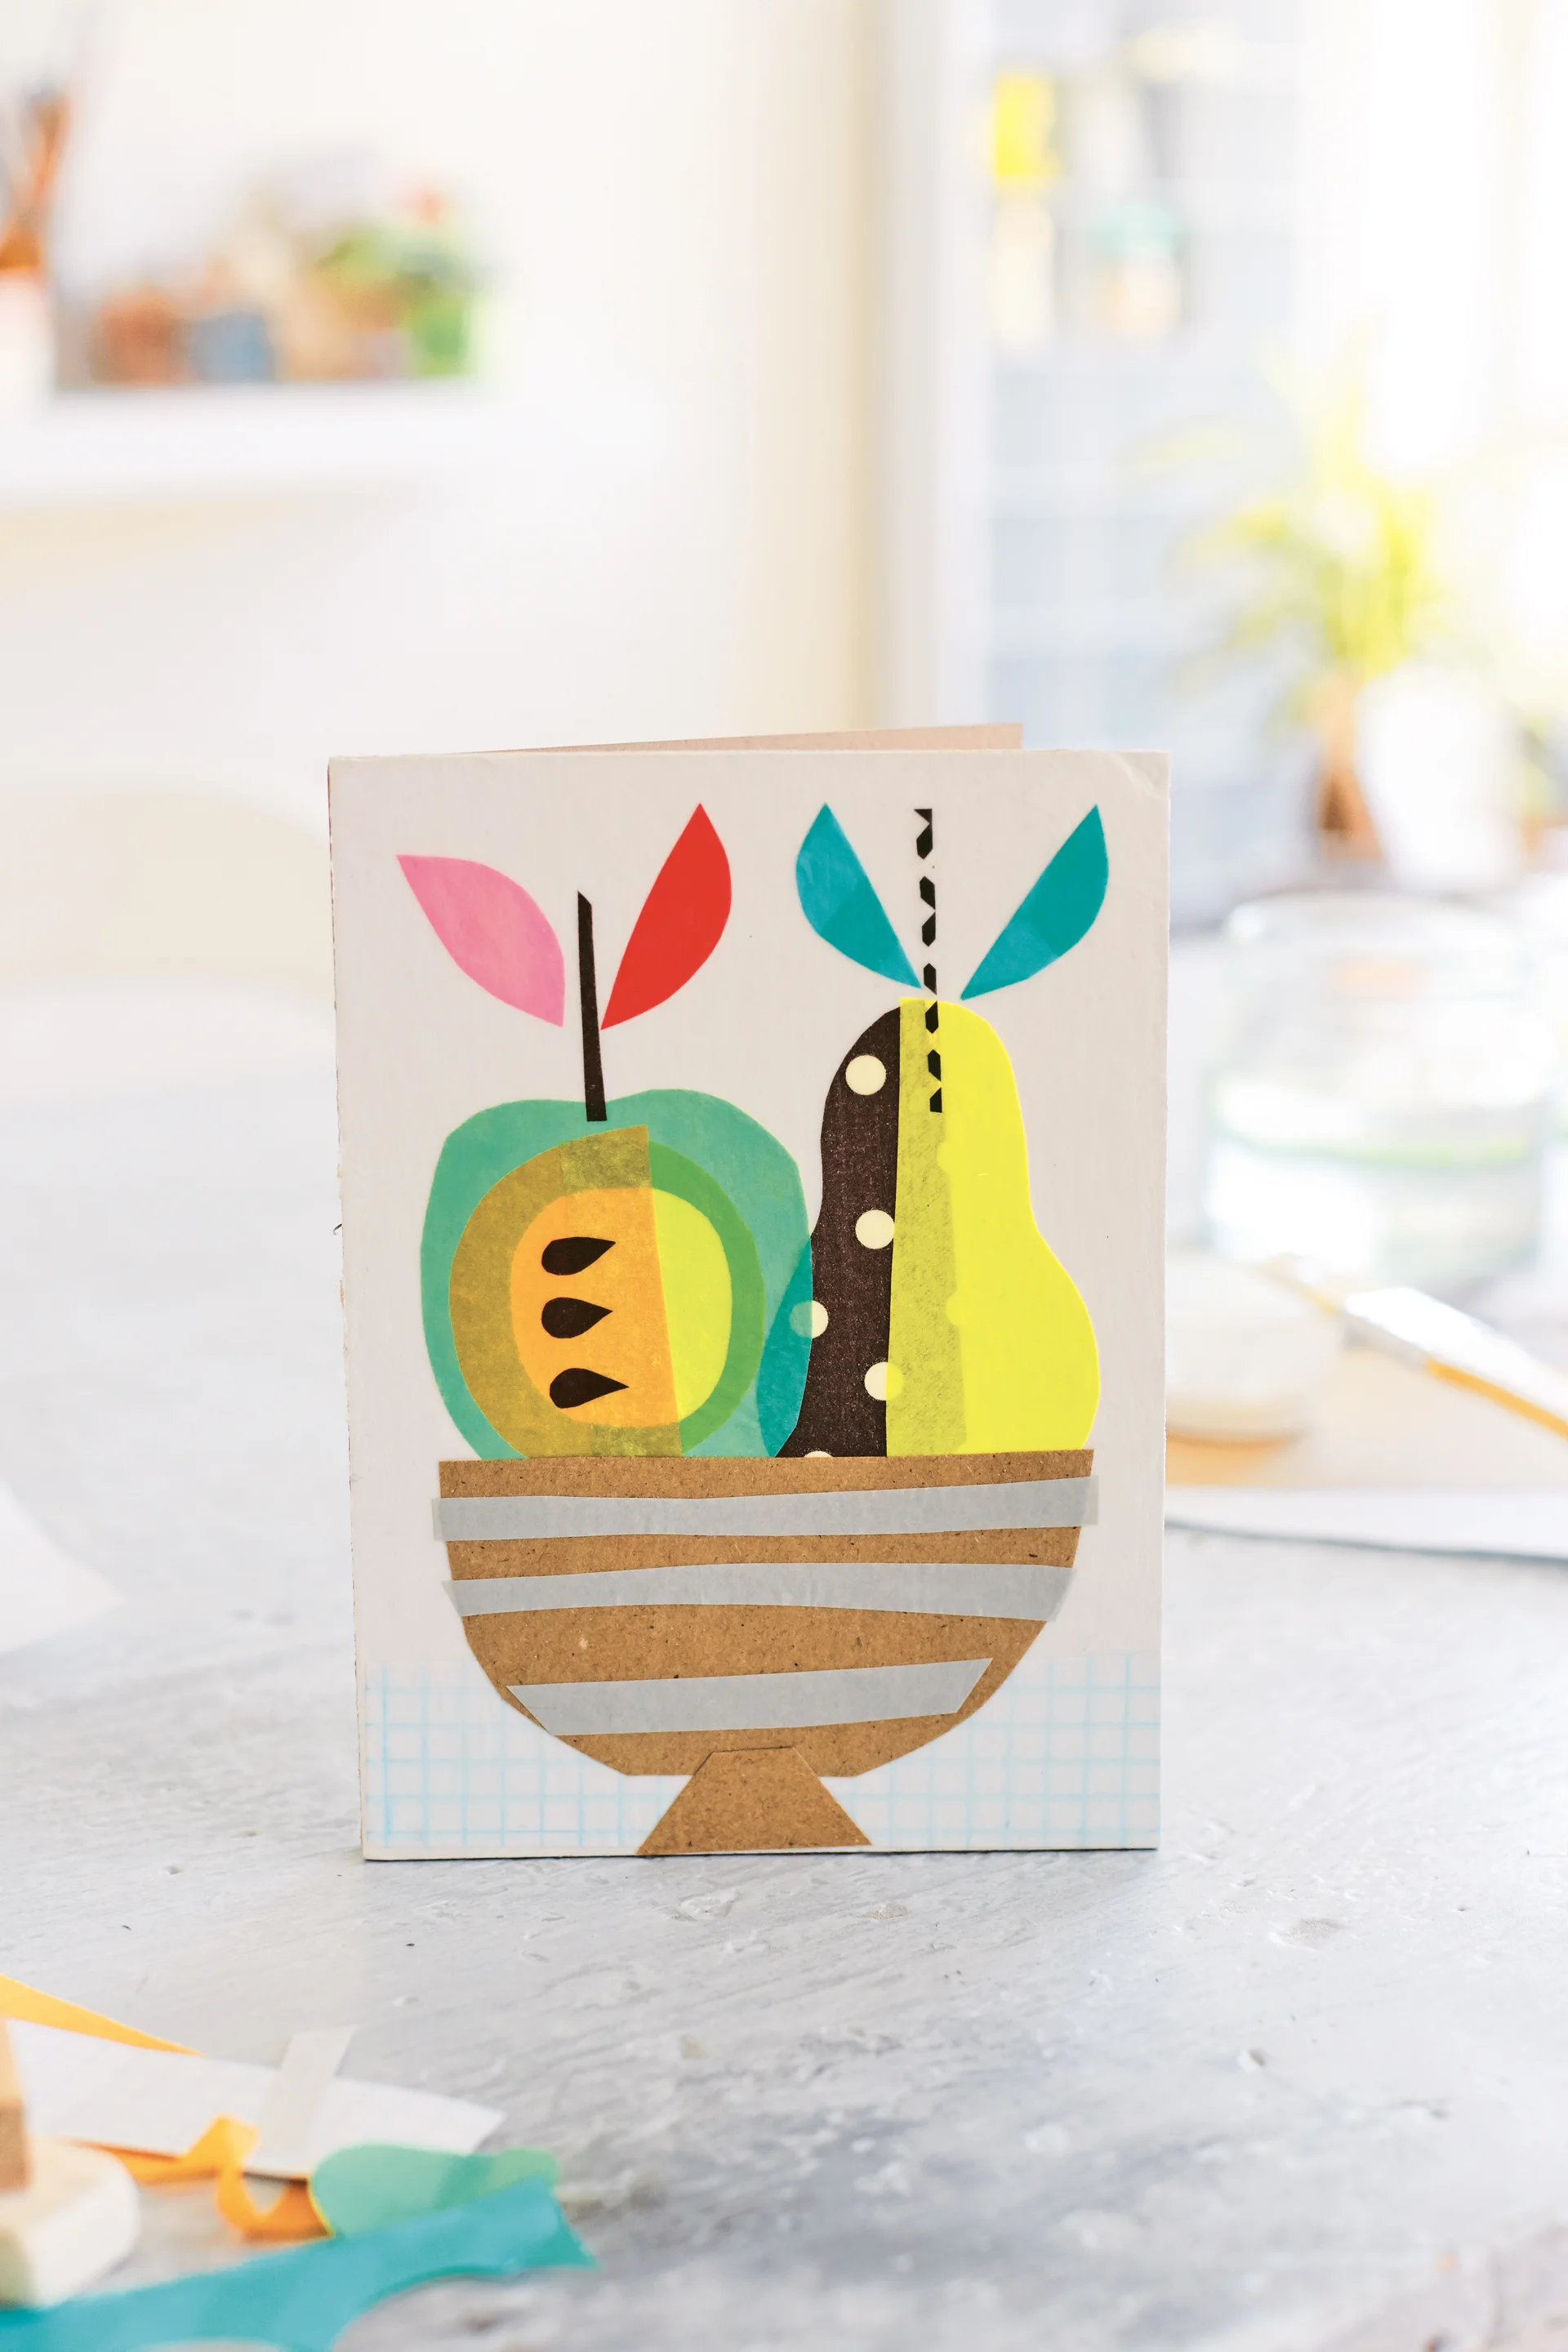
Have you ever wanted to find out about the ins and outs of selling your own handmade cards? We are a nation of card givers, greetings cards punctuate and chronicle our lives, House of Cards by artist Sarah Hamilton is a book that celebrates the gree…

Have you ever wanted to find out about the ins and outs of selling your own handmade cards? We are a nation of card givers, greetings cards punctuate and chronicle our lives, House of Cards by artist Sarah Hamilton is a book that celebrates the greeting card industry as well as showing you how to become part of it using your own designs.

It is an attractive book full of fresh bright visuals and shows you how to make money from your art. Full of sassy know how, packed with expert tips and advice from practising artists, it's a designers must have manual. A practical as well as informative book it helps short circuit some of the hard work of starting out selling your own cards.

Card by Sarah Hamilton image by James BolstonThe book is divided into two sections, the first contains an informative account of the history of greetings card giving, along with all the nitty gritty and practical detail to help get you started with …

Card by Sarah Hamilton image by James Bolston

The book is divided into two sections, the first contains an informative account of the history of greetings card giving, along with all the nitty gritty and practical detail to help get you started with card creation and sales. There is also an invaluable chapter by artist agent Jehane Boden Spiers giving inside advice on liscencing art work as well as insight into the deals available to designers to increase their portfolio of earning potential as well as providing a nest egg.

Artwork by Lynn Guinta mage by Kevin CozadTo get you started on your own creative journey the second section has 10 exciting practical easy to follow step by step projects introducing many techniques such as lino, screen printing and decoupage. Show…

Artwork by Lynn Guinta mage by Kevin Cozad

To get you started on your own creative journey the second section has 10 exciting practical easy to follow step by step projects introducing many techniques such as lino, screen printing and decoupage. Show casing ten artists it gives us the unique opportunity of having a private glimpse into the artist working studio. The book is generous and each case study starts with a short piece about the artist as well as hints on tools and techniques and inspiration to help you create your own personal artwork.

Card by Lynn Guinta image by Kevin CozadThe book supports the inspiring Just a Card campaign. The premise is that card sales are an important part of independent artists and shops income generation and if we all buy cards when we visit them we help …

Card by Lynn Guinta image by Kevin Cozad

The book supports the inspiring Just a Card campaign. The premise is that card sales are an important part of independent artists and shops income generation and if we all buy cards when we visit them we help keep them going.

An attractive book full of energy and packed with invaluable advice, it's an indispensible bookshelf addition for anyone in the visual design industry wanting generate an income in the world of greeting cards.

Cards by Gabriela Szulman image by Kristy NobleHouse of Cards by Sarah Hamilton is published by Pavilion.Find them on Instagram at -@pavilionbooks @hoc.cardbook @justacard @sarahhamiltonprints @jehanebodenspiers_

Cards by Gabriela Szulman image by Kristy Noble

House of Cards by Sarah Hamilton is published by Pavilion.

Find them on Instagram at -

@pavilionbooks @hoc.cardbook @justacard @sarahhamiltonprints @jehanebodenspiers_

If you liked this book review, why not read my review of 'Home For Now' by Joanna Thornhill