Soul Food Studio

home

Book Review: Mad About the House by Kate Watson-Smyth

Book Reviews, AllAmanda Russell
IMG_0002.jpg

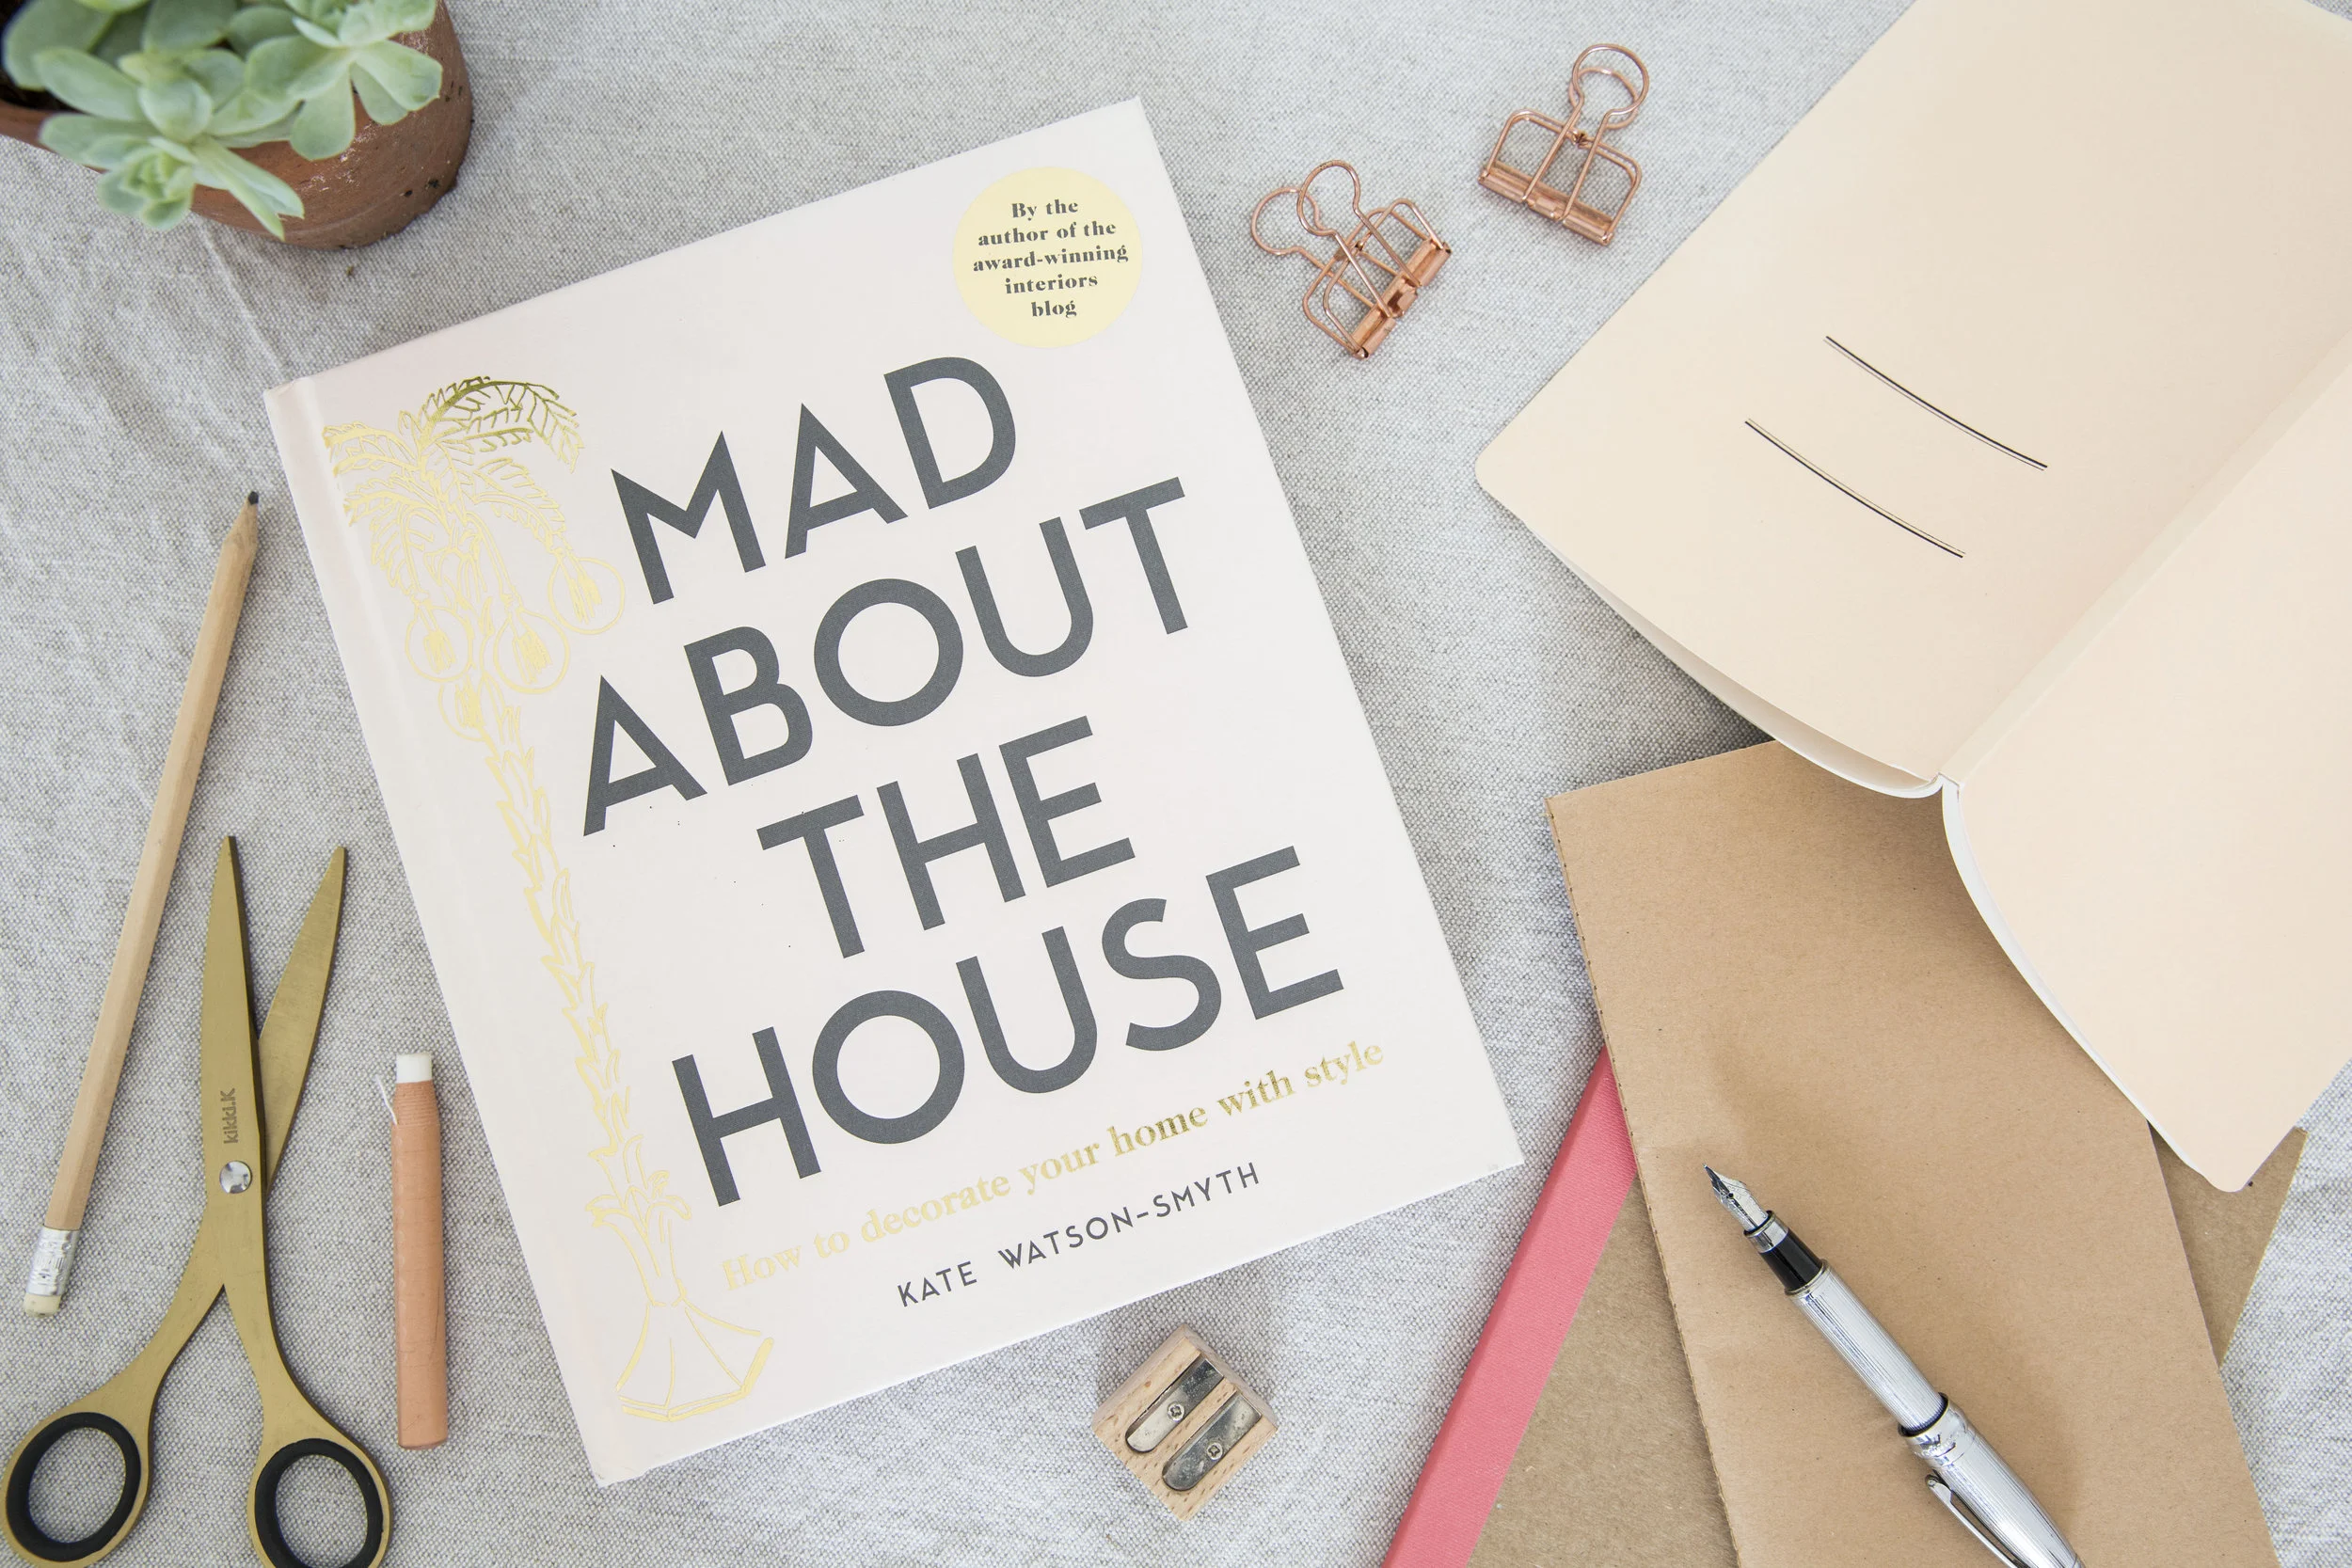
With a big move coming up I was more than delighted when a review copy of Mad About The House by Kate Watson-Smyth arrived. With over 15 years writing about interiors there’s not much journalist Watson-Smyth doesn’t know about putting together a great interior. It’s a complete, how to on defining your own unique interior style to make your home work for you. Between the covers there a mine of practical good sense tips as well as advice on how to bring that extra edge of wow to your interiors.

Though I’m a designer, stylist and have forever been involved in interiors it certainly doesn’t mean I‘m not still hungry for new ways to make a house into a stylish home. Rest assured this is not glossy coffee table book packed with out of budget fashionable interior images. It’s rather more a work book, future proofed with drawings and carefully chosen photographs, coupled with good solid classic interiors advice to guide you towards defining your interior style.

The book is divided into three sections, the first leads you through the minefield of finding inspiration on the way to defining your style, which includes invaluable information on using colour. To guarantee the success of your interior projects the middle section contains a chapter on every room in the house, each covers details specific to the function of the room, along with lighting, storage and furniture. The crowning glory is found in the last section where Watson-Smyth gives the low down on top design hacks gleaned over her many years of experience.

Creating a stylish home to feel proud of doesn’t necessarily mean splashing the cash and expending eye wateringly large sums of money. This book is there to guide you through sometimes difficult style and decorating dilemmas. It helps you target the look you want to achieve in your home to reflect your own personal style while spending your budget wisely.

Mad About The House by Kate Watson-Smyth is published by Pavilion.

https://www.pavilionbooks.com/book/mad-about-th

Here is another book review you might like, go take a look: Book Review - Making Winter: A Creative Guide for Surviving the Winter Months by Emma Mitchell

La Rentre: The Start of My Plastic Free Journey

Living, AllAmanda RussellComment

Returning from the summer break, to school and work brings the wonderful feeling of new beginnings, there’s nothing like it to restore the resolve and tackle projects with vigor and confidence. Though this event repeats through our lives strangely we don’t have a name for it, in France it’s called, La Rentre.

2C2A2469.jpg

With the enforced a break, foot off the accelerator, leaves clear space to reflect on the direction life is taking. Since seeing images of the polluted sea with the drifting islands of plastic debris harming both the environment and wildlife, I’ve been mulling over how to make the changes and embrace a plastic free life. There’s the itch to throw myself into a passion of dramatic change, discarding old ways in favor of new, but I know from experience that’s a risky strategy, set the bar too high and there’s the risk of abandoning the short lived changes. I’m in favour of making easy to adopt, incremental changes that can be absorbed into life to seamlessly create a new version of normal.

2C2A2463.jpg

Following the route into a plastic free life I’m thinking, small changes for easy wins. The exciting part is that in the not too distant future the adjustments will feel normal, having been effortlessly absorbed into life. Giving up plastic carrier bags for reusable cloth tote bags was an easy win as was swapping disposable rollerball pens for newly resurrected fountain pens which was a joy. This is the beginning, there more changes in the pipeline, watch this space!

Please can you tell me about any changes you have to get closer to plastic free.

If you like this post check out my post on Going Backwards to go Forwards: Rediscovering the Joy of Writing with a Fountain Pen

Kintsugi: The Glam Rock of Ceramic Repairs

Crafts, AllAmanda Russell
IMG_0006.jpg

With its lush floral bouquet and wreaths, when my large blue and white transferware platter broke it was too special to throw away. A while before I was given a Kintsugi repair kit as a gift and my broken platter was the ideal candidate for a trial run of this technique.

The ancient art of Kintsugi, is the glam rock of ceramic repairs. This elegant method of repair was developed by the Japanese who believe a ceramic piece, once repaired is more beautiful than the formerly undamaged piece.

After repair the china will stand up to gentle use, clean by wiping over with a damp cloth. The platter is perfect for a huddle of plants, or to hold a selection of metze dishes or fresh fruit.

While gluing the pieces together an extra pair of helping hands can be useful to maneuver the china into place, particularly if they are large pieces.

DSC_0014.jpg

To get hold of your own Kintsugi Kit visit - https://humade.nl

1. Wash the broken china in warm soapy water to remove dirt and grease from the broken edges of the china, rinse and dry.

1. Wash the broken china in warm soapy water to remove dirt and grease from the broken edges of the china, rinse and dry.

2. Using a lolly stick mix together equal parts of the two part quick dry epoxy adhesive.

2. Using a lolly stick mix together equal parts of the two part quick dry epoxy adhesive.

3. Stir a small amount of the gold dust into the adhesive to colour it.

3. Stir a small amount of the gold dust into the adhesive to colour it.

4. Use the lolly stick to spread an even layer of gold adhesive along both broken edges of the china.5. Wait a minute for the adhesive to start going off before bringing both halves together and then holding together firmly until the adhesive has se…

4. Use the lolly stick to spread an even layer of gold adhesive along both broken edges of the china.

5. Wait a minute for the adhesive to start going off before bringing both halves together and then holding together firmly until the adhesive has set. Before the adhesive completely hardens brush over with gold dust.

6. When the adhesive is completely dry, bring a warm glow the gold adhesive by burnishing gently with a soft cloth.

6. When the adhesive is completely dry, bring a warm glow the gold adhesive by burnishing gently with a soft cloth.

IMG_0004_1.jpg

If you like this post check out my post on Envelope Notebook

Constance Spry Vases for Everyone

Styling, AllAmanda Russell

With her innovative approach society florist Constance Spry brought bohemian vision
to floristry from the 30s beyond the 50s into the 60s. A visionary, her books on flower
arranging and cooking influenced a generation of 50s housewives. Much copied,
mantle vases in her style became a must have for every 50s homemaker hungry for
her look.

IMG_0004.jpg

Their cool and classic designs are perfect for making a bold statement, adding style
to any interior. The vases often come in a family of sizes, a different one to cater for
all your floral needs, short or long stemmed.

IMG_0004.jpg

Follow the 30’s society florist example and add more than just flowers. Extend a
bunch of market or garden flowers and make them altogether more interesting by
mixing in gnarly twigs for height, vine trails for waft, infill with garden foliage then add
flowers.

IMG_0007_2.jpg

Or generously plant up with a cushion of moss studded through with spring bulbs, or
fill to overflowing with fresh fruit, with bunches of grapes and summer stoned fruit.
Ring the changes by displaying it empty, as a stand alone sculptural piece. Your
imagination is the only limit to how you choose to style your vase.

When you’re looking for these vintage pieces expect signs of wear. More often than
not the surface of the glaze will have slight crazing and there will be scattered iron
spots on the interior, which add to the character of ceramics of this age.

If you are interested in seeing more, go have a look in my shop, where theres a big
selection.

Make your own Funky Feather Christmas Wreath

Crafts, AllAmanda Russell

Who wouldn’t want this incredibly chic colourful feather wreath to bring bright carnival colour to your room? I show you how to make this unique wreath with the minimum of effort.

homestyle-makes-4-12.jpg

You will need:

Turkey Quills in assorted colours

Polystyrene wreath form

Glue gun

Fishing line

Command Hook

Satay stick

homestyle-makes-4-13.jpg

The secret to the wreath is to put the feathers in at an angle so they completely cover the white polystyrene form. Starting pressing in feathers on the outside edge, first, make a pilot hole in the edge of the wreath with a satay stick, press the feather into the hole, then squeeze on a blob of glue to hold. Add the feathers in staggered layers, about 3cm from the next one. Work from the outside to the inside edge moving, around the wreath with each new layer.

When finished decide which is the top of the wreath and tie around a loop of fishing nylon to invisible suspend the wreath from a removable Command hook.

I used:

Specialist Crafts: 3 packs Turkey Quills in assorted colours £6.17

Specialist Crafts: Polystyrene ring approx £1

If you like this check out my post on how to decoupage you own hand plates

Create your own handmade Christmas decorations

Crafts, AllAmanda Russell

This nifty little project making Christmas decorations, is one for people who have pets using old pet food containers. We are talking about those lightweight aluminium ones with a lip round them.

You will need:Clean pet food containersPatterned paperRibbonWooden picnic spoonsPVA gluePaintbrushAcrylic paintThin cardClear sticky tapeDouble sided tapeAcrylic paintFelt tip pens pencilScissors 

You will need:

Clean pet food containers

Patterned paper

Ribbon

Wooden picnic spoons

PVA glue

Paintbrush

Acrylic paint

Thin card

Clear sticky tape

Double sided tape

Acrylic paint

Felt tip pens pencil

Scissors


Instructions:First cover the inside of the container with the paper face down. Draw around the edge with a pencil. Take a pencil and extend the sideline of the square.2. Cut out the paper cross shape. Fold the side arms in to crease the paper. Paint…

Instructions:

First cover the inside of the container with the paper face down. Draw around the edge with a pencil. Take a pencil and extend the sideline of the square.

2. Cut out the paper cross shape. Fold the side arms in to crease the paper. Paint the reverse of the paper with a layer of PVA glue, put the paper into the tray, press the two shorter sides onto the tray, then press out the long sides onto the sides. Along the top edge of the tray cut deep nicks in the paper and wrap the paper over the edge to stick in place.

3. To cover the outside of the tray, take a contrast printed paper. Paper face down draw around the base of the tray, cut out square shape. Measure around the outside of the tray, add 1cm for overlap. Cut a strip of paper the measured length and 3cm wide. Paint with PVA glue then wrap around the tray cutting long nicks in the paper to ease around the curved corners, press the loose strips into place on the base, then glue the square of paper over to cover. Poor glitter onto a plate, paint the front edge of the tray with PVA and dip in glitter.

4. To make the portraits, if you like use scissors to trim the top of the spoon into a hairstyle, then paint the spoons with a base coat of white acrylic paint. While they are drying make the shoulders for the portraits. Cut a strip of thin card slightly narrower than the opening of the tray and about 2cm high, fold in half along the length then glue on printed paper.

5. Use acrylic paint to mix a variety of skin tone colours, paint the spoons. Leave to dry then use felt pens to draw on details. Use sticky tape to attach the portrait onto the shoulders. To keep the portrait in position cut a narrow support strut from thin card about 4cm long, fold in both ends by 1cm, then tape one to the reverse of a portrait. Stick the shoulders to the bottom edge of the tray with double sided tape and tape the end of the support strut to the back of the tray. With the point of the scissors make a hole through the top edge of the tray. Cut a length of ribbon and pass one end through the hole and tape in place.

If you like this check out my post on making a star light canvas

Book Review 'The Shop Keepers Home' by Caroline Rowland

Book Reviews, AllAmanda Russell

Published by Jacqui Small, £25 hardback.

When it comes to the stylish peoples’ houses, don’t we all just love to get in there and have a bit of a snoop? Packed with images Caroline Rowland’s The Shop Keeper’s Home gives us the chance to check out the houses of the some of the most influential independent retailers worldwide. The book is divided into two sections, the first comprehensively covers the nitty gritty details of interior design and the second using the chosen interiors gives an in depth exploration of different types of retail experience.

This book is lavishly illustrated, Caroline Rowland seeks out retailers with stylish interiors and curates them to show core practical interior design tips like clever storage and lighting while giving us a strong flavor of her own personal aesthetics. We are taken behind the closed doors of diverse lifestyle store locations, there’s a cafe, craft shop, old barn and even a repurposed gas station.Boo

One of the shops featured is the Hambledon in Winchester, here at R&B we’ve always been fans and an excuse for a visit is never difficult. As well as old favourites we are introduced to new retail emporiums to inspire us to go out and seek. A wonderful visual resource, The Shop Keeper’s Home gives us a chance to indulge our curiosity as well as feeding the soul with a wealth of very stealable ideas.

If you like this post check out my book review of 'Urban Pioneer'

Home For Now by Joanna Thornhill

Book Reviews, AllAmanda Russell

If you are thinking personalizing your space on a very restricted budget is impossible, Home for Now by Joanna Thornhill is the book for you. It spotlights the challenges people are facing in housing, with astronomical house prices many are finding they have to live in temporary accommodation for much longer than expected. And even after managing to get a foot on the housing ladder, with the substantial debts incurred there is little budget left for splashing the cash when making home your own.


Home for Now has a wealth of inspirational detail and practical tips to show you how to make the most of the space you live in. The book is divided into chapters that target and analyse the needs of different living spaces with the message, plan and asses your needs before you start buying. As well as the practicalities, the book is packed with creative ideas and visuals to help you make changes reflecting your life and loves, the emphasis being very much on comfortable and stylish.


The style of Home for Now is eclectic, it’s about being flexible and taking a fresh look at what you have, can you repurpose or display it? In each chapter there are interiors make projects, refreshingly they are all hands on, using the minimum of skills to achieve stylish transformations of skip rescues, car boot finds and family hand me downs. Our favourite project is a very doable no sew chair, repainted and covered in a wild African print fabric.


Home for Now will leave the reader feeling confident about stamping their personality on their space and making home on a very restricted budget. Remember rules are there to be broken and be playful.

Home For Now by Joanna Thornhill, published by CICO Books (£16.99)

Photography by Emma Mitchell and James Gardiner © CICO Books

If you like this book review read my review of Making Winter by Emma Mitchell